
Content
If you want your own personalised boxes but you don’t dare to make them because you think that you need to be design savvy and a professional, we’re sorry to say that you’re wrong. At SelfPackaging we have created an “Online Printing Software”, so that everybody, whether you are a professional or a novice in the packaging sector, can get their hands on unique boxes. In this post we will show you how to use it, so the first thing you have to do is go to our SelfPackaging website.
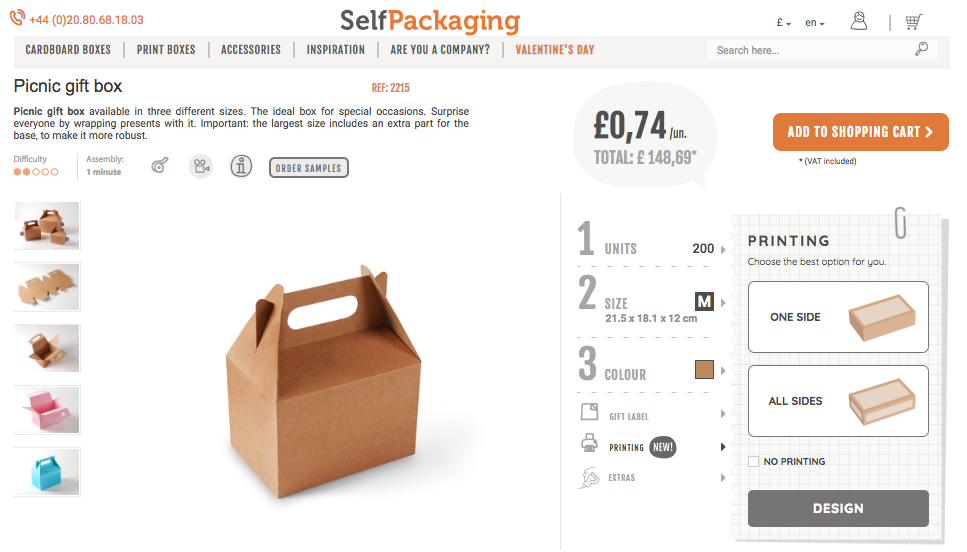
The majority of cardboard boxes are available to be personalised with the Configurator, and if one of your favourites isn’t there, it surely will be soon enough! To access it, go straight to the “Print boxes” section and choose which type of box fits the best (amount, size and colour). To start personalising it, you can click on “PRINTING” on the tab for each product. It’s really easy to find, it’s in section 3 “COLOUR”.

When you click, on the right in the box you will be asked if you want to personalise just one side or the entire cardboard box. Select the option that you want and the “DESIGN” button will turn orange. Click again to go to the Configurator. There will be some warnings and instructions that will appear on the screen which we recommend that you read carefully so that you don’t have any issues with your printed order. When you have read them and you are ready to start, click on the orange “ACCEPT” button.
Printed boxes: One-side edition
Once you have your chosen printed box, the first thing you need to do is give the project a name. When you have done so, you will see that you have different options. But don’t worry! The system is very easy to use and user-friendly, so you won’t have any problems when editing them if you don’t have any design experience.
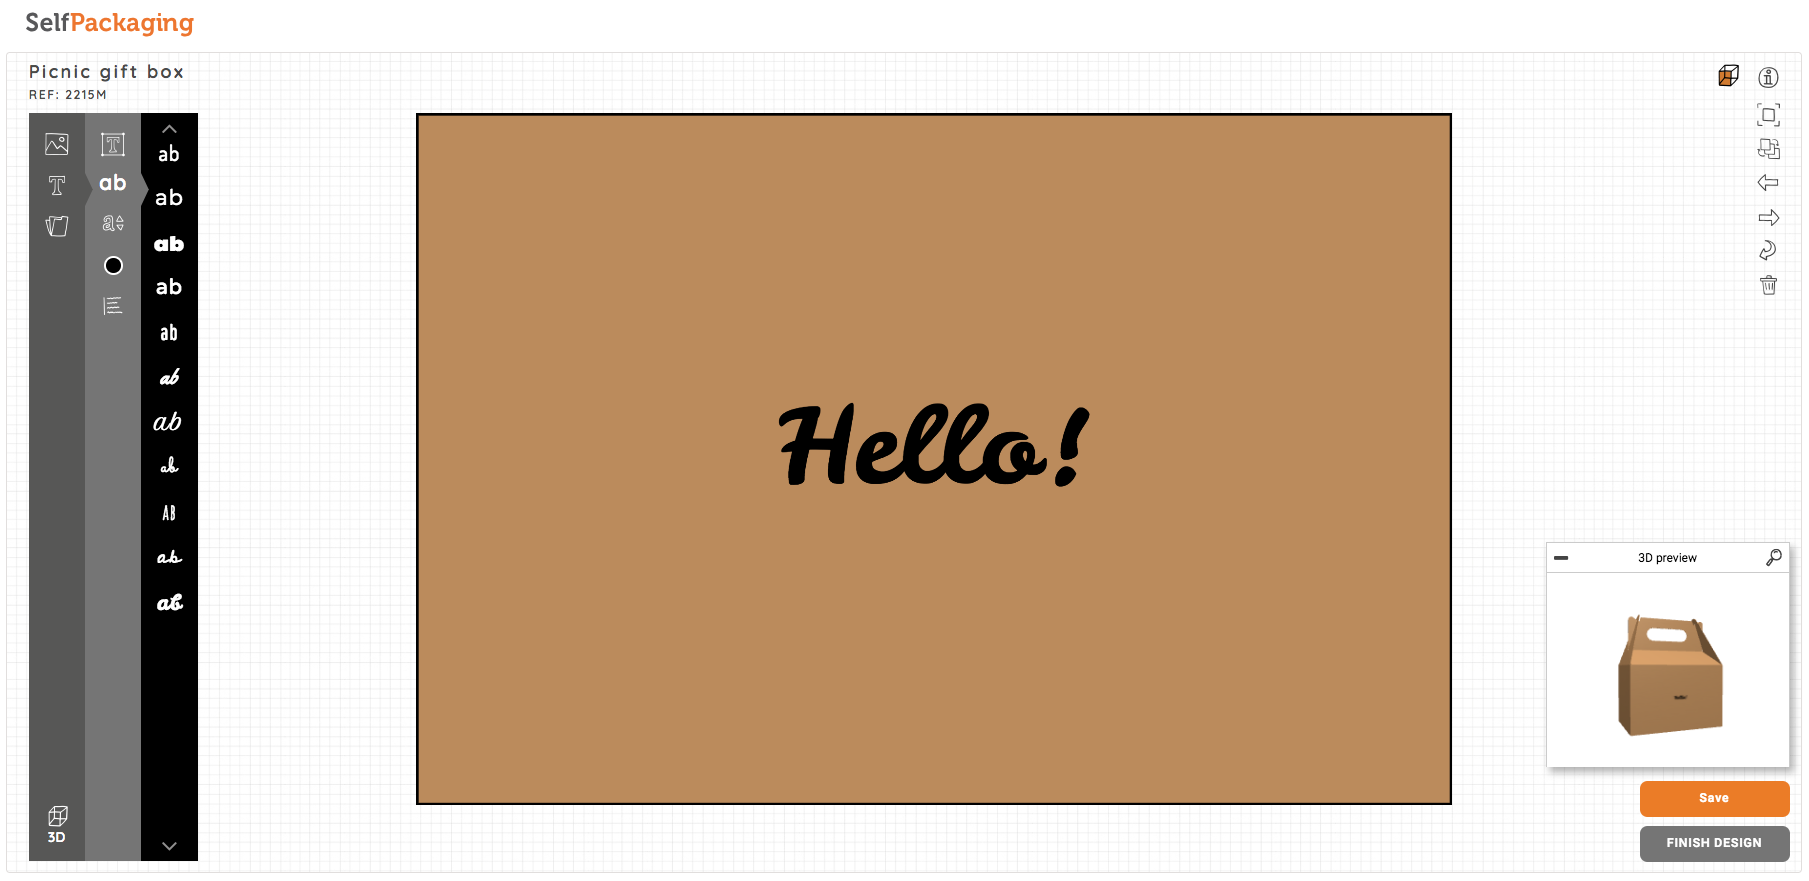
We are going to guide you a little bit more through the menus. On the left-hand side, you have the tool bar. The first feature (at the top) is your image gallery. Here you can upload the photos you want to use them when you want. Also, if you are a registered user, they will be saved in your folder. The second, the “T”, is for texts and here you can write about your cardboard box. From the bottom to the top, the functions are: add text, change source, change the letter size, text colour and text alignment You also have the icon of a folder. The designs that you are creating will be stored there, so you won’t have to redo them each time you want to go back to your designs. Right at the bottom, by clicking on “3D Preview” you can see how your design will look in 360º.
On the upper-right side, you can find more functions. Due to the fact that we are only editing one side at the moment, the “A side” icon will appear by default. The icon on its right corresponds to the “Instructions” icon, if you need help, and from the bottom to the top we have: the “Centre” button, if we have moved around the editor, the “Send to back” button, so that if there are overlapping elements, we can put them in order with this button, and the “Eliminate” option, if we decide to delete the project. Below, we have the “Save” button, if we want to leave the project half-way through and continue later on, and the “Finish design” button if we like the result and we want to have it delivered as soon as possible.
Printed boxes: Editing all the sides
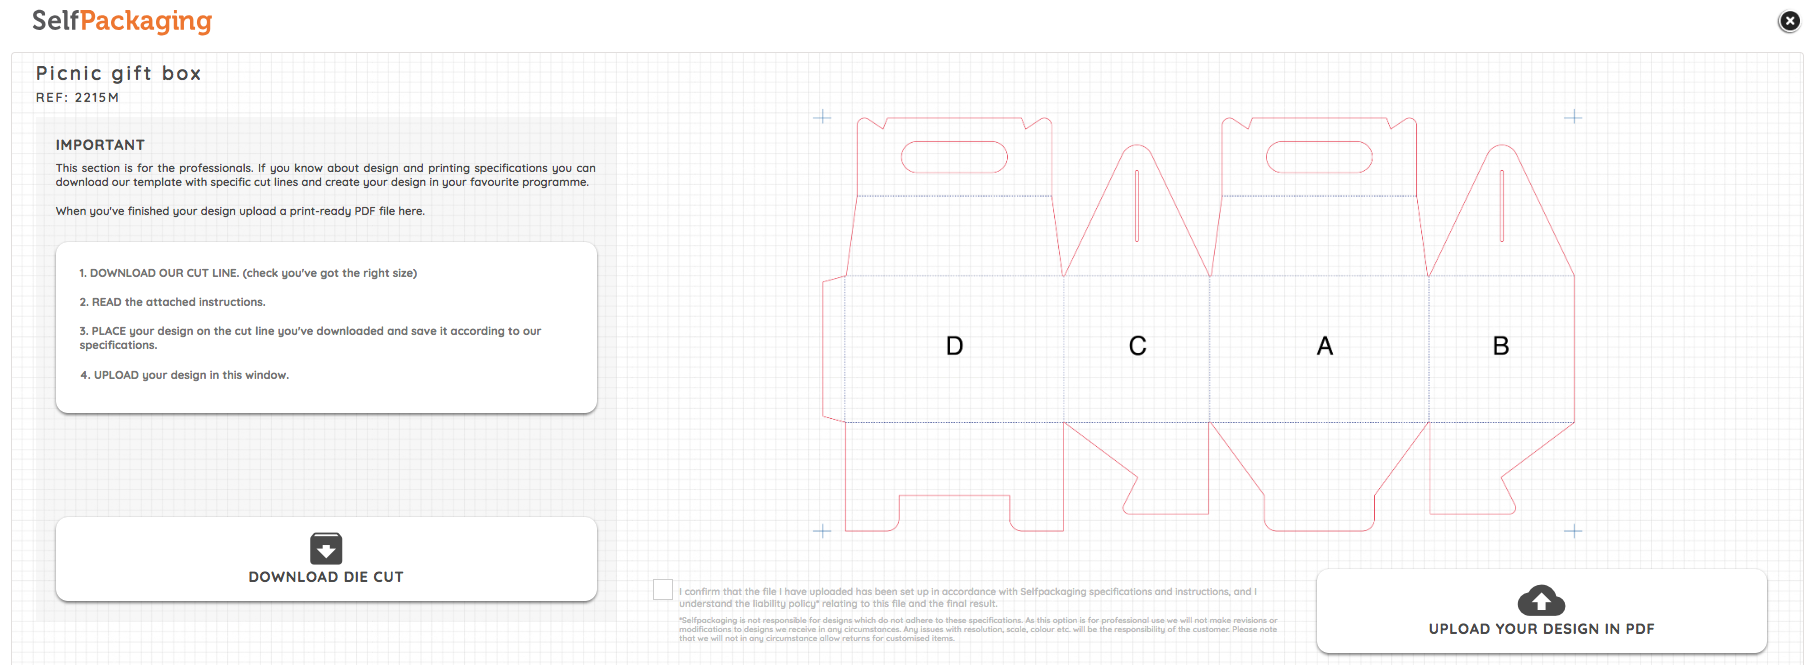
If you have decided to edit all the sides, the process is slightly different because when you click on design after selecting the option, a warning will appear to choose whether we want to use the configurator, or if on the other hand, we have more design knowledge, we can choose the “Professional design” option.
If we choose the “Professional design” option, we must click on “Download the cut-out” to start the download, edit it in our favourite editing programme and then, on the same screen, click on “Upload your design (PDF)” to upload the edited project in PDF format. Be sure to have read the conditions about the PDF before uploading it. You will have to prepare it for printing.
If you have chosen the “Online design”, the menus are exactly the same as the ones for the one-side design. The only difference this option has is the sides. In this way, you can move around easier to edit them, and always know what part of the box you are working on.

As you can see, to obtain your personalised boxes you don’t need to be an expert designer, and with the SelfPackaging Printing Configurator, it’s so easy, whether you have design experience or not. We think that everybody should be able to have the chance for their business to have their own unique boxes because they add a lot of value, which we know is going to boost your brand. So…? After reading this, do you feel ready to create boxes with us?
Pingback: Tips from designers to create customized packaging - Selfpackaging Blog