
Content
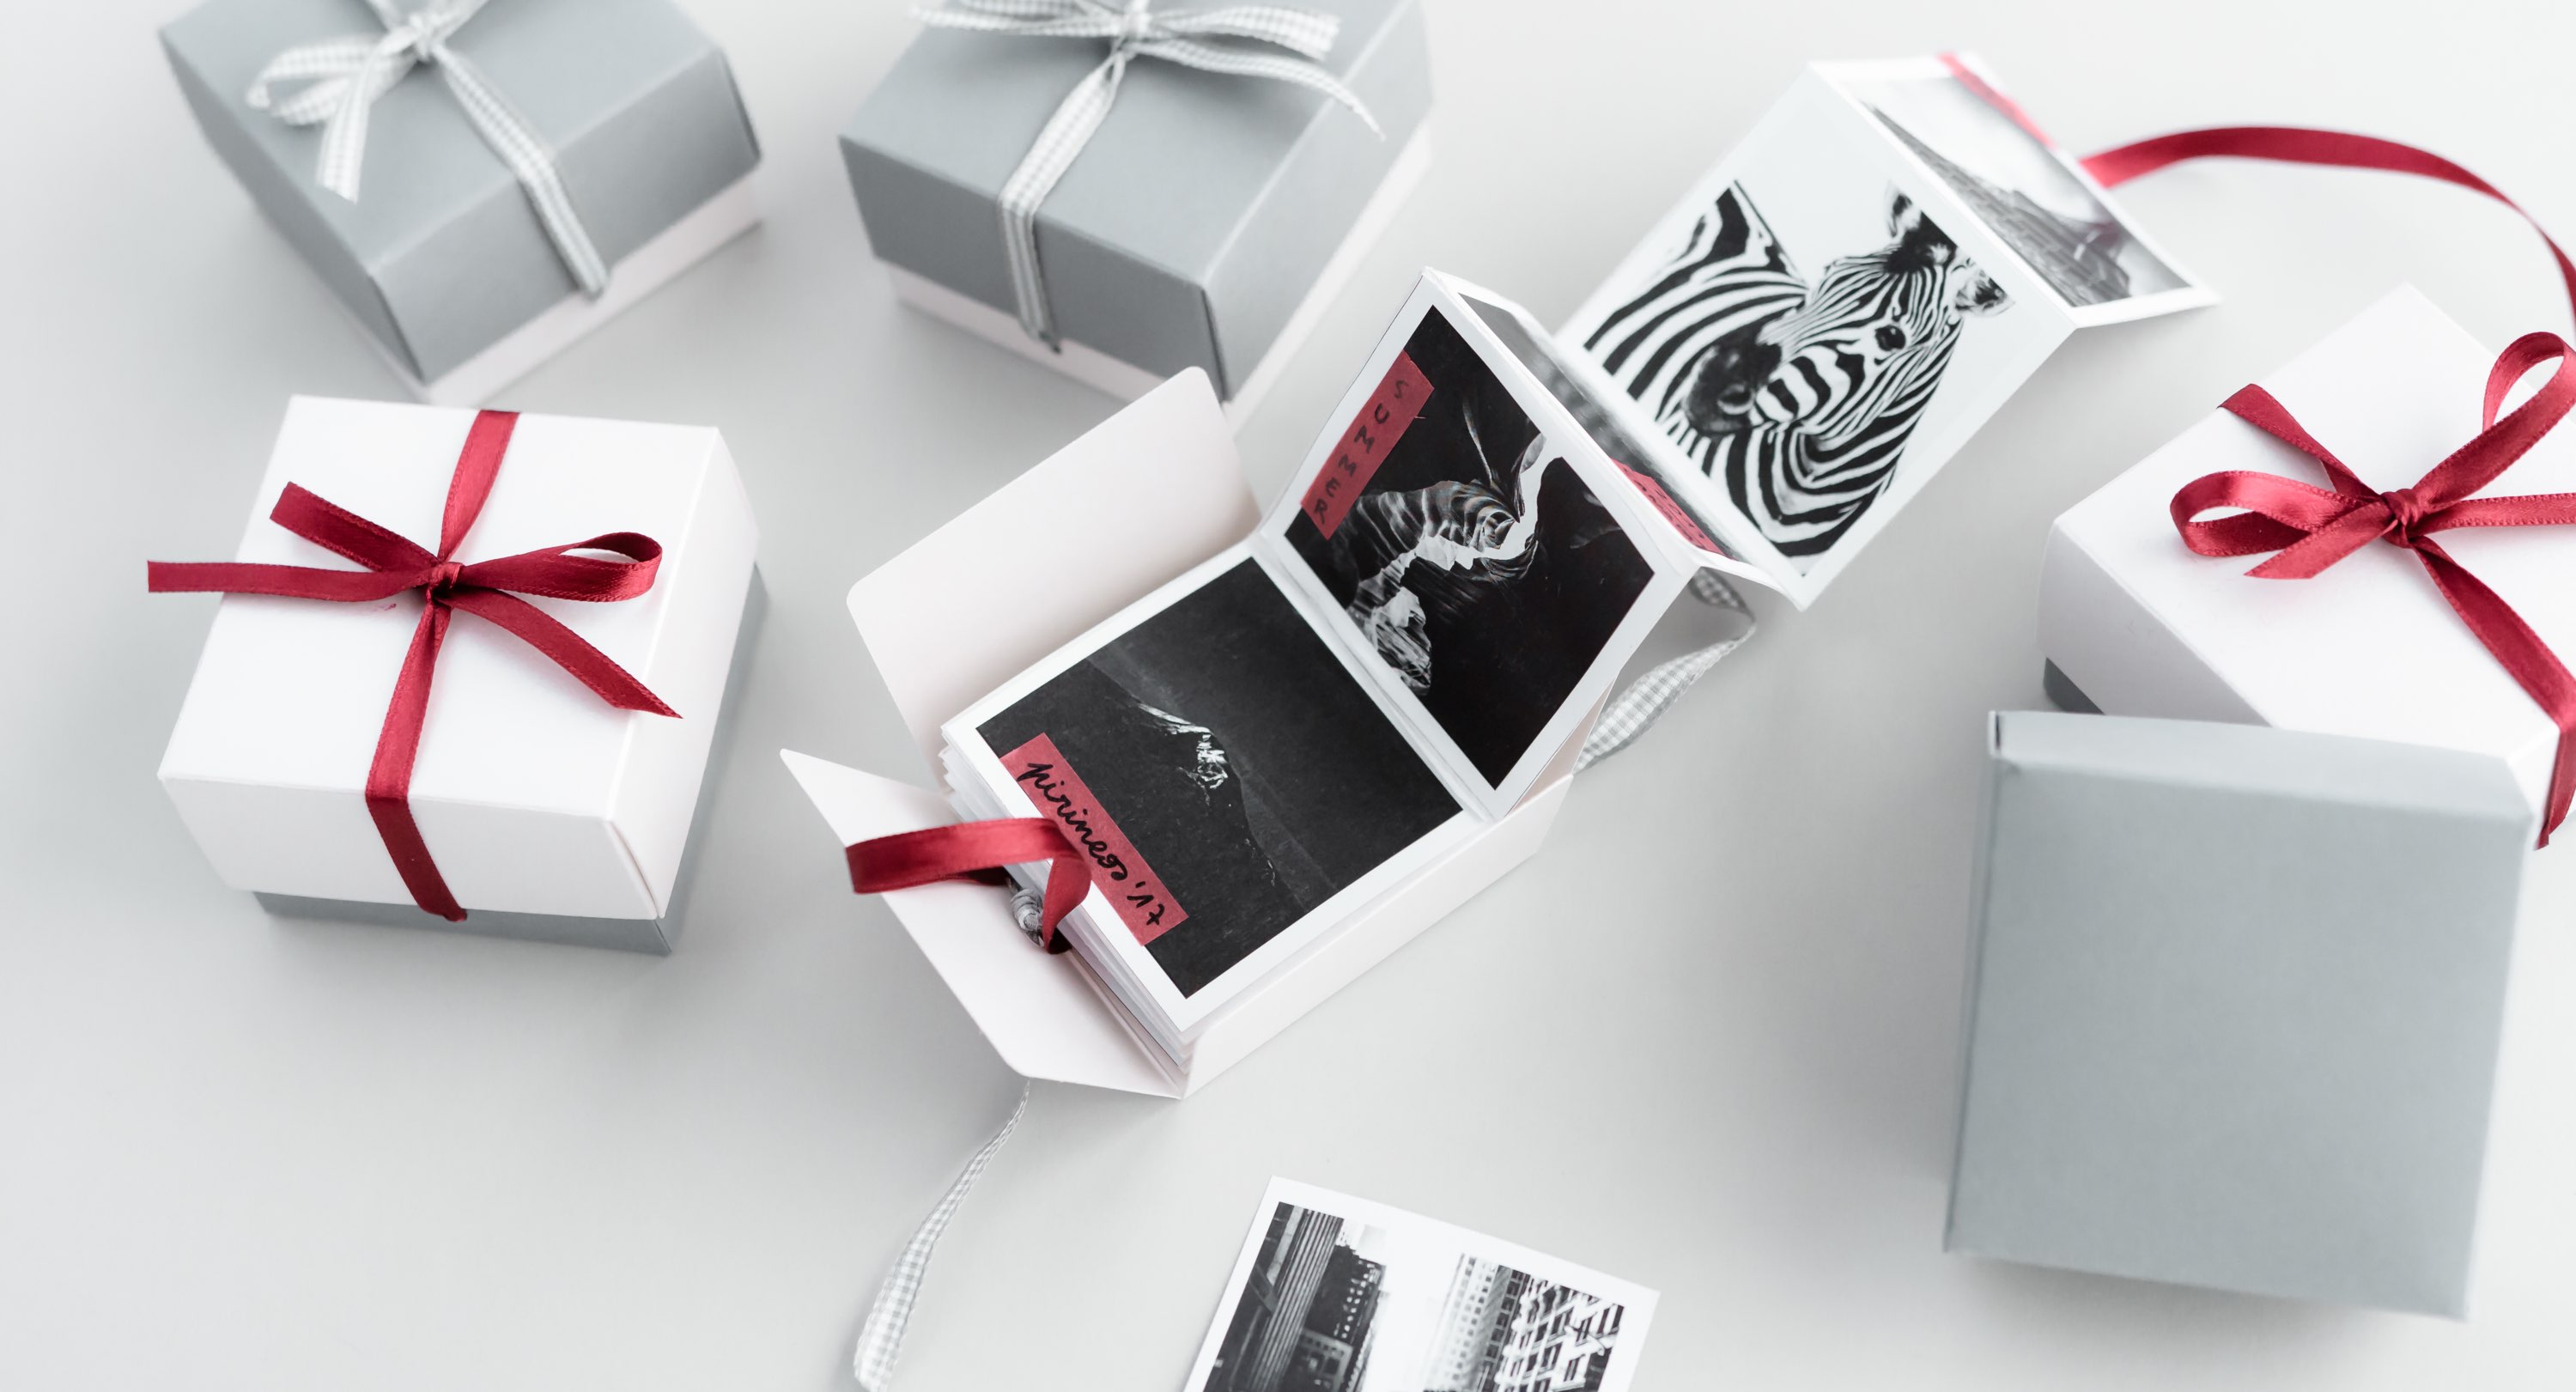
We all like to remember our latest holiday, that party from the other day, our most recent family meal… and we do it by taking hundreds of photos on our mobile phone. The problem is that those photos are quickly forgotten in our phone’s gallery and we don’t get a chance to enjoy them on a regular basis. The cool idea we bring you today allows you to print all these photos easily so you can see and show them to people whenever you want. We are going to create an accordion photo box, with the most relevant photos we took last year. It’s an alternative to a conventional photo album, but much more fun!
It is also a great idea for a present. You can compile photos for someone’s birthday, a photo selection for a wedding anniversary… It’s a nice little gift loaded with good memories and very easy to make. Photos allow us to look back on our favourite moments together, so share them on paper!
Are you ready? Let’s do it!
A super post in collaboration with Esencia Gráfica.
Materials for the Accordion photo box:
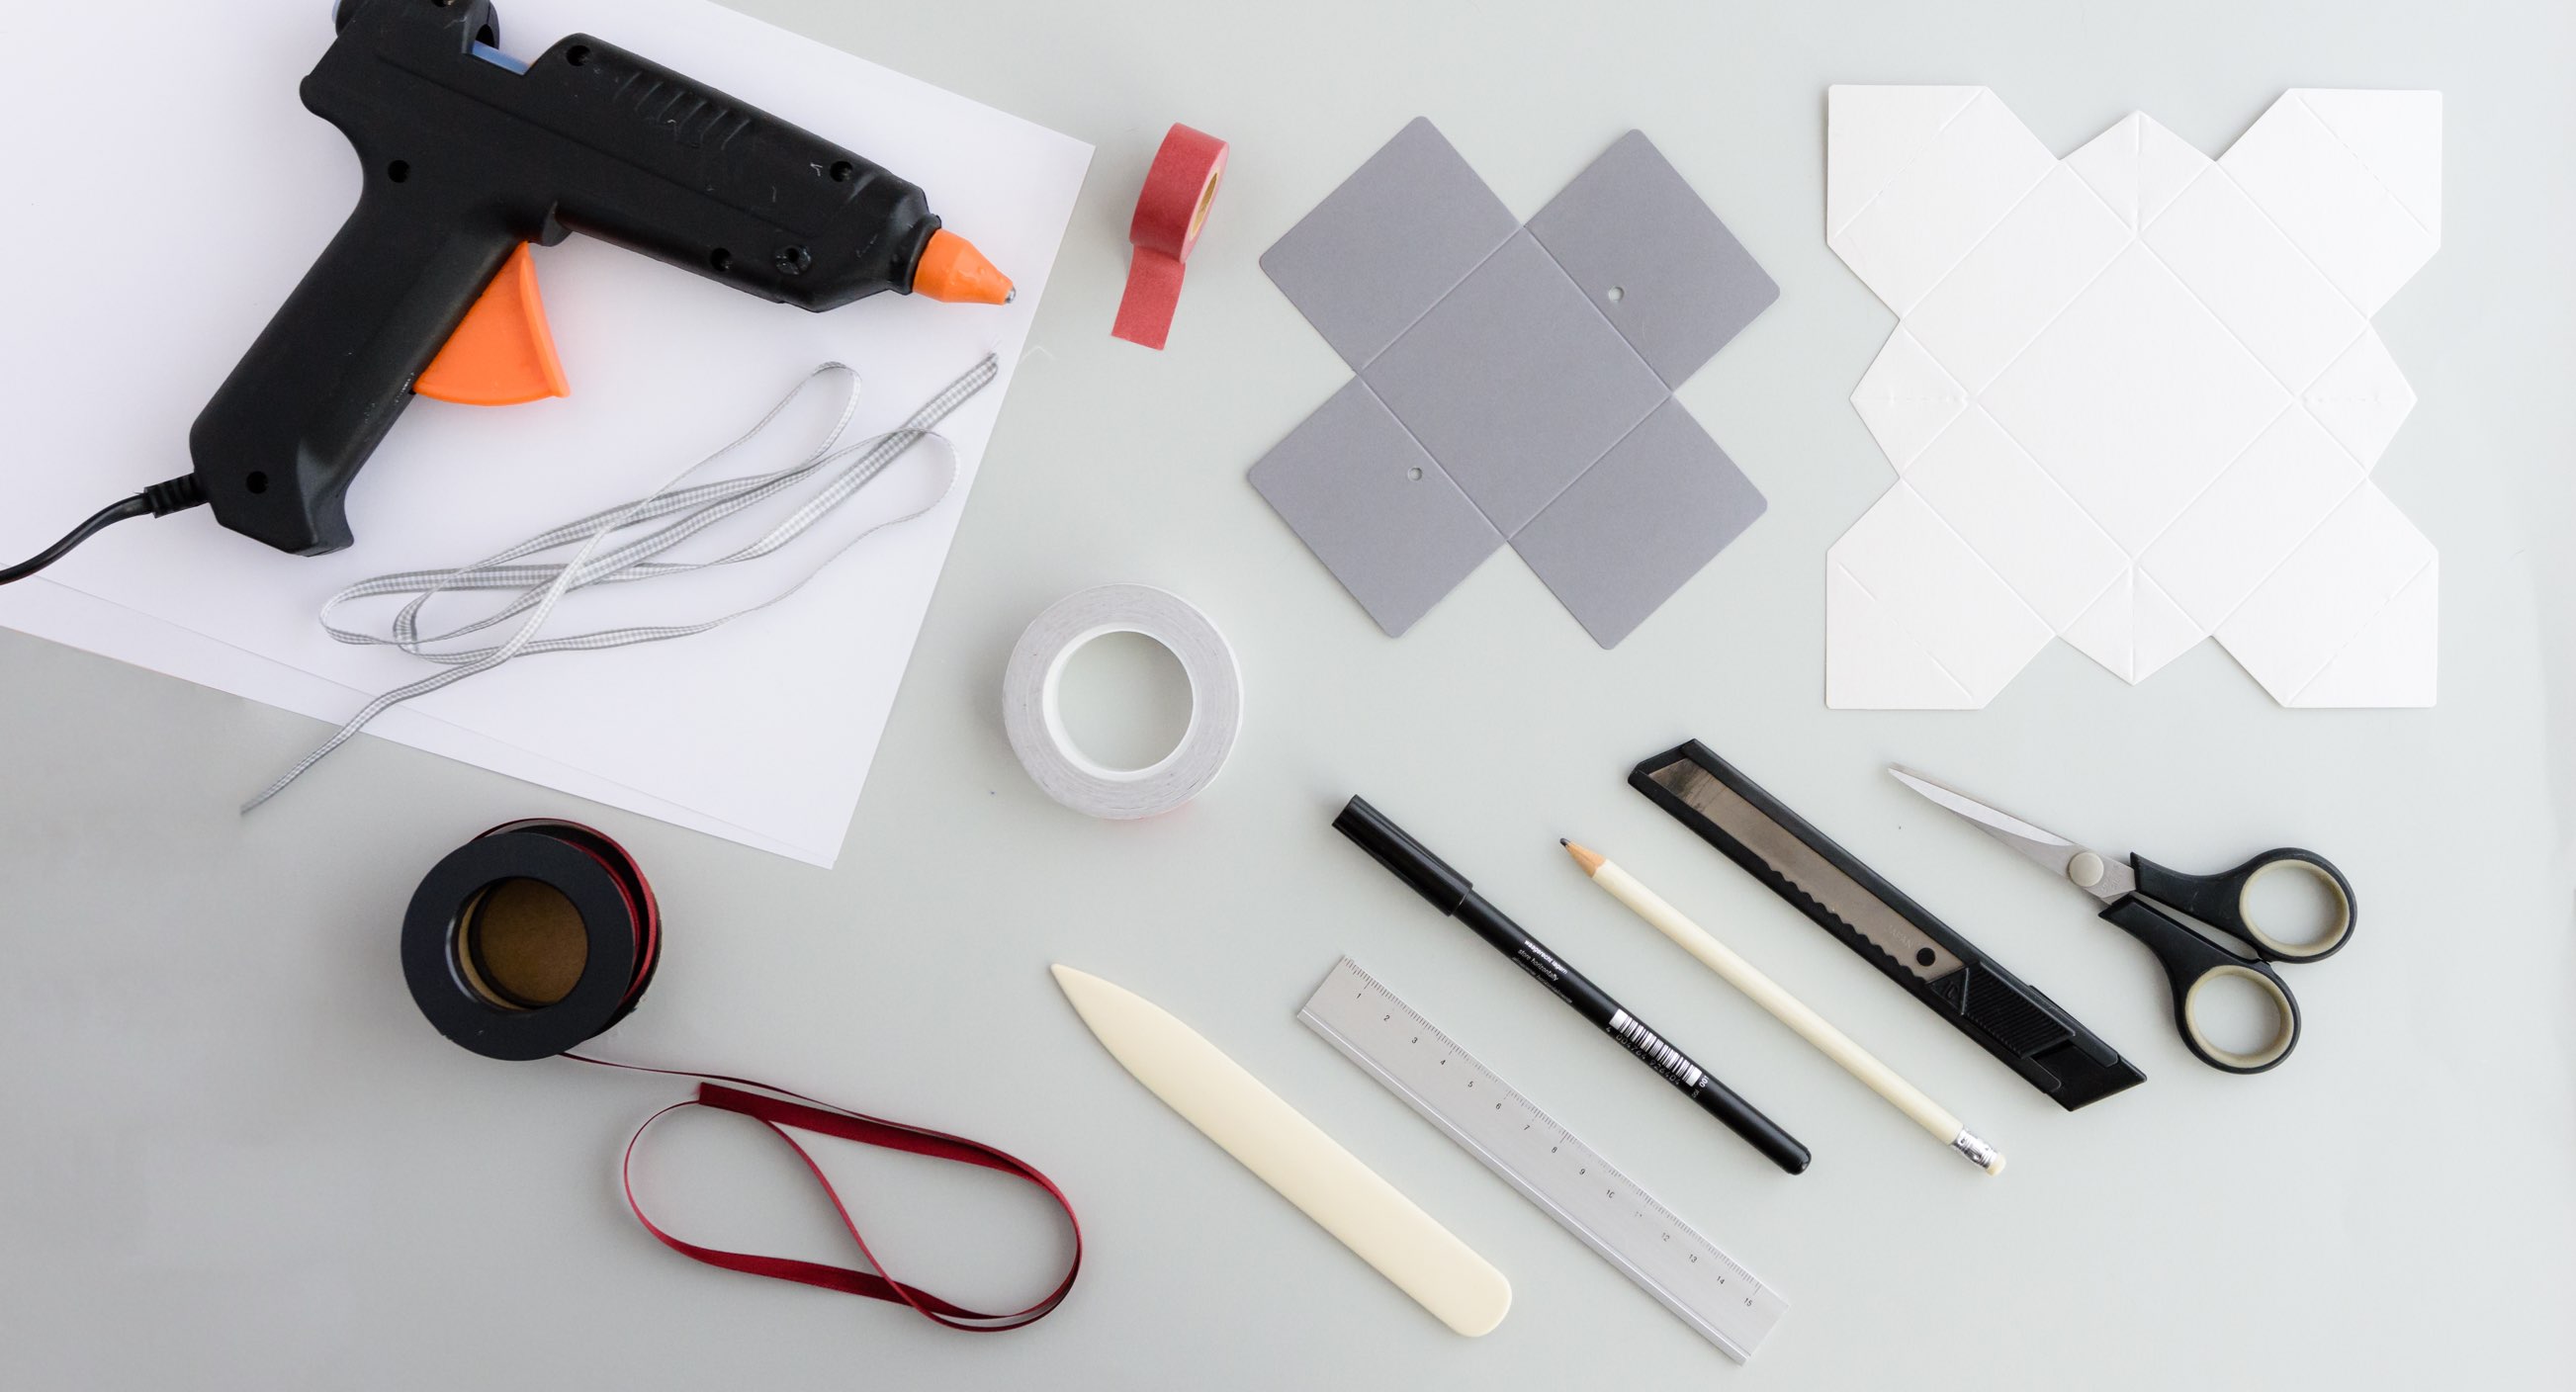
- Simple square box with a lid
- Satin ribbon. We have chosen the burgundy-coloured one
- Mini burgundy washi tape.
- Double sided tape
- Pencil
- Ruler
- Box cutter or scissors
- Felt-tip pen
- Cardboard
- 12 of your favourite photos
Step by Step:
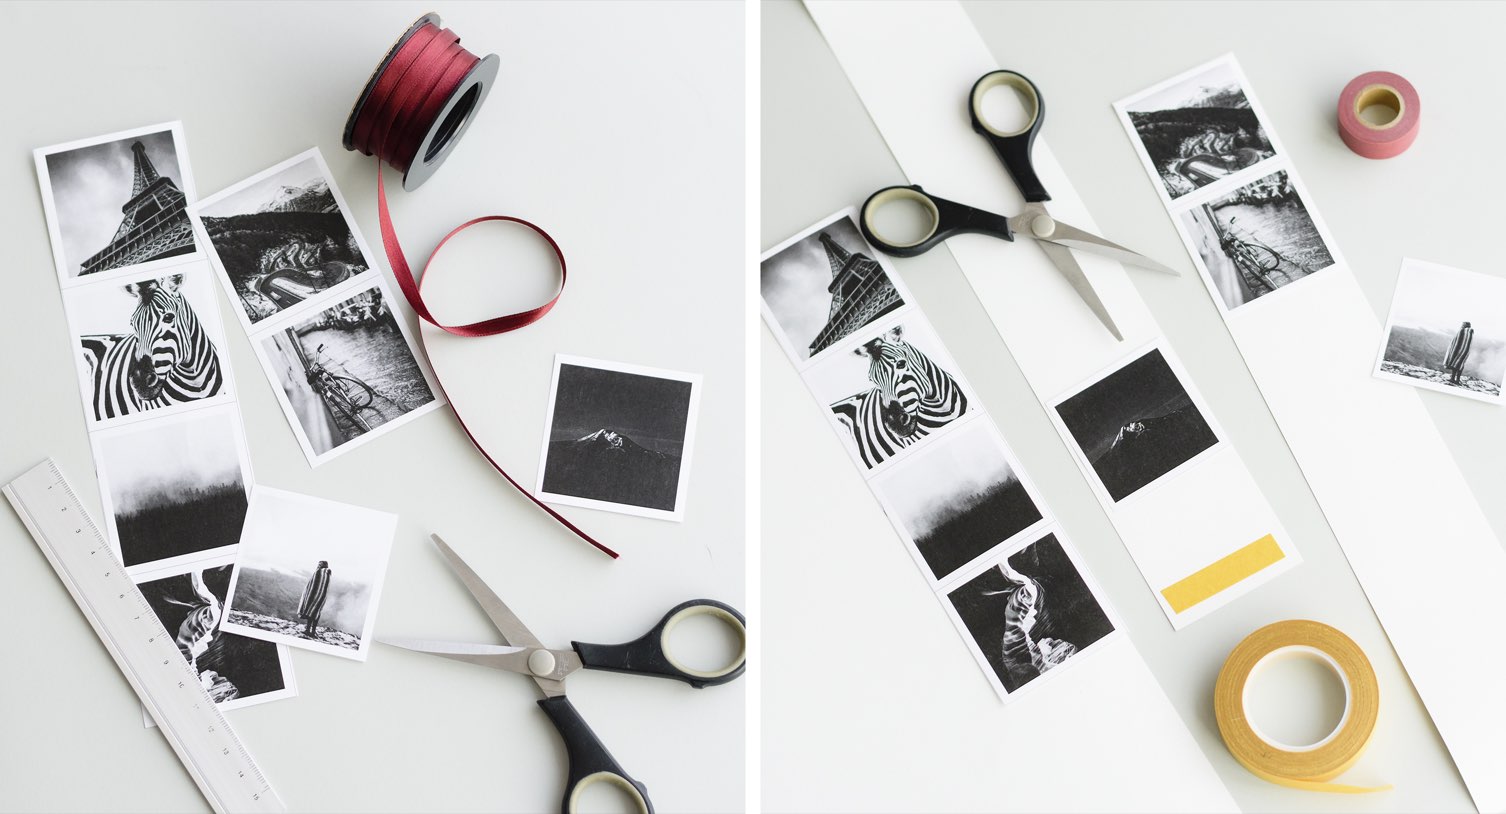
1 – Select the 12 photos you like best and print them out. Cut them into a square 5.5 x 5.5 cm format. We have printed all our photos in black and white for a more elegant look.
2 – Take the cardboard and place all the photos in a vertical line. You will probably need at least two strips of cardboard. Leave a small space on the end of the strip to place the double sided tape so you can glue the two strips together.
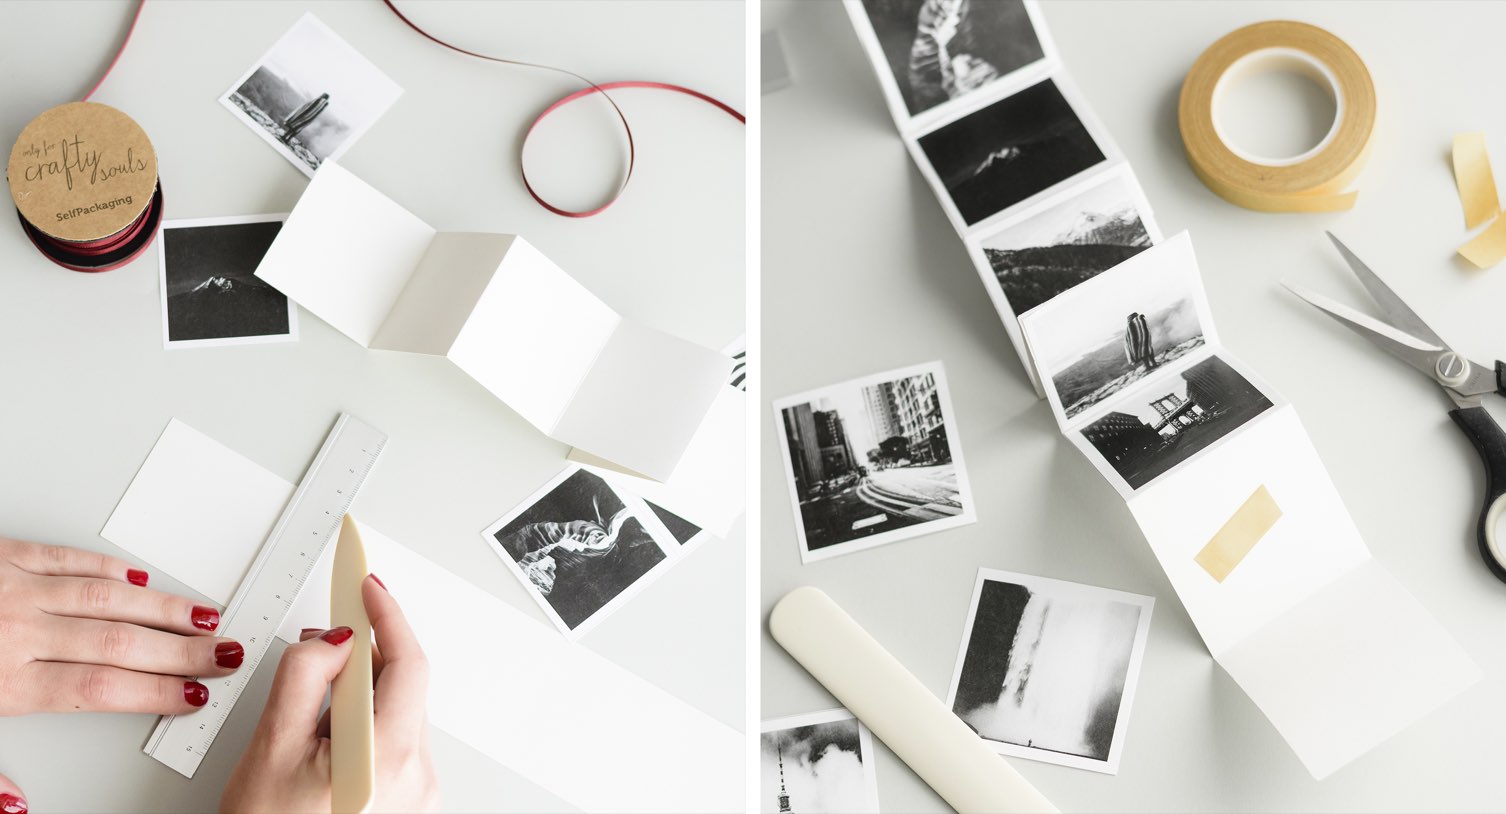
3 – Now let’s make the folds so the strip takes the shape of an accordion. With a ruler and a folder we make the folds 5.5 cm apart (the height of our photos).
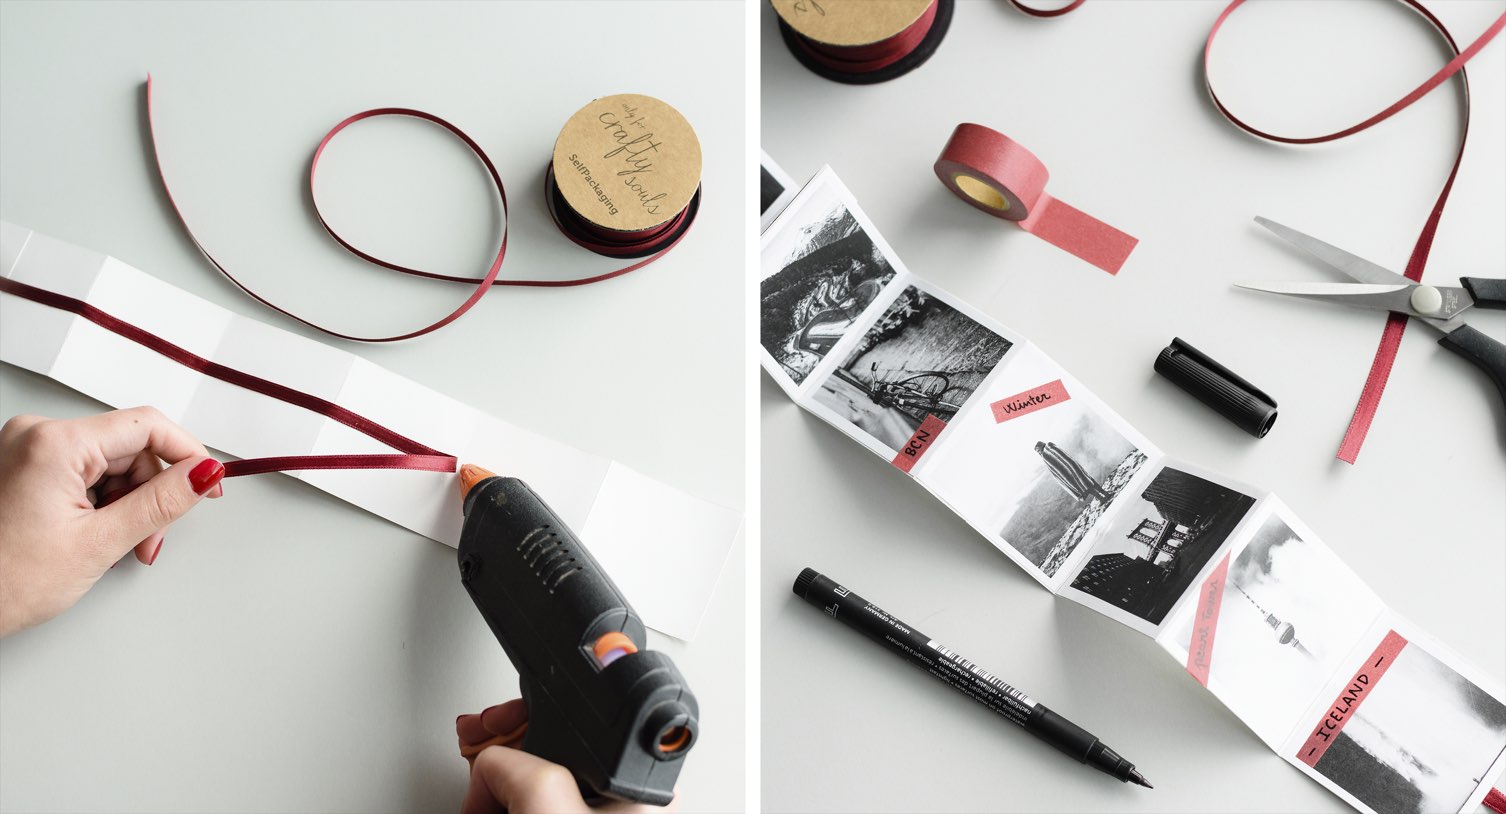
4 – Once we have marked all the folds, we stick the photos on the accordion with a bit of double sided tape.
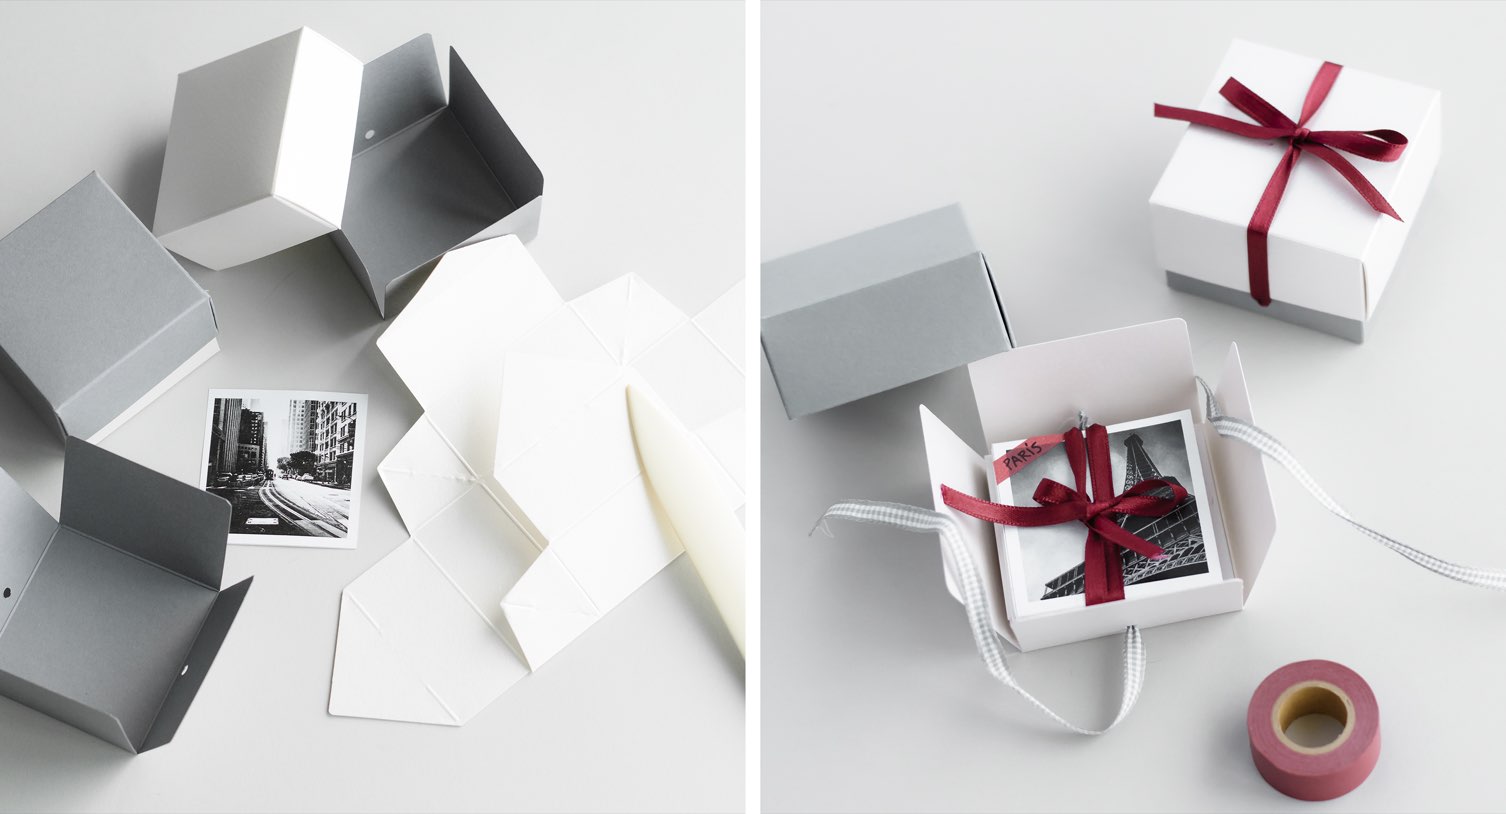
5 – Along the back of the accordion, we stick the satin ribbon on with some hot glue, leaving a little extra length on each end. The ribbon will help us take the accordion out of the box and hold the strip more comfortably.
6 – Now it’s time to add a touch of colour. Use the pieces of washi tape as decoration around the photographs. You can use a felt-tip pen to write, on the washi tape, the place where the photo was taken, the date, or any little memory you want to remember every time you look at the photo.
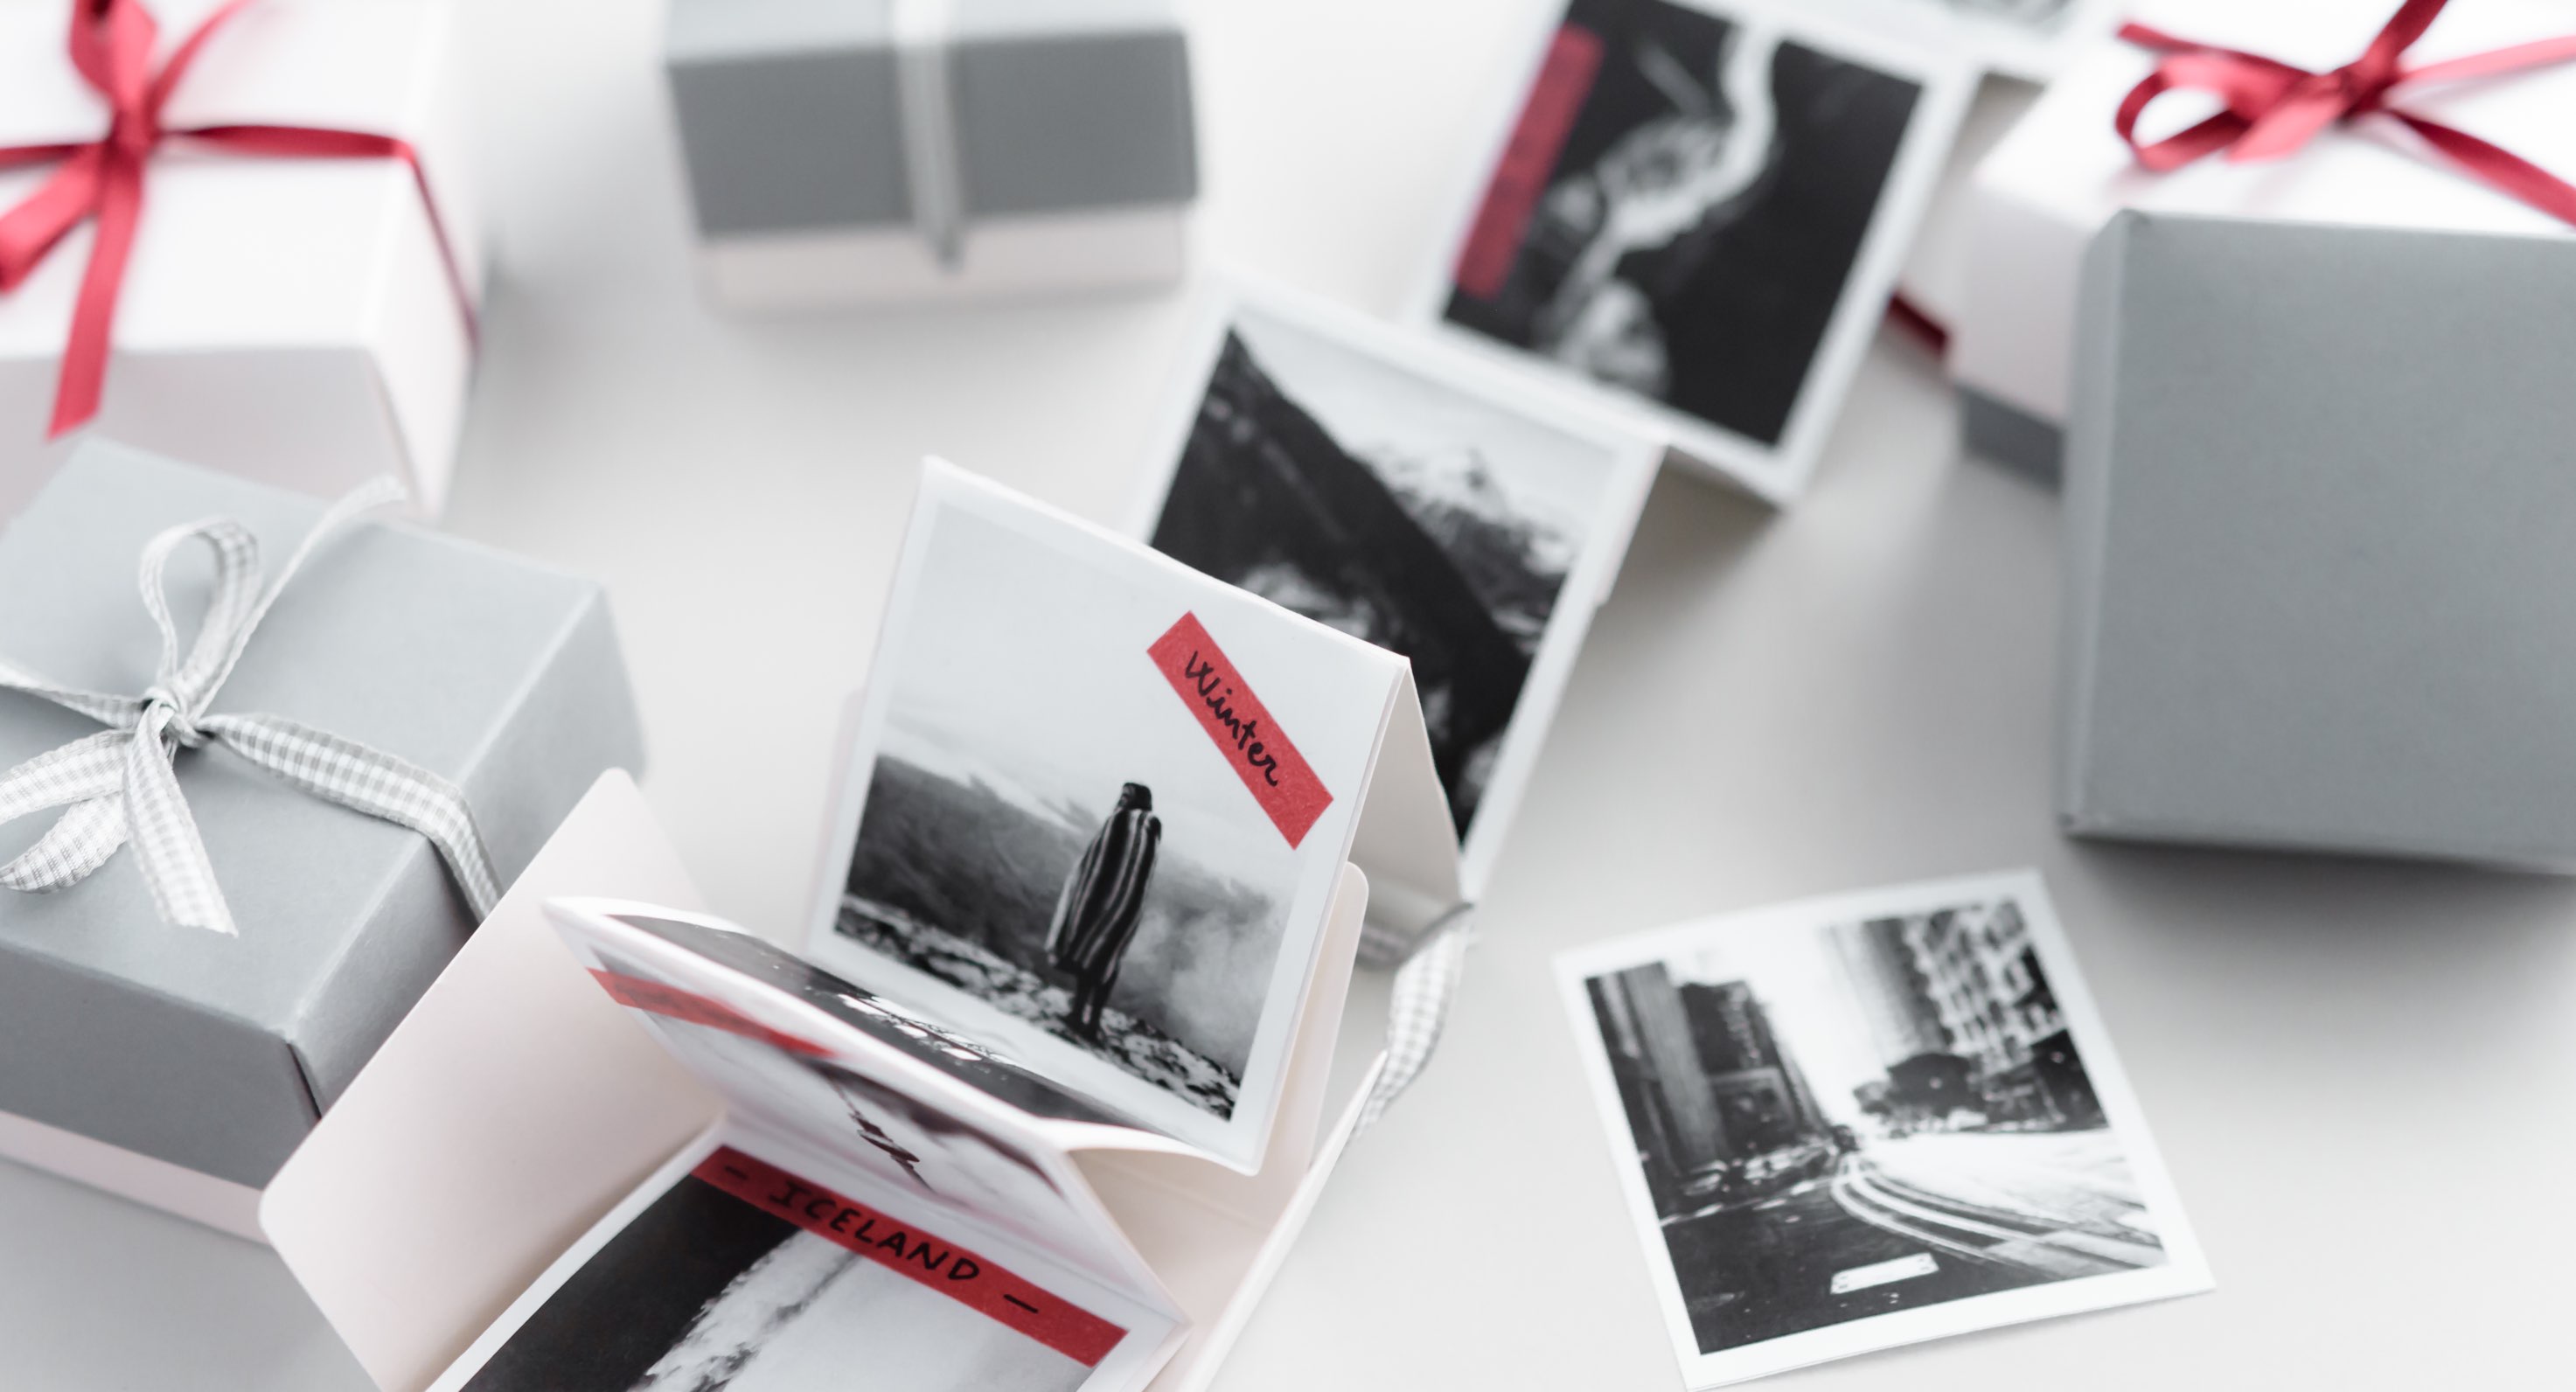
7 – Assemble the box and prepare the gingham ribbon that closes the box. You can watch the assembly video here.
8 – Finally, decorate the box to match the photos and little details on the accordion.
You now have no excuse not to show off those amazing photos of your favourite memories thanks to our very creative accordion photo box!
Pingback: Original photography boxes to collect your memories - Selfpackaging Blog