Content
At this point in time we are sure you already know it is possible to print personalised boxes directly from SelfPackaging, right? It is not possible for every single one of our card boxes, or at least not directly from the website, but it is possible to make a special request for a quote for any of our boxes for orders over 250 items by filling the form at “Are you a company?“.
How do you print personalised boxes?
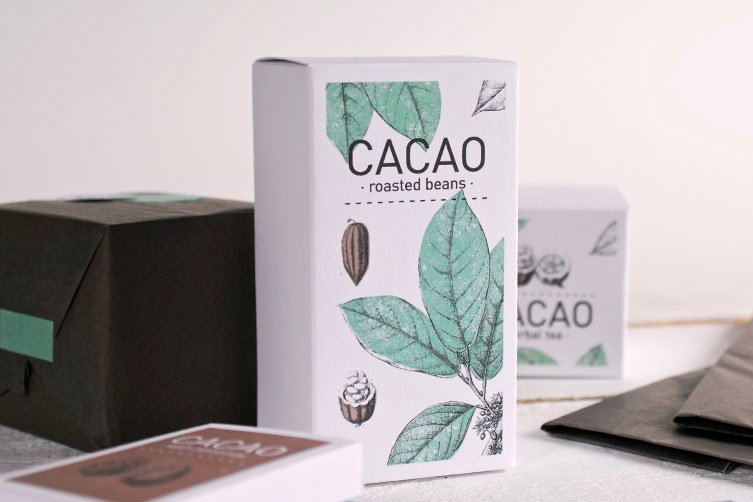
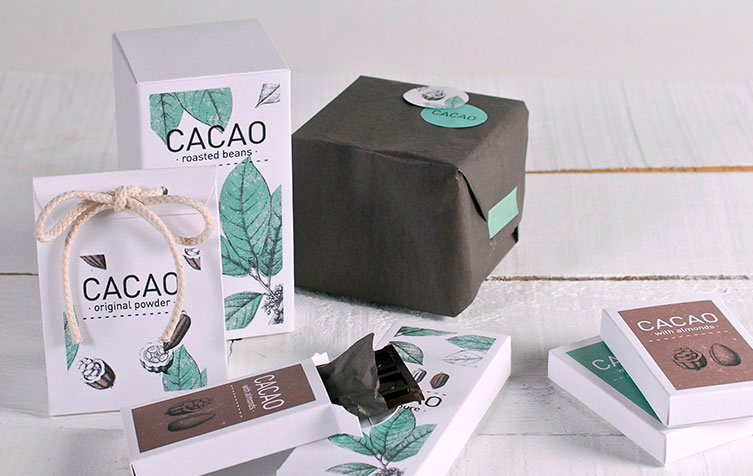
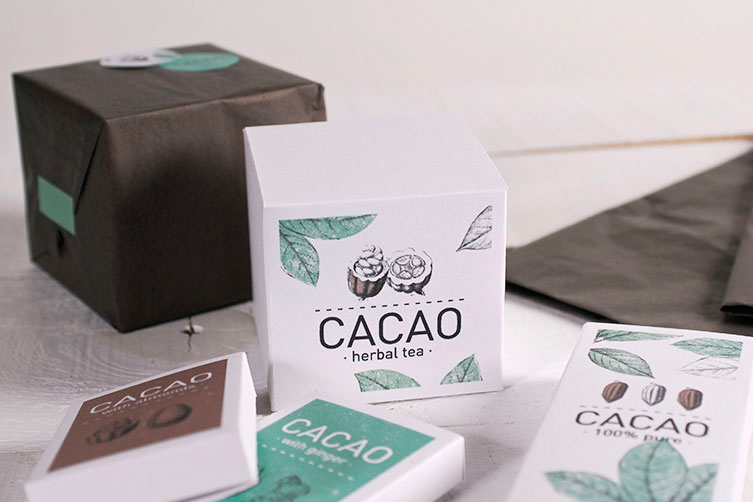
So you can see how easy it is, we have created a step by step guide for the example above so you can use when you need any other custom print. In this case, the idea was to print personalised boxes with a background image and a text over it. Let’s get started!
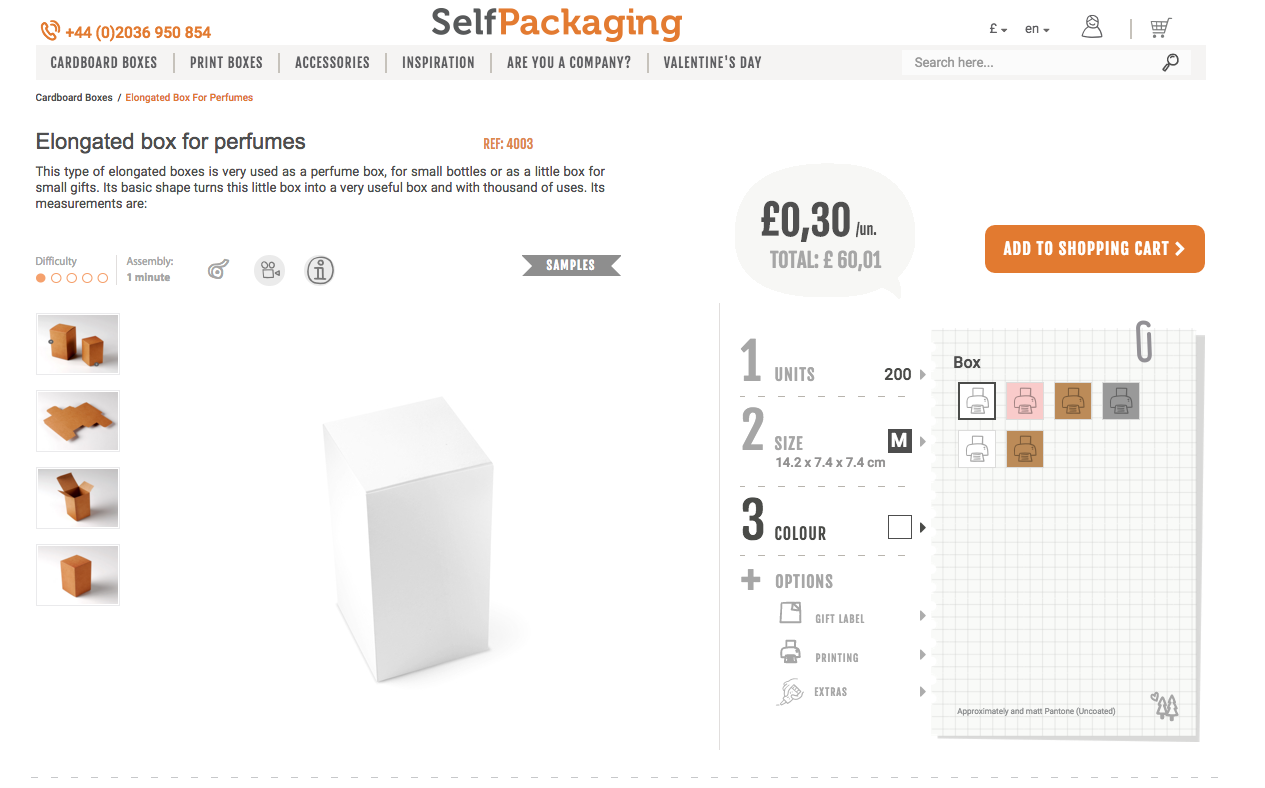
Step 1: Choose the box you want to customise
In our ‘Print boxes’ section you will find all those models (which we are currently extending) that can be currently printed directly from the website and almost virtually with no minimum order. In this particular case, we have chosen size M of our elongated box for perfumes, ref. 4003:
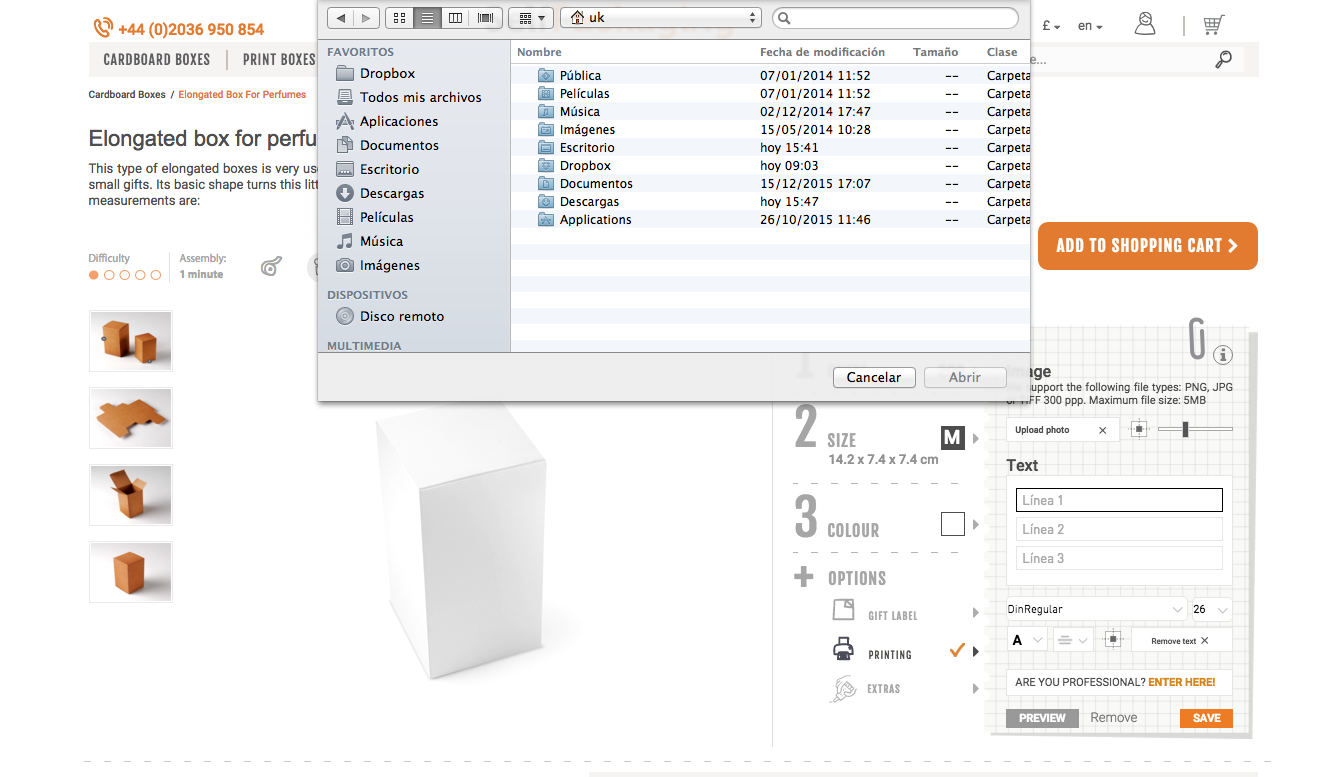
Step 2: Personalise your box online
We choose the white box and complete the information on the order we want to place, including the number of units we want. Next, we go to “PRINT”, and click on “Upload photo” (cloud icon). We find the image we want to upload in our computer:
For this occasion, our designers have created a botanical background, which was the theme we were looking for. If this background in particular is of any use to you, you can download it by clicking here.
Once we have applied the file to the cardboard box, you’ll see it on the website like this:
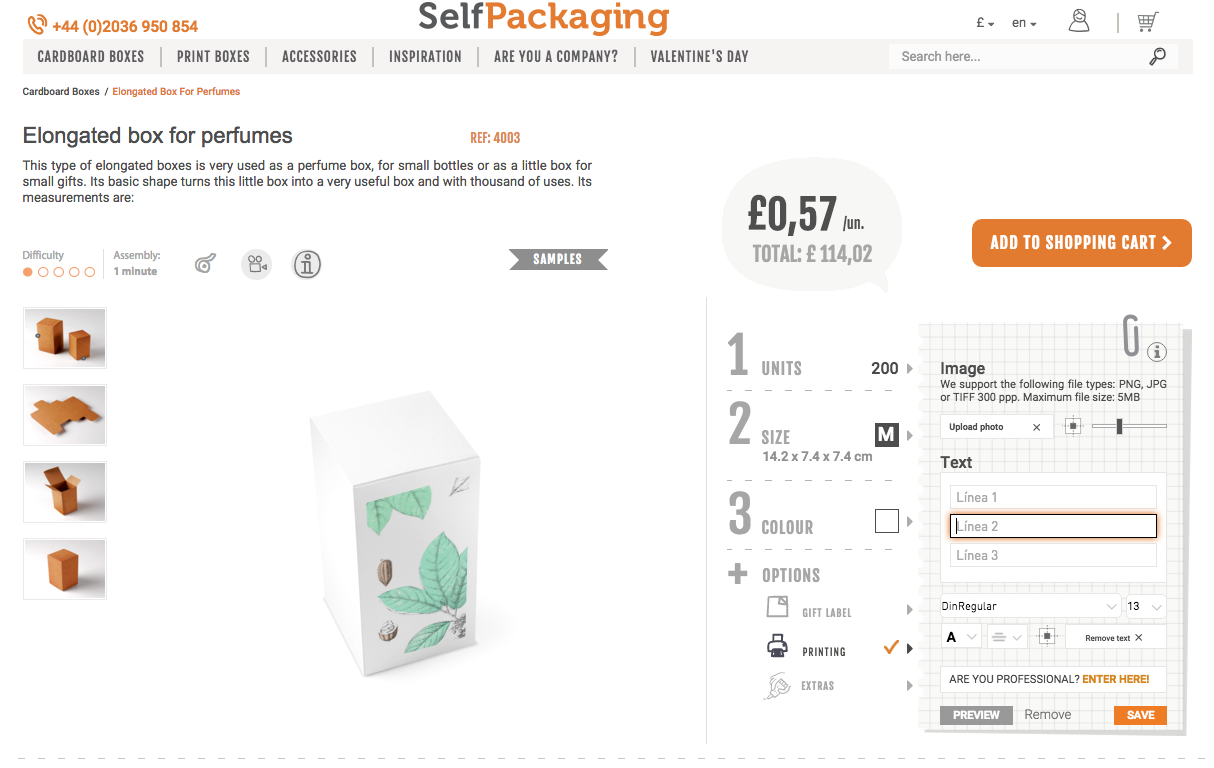
Using the side menu, we can make the image we have uploaded bigger and smaller by clicking on the “-“ or “+” icons and dragging it over the box to choose the right position
… now we get to work on the text. Don’t worry, it’s very easy, don’t forget that.
In this case we want three lines of text on the image, which is what the printing preferences allow.
The preferences allow us to change the font, colour and text justification.
We have chosen the Din Regular font. In the first line, we have written the word “CACAO” with a 26 font size; for the second line ” roasted beans ” we have used font size 10; and the same for the last one, in which we have included a broken line. We have used the default black for the text, as it went well with our design. If you need to change it, you can do so easily by clicking on the capital letter A in the preferences. Can you see it?
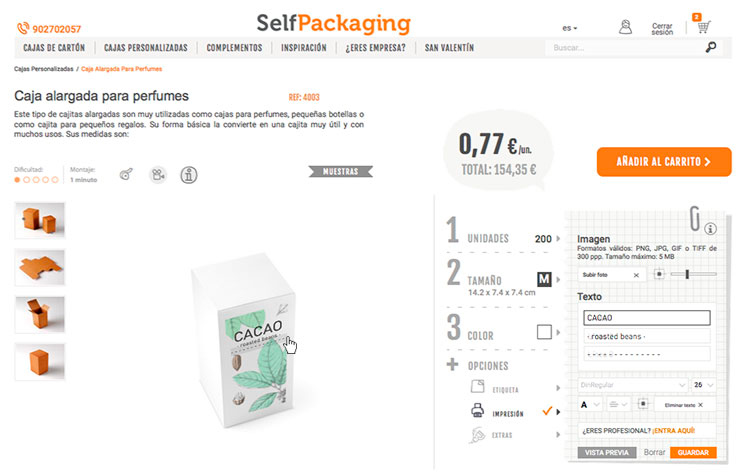
Step 3: Add the boxes to your shopping cart
The last step to get your customised boxes once the design is ready is adding them to the shopping cart… And receiving them at home!
All ready, now you know how to print customised boxes from SelfPackaging. Wasn’t it as easy as we promised? And it looks good, doesn’t it? We love it!