Content
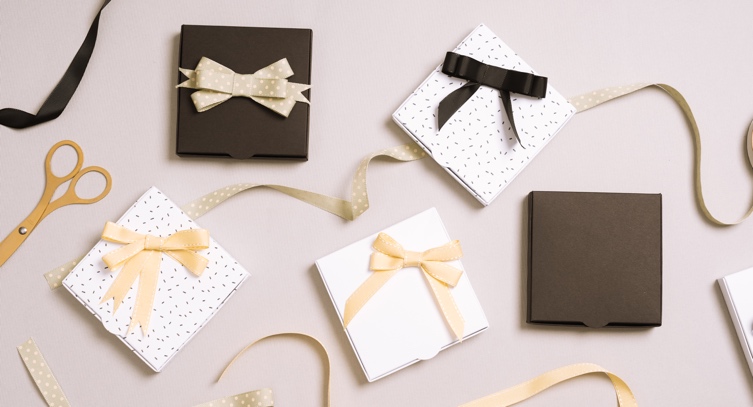
Every time we think of the perfect gift-wrapping, we imagine a nice wrapping with a ribbon bow. Some shops will wrap your package with gorgeous wrapping, now you can learn it to do it at home, because a handmade bow is the perfect topper for gifts, and it makes it special!
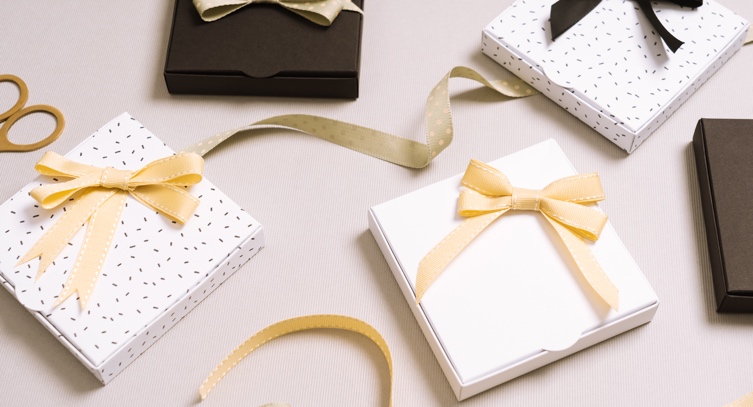
The secret for a perfect wrapping is the color, size and decoration. We absolutely love to keep presents boxes, in fact you can reuse them any time and it has more advantages that wrapping paper (Go eco-friendly!) We believe that wrapping a box is always nicer than wrapping the present directly as it makes it easier because of its shape. As we mentioned before, once you receive the lovely present you can give the box a second life.
But, we will first show you how the boxes look with simple bows, there are infinite ways of making it. Here’s how we make it.
Because everyone knows how to create simple bows, but do you know how to make them big and adorable? Learn how to do them with one of our favourite laces, impress your family and friends with your wrapping skills! So in this post, we’ll teach you not one, not two, but three ways on how you can tie a bow.
This post was made by the amazing team at Warm Home Life.
SUPPLIES
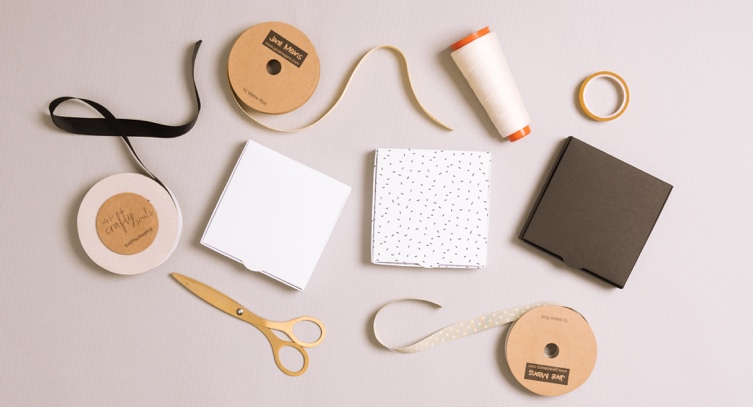
–Yellow ribbon with backstitching
-Simple lidded gift box- black
-simple lidded gift box- white
-Scissors
-Double-sided tape
-Thread
-Needle
STEPS
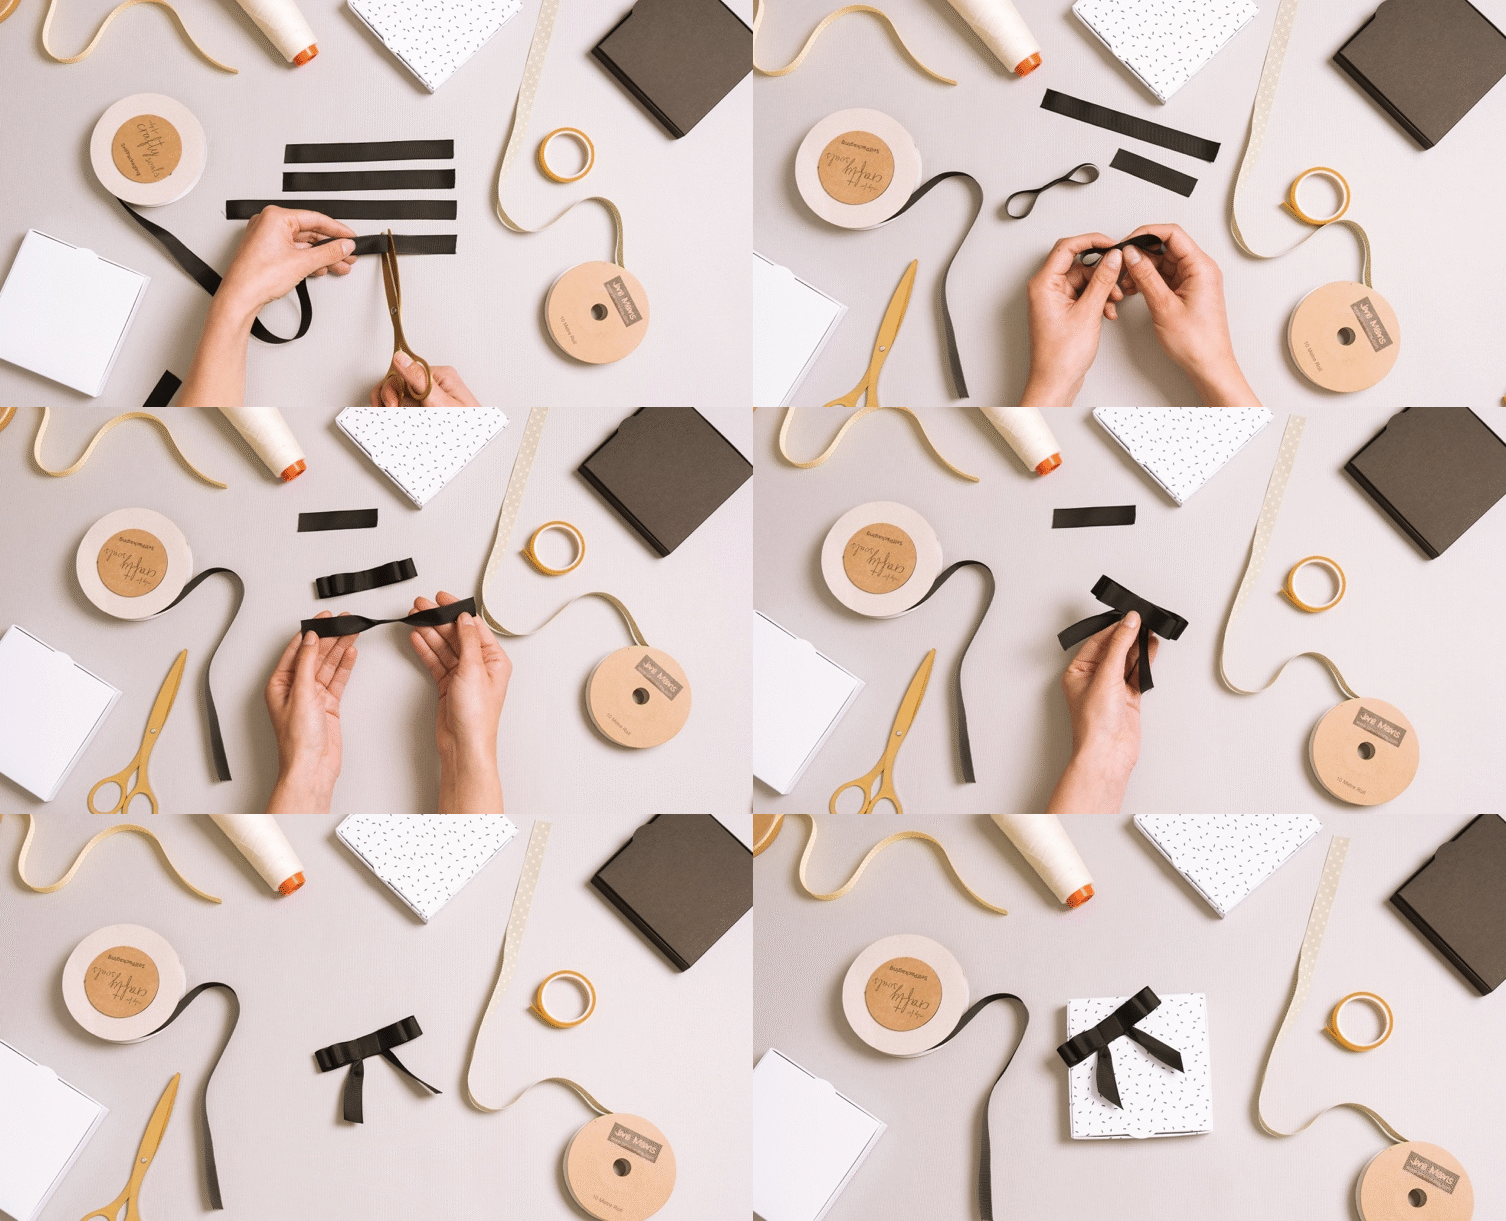
DOUBLE LACE RIBBON
1.For this lace we are going to use black grosgrain ribbon. First, cut four pieces in two parts, one larger and the other shorter.
2. Now you need to close the two same sized pieces in a loop, you can do it with double-sided tape. With a bit more tape, stick the inside pieces of each loop.
3. Next, put together the two bows that you got before
4. Fold the longer piece of lace in the middle and fix it with tape
5. Then fold it in half in a “V” shape and glue it to the back of the double loop.
6. Close the set with the shortest piece of tape and fix it in the same way.
7. To finish, cut the ends diagonally and paste it in your box. With the marbled box it looks great!
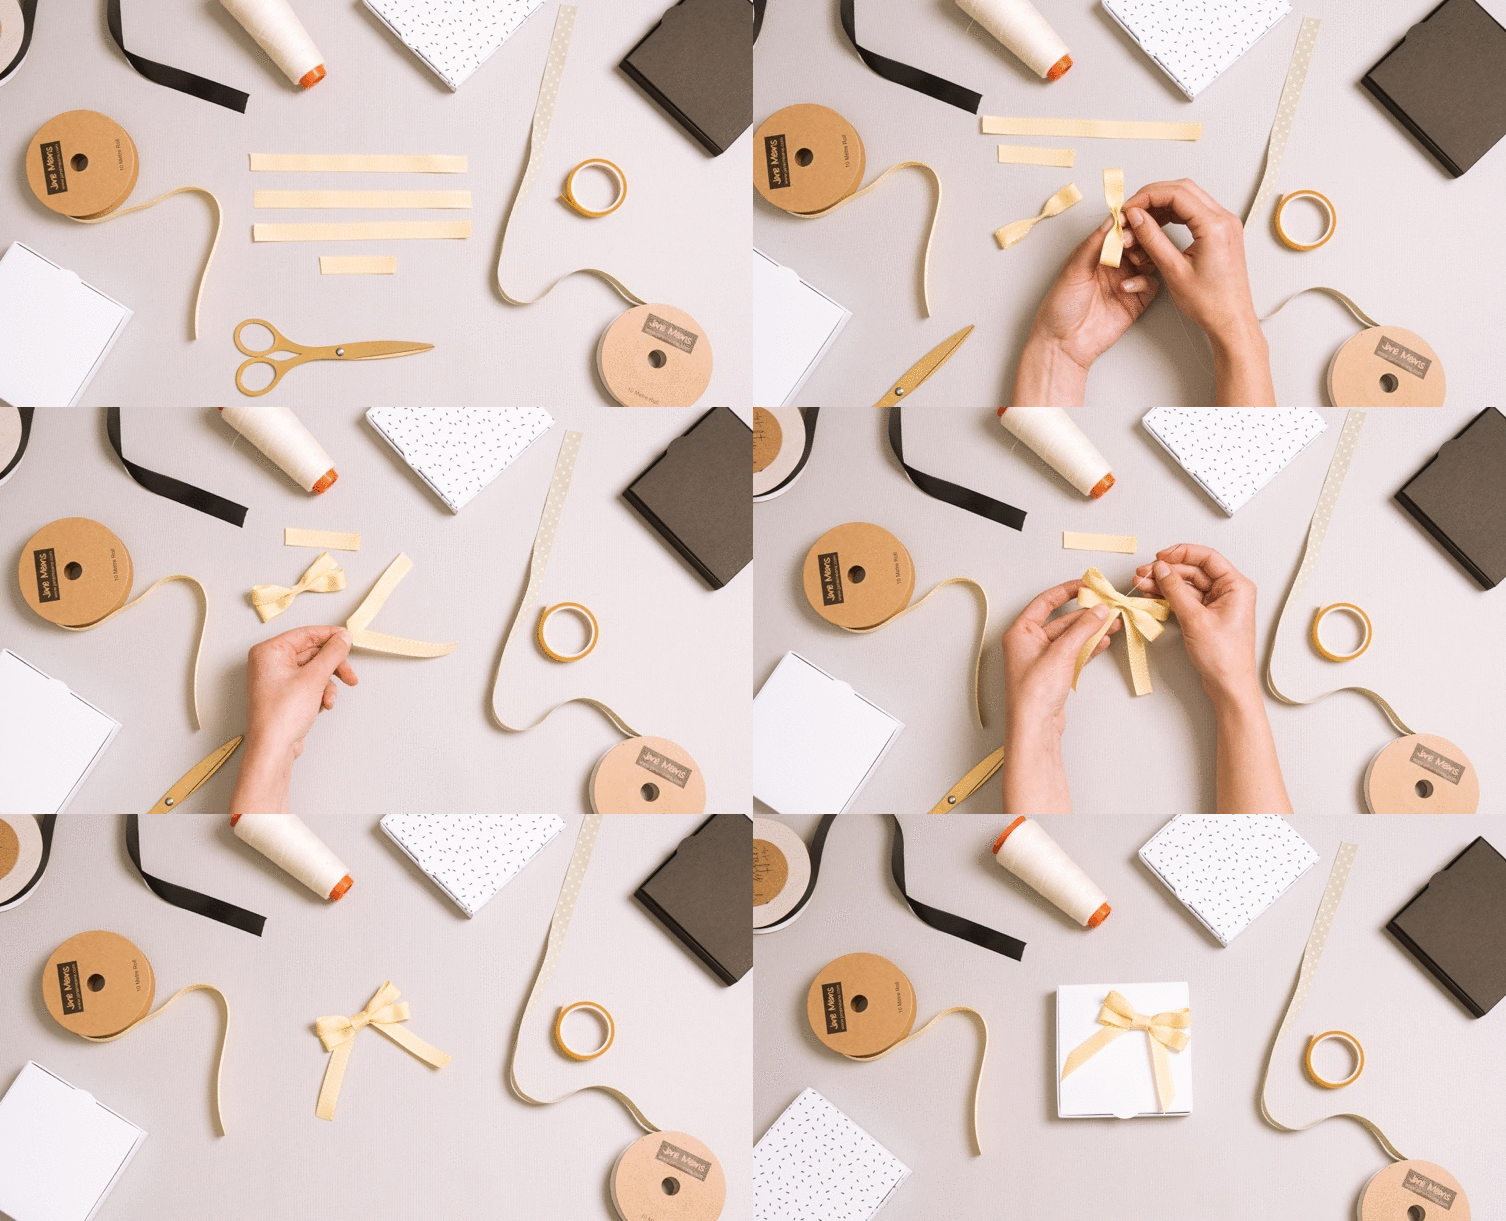
CROSS DOUBLE LOOP
1.In this case we have cut three equal pieces and one small piece of yellow tape with stitching.
2. As in the previous case, join in the form of a circle two of the long pieces with adhesive tape.
3. Then it forms a loop, narrowing the central part and stitching with thread and needle to fix it. Then, join them in the center with more stitches.
4. Fold the remaining piece of long tape in the “V” shape and sew it to the set on the back.
5. Hide the entire union with the small piece and fix it with adhesive tape.
6. To finish, cut the ends of the tape in “V” diagonally and paste the double loop to the white box. Simple but elegant!
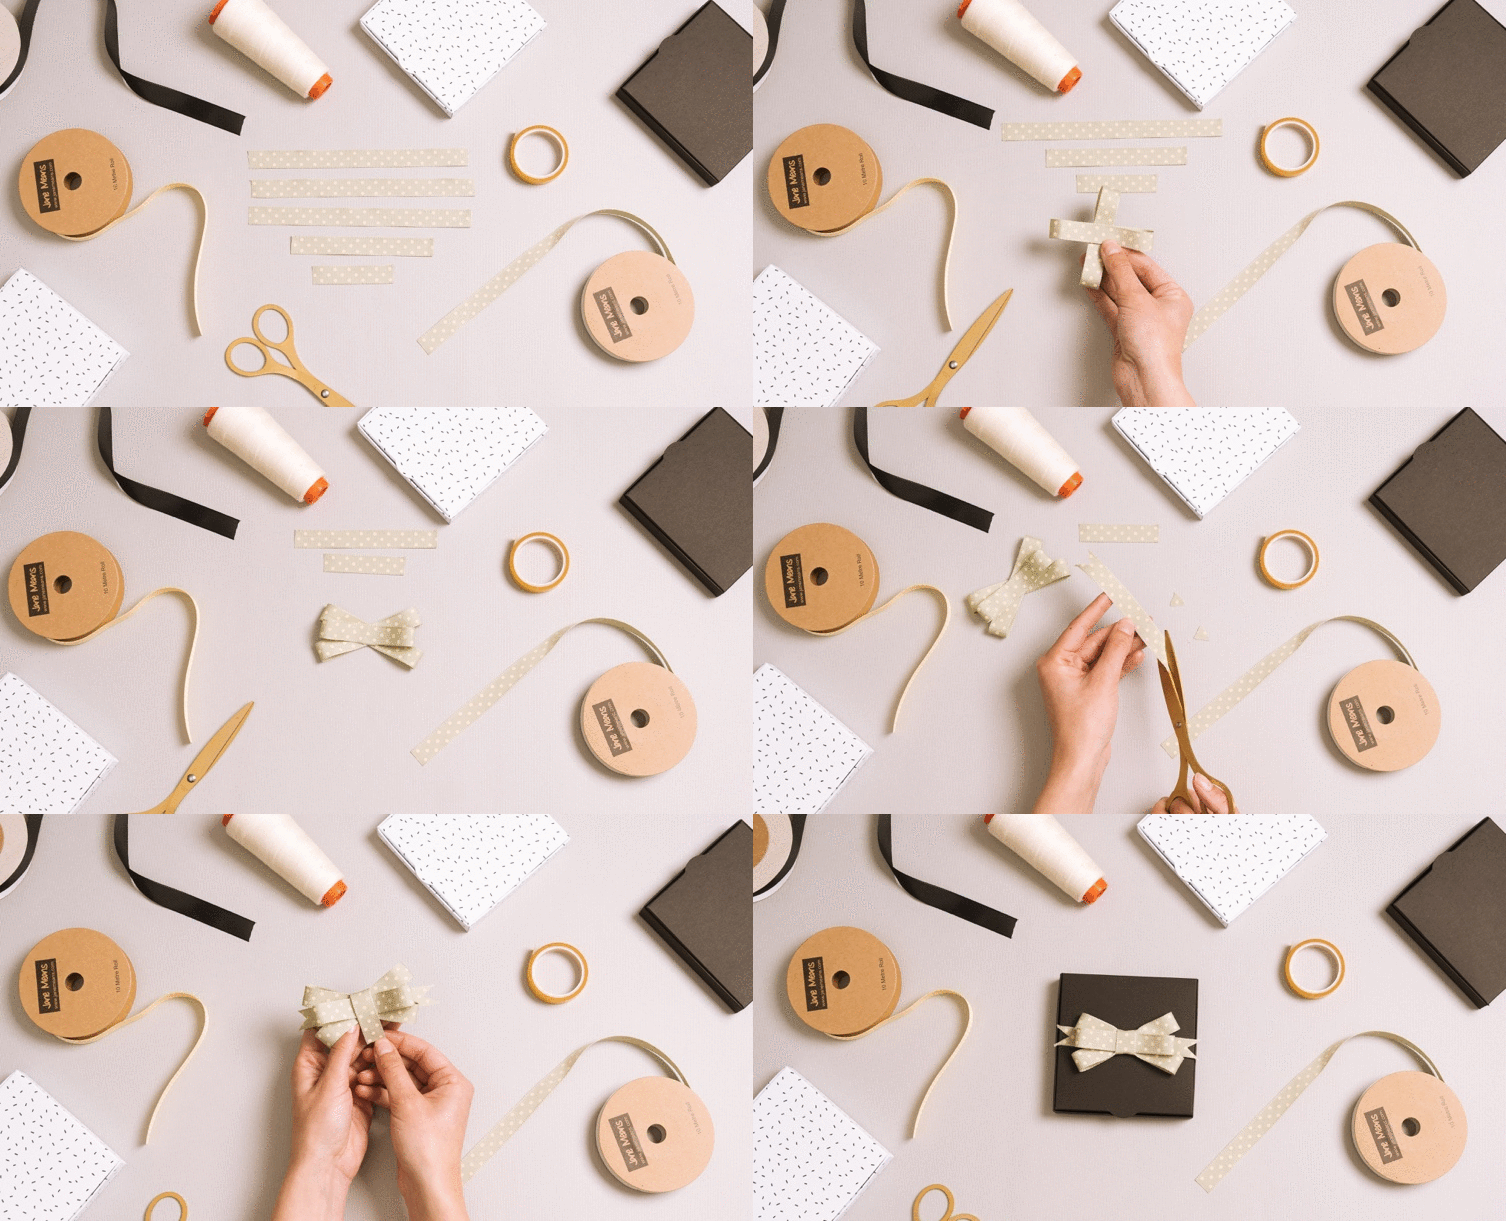
TRIPLE LOOP
1.Cut out three equal pieces and two more pieces of different size. For this model we have used the mint tape with moles.
2. Following the same process as in the previous cases, closes two circles of tape.
3. Next, cross them and glue them together with adhesive tape.
4. Now, make a third circle with another piece of ribbon and glue it horizontally on the loop that you have mounted in the previous step.
5. Then cut out the ends of the longest piece of tape in the form of a “V” and stick it on the back of the new set.
6. Embellish the joints with the last piece of tape and tape it with tape.
7. Finally, stick your triple bow on the black box. You’re going to leave everyone with their mouths open!
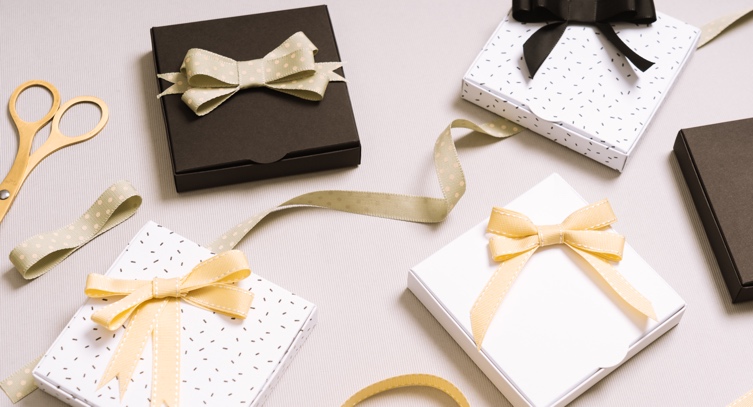
Now you have no excuses to make nice wrapping creations!

