Content
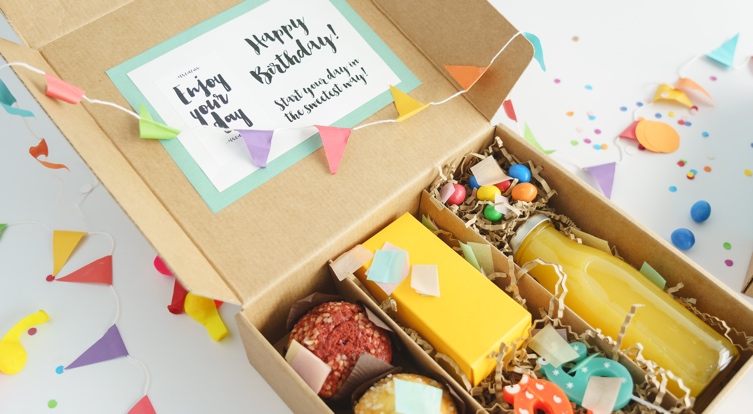
A birthday means a happy, fun day full of heartfelt wishes and messages. When the birthday of a relative or a friend comes around, we love to make their day a little bit more special. It’s a day that needs to start with enthusiasm and, above all, lots of energy! That’s why we present you a very colourful idea full of vitamins. Make the birthday girl or boy start their day with a lot of vitality with this breakfast box!
Take note!
A special post made in collaboration with Esencia Gráfica.
Materials:
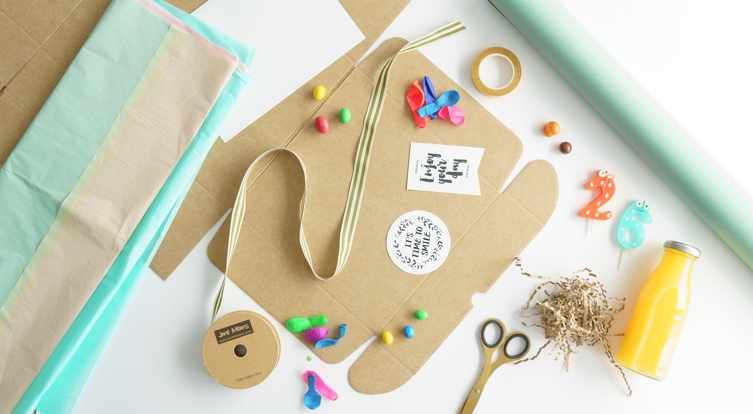
– Flat box with a holder
– Striped grosgrain ribbon
– Happy Birthday stickers
– Coloured tissue paper
– Cardboard
– Scissors
– Double-sided tape
– Marker
– Candles, breakfast, balloons… and small gifts!
STEP BY STEP:
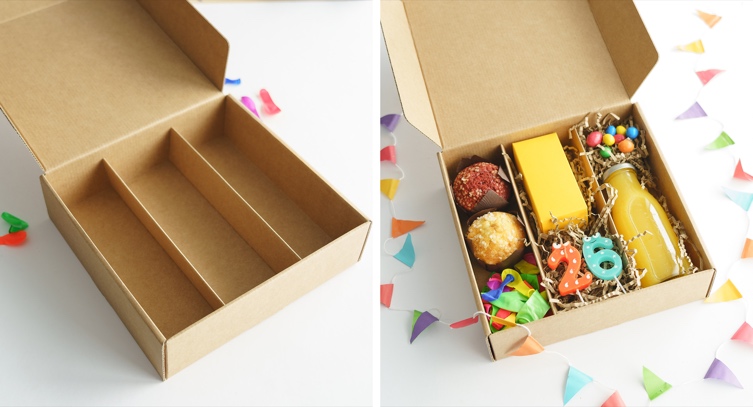
- Assemble the box
- Make and spread a bottom layer of paper shavings inside the box and then place all the different gifts and tokens you want on top.
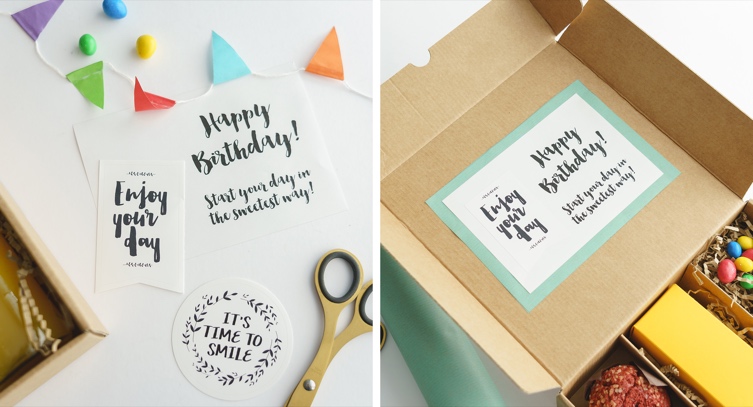
- Cut out a rectangle-shaped cardboard like a birthday card and write a message for the birthday boy/girl. If you prefer, you can make it on your computer and print it. Add one of our birthday stickers to match the birthday card.
- Cut out a piece of wrapping paper, making sure each side is 2cm longer than the birthday card from step 3: it will be the frame. Then paste the card on top of it and glue the whole thing on the inside of the box lid.
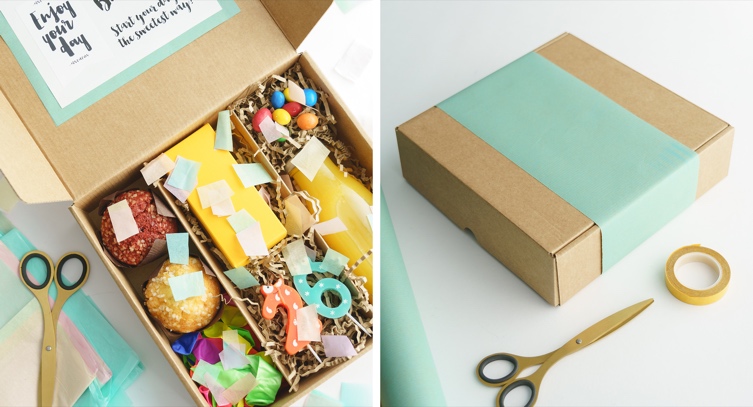
- As a final touch, cut some pieces of coloured tissue paper into confetti, and sprinkle it over the gifts inside the box.
- Close the box and cut another piece of wrapping paper as a sash, covering the box all around. Stick it with double-sided tape.
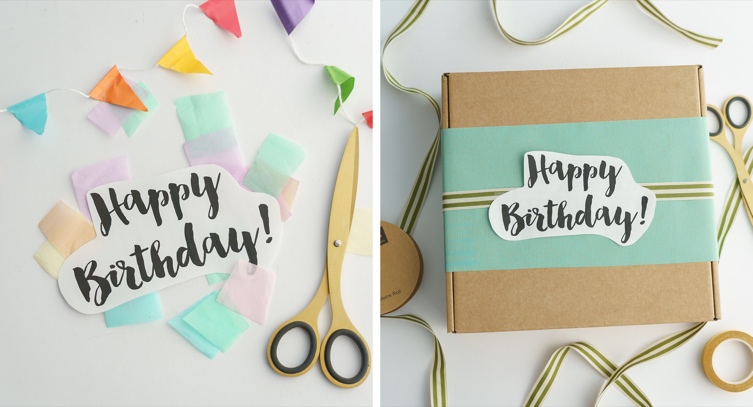
- Using another cardboard, write “Happy Birthday!” – or design it and print it with your computer. Then cut it out following the shape of the letters to make it look more lively.
- On top of the sash, add the striped ribbon and knot it. Then add on top your “Happy Birthday” from step 7 with double-sided tape.
Coming up a birthday box full of energy!