
Content
You have probably thought you’d like to have a projector at home before, but you’ve given up the idea because they are very expensive. You have probably thought of it when you wanted to show your group of friends your holiday photos or videos.
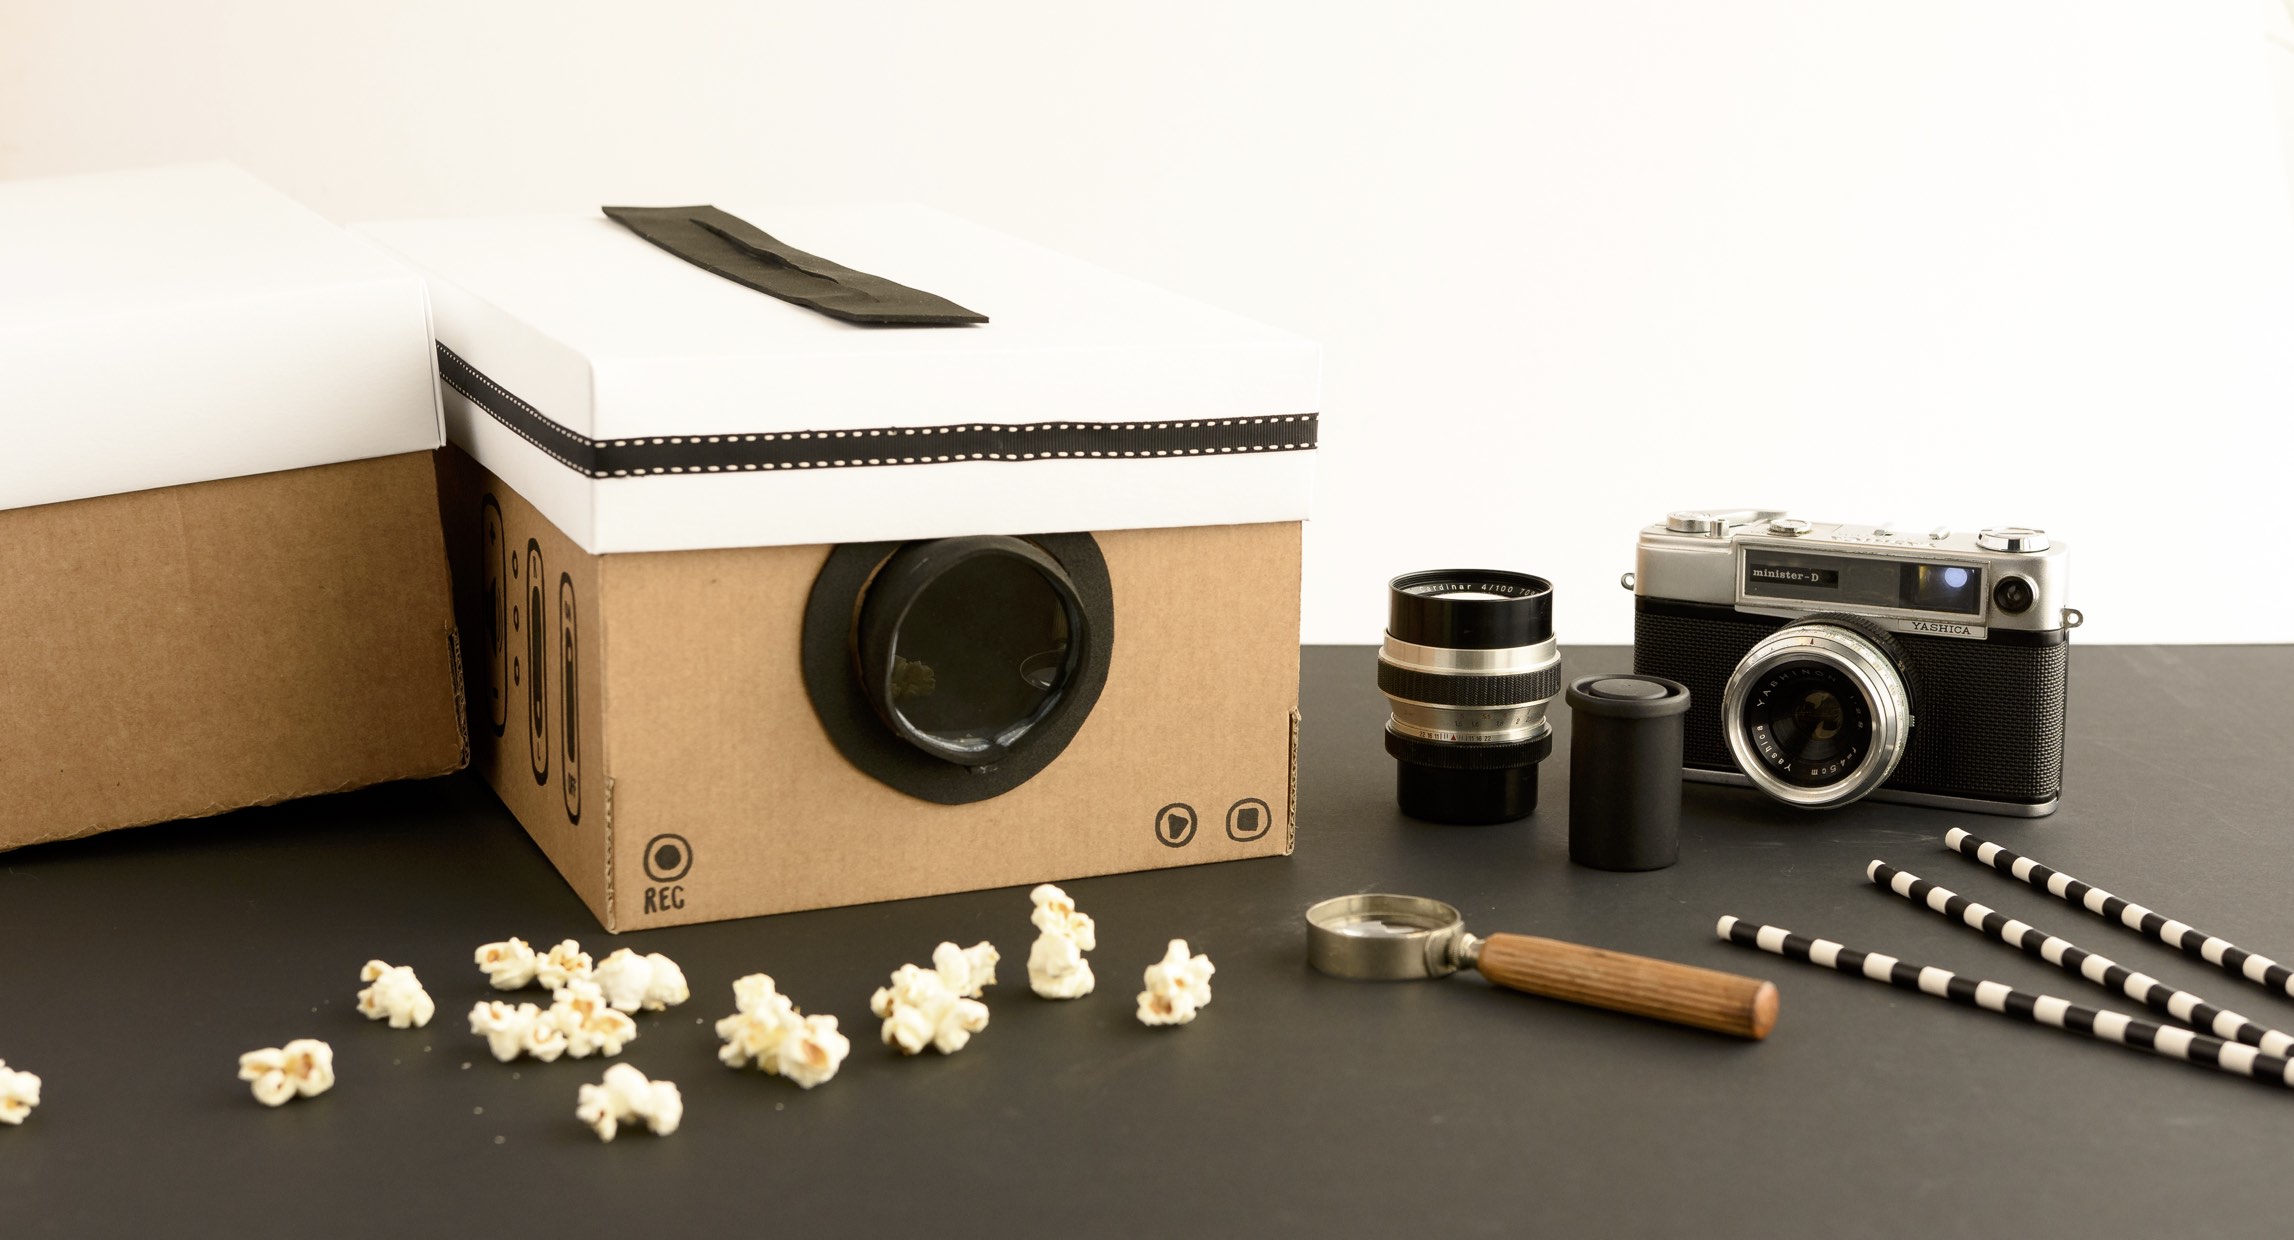
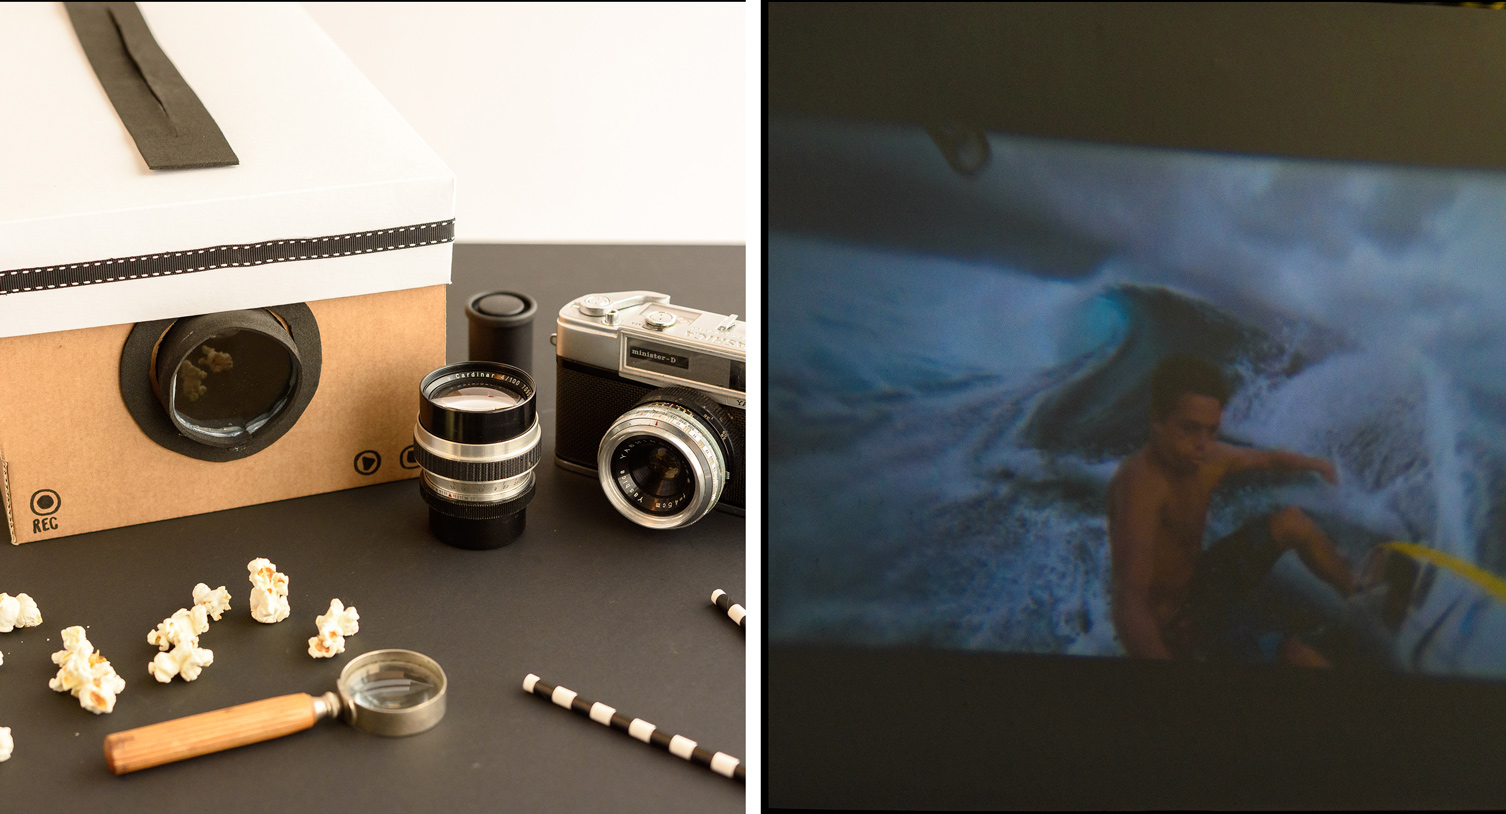
We have good news: making a DIY projector, is possible! With two magnifying glasses and a mobile phone we can make our own projector and set up our own cinema at home. Don’t forget you’ll need a white wall on which to project.
This tutorial is not just cheap, it encourages you to recycle and give the things you don’t use any more a new goal. So, find that show box lying around the house and, get to it!
If you can’t find a shoe box, we have some more good news: we have recently started selling our new shoe boxes. They are very useful and we can use them for lots of different things!
Pick up pencil and paper and, action!
A super post in collaboration with Esencia Gráfica.
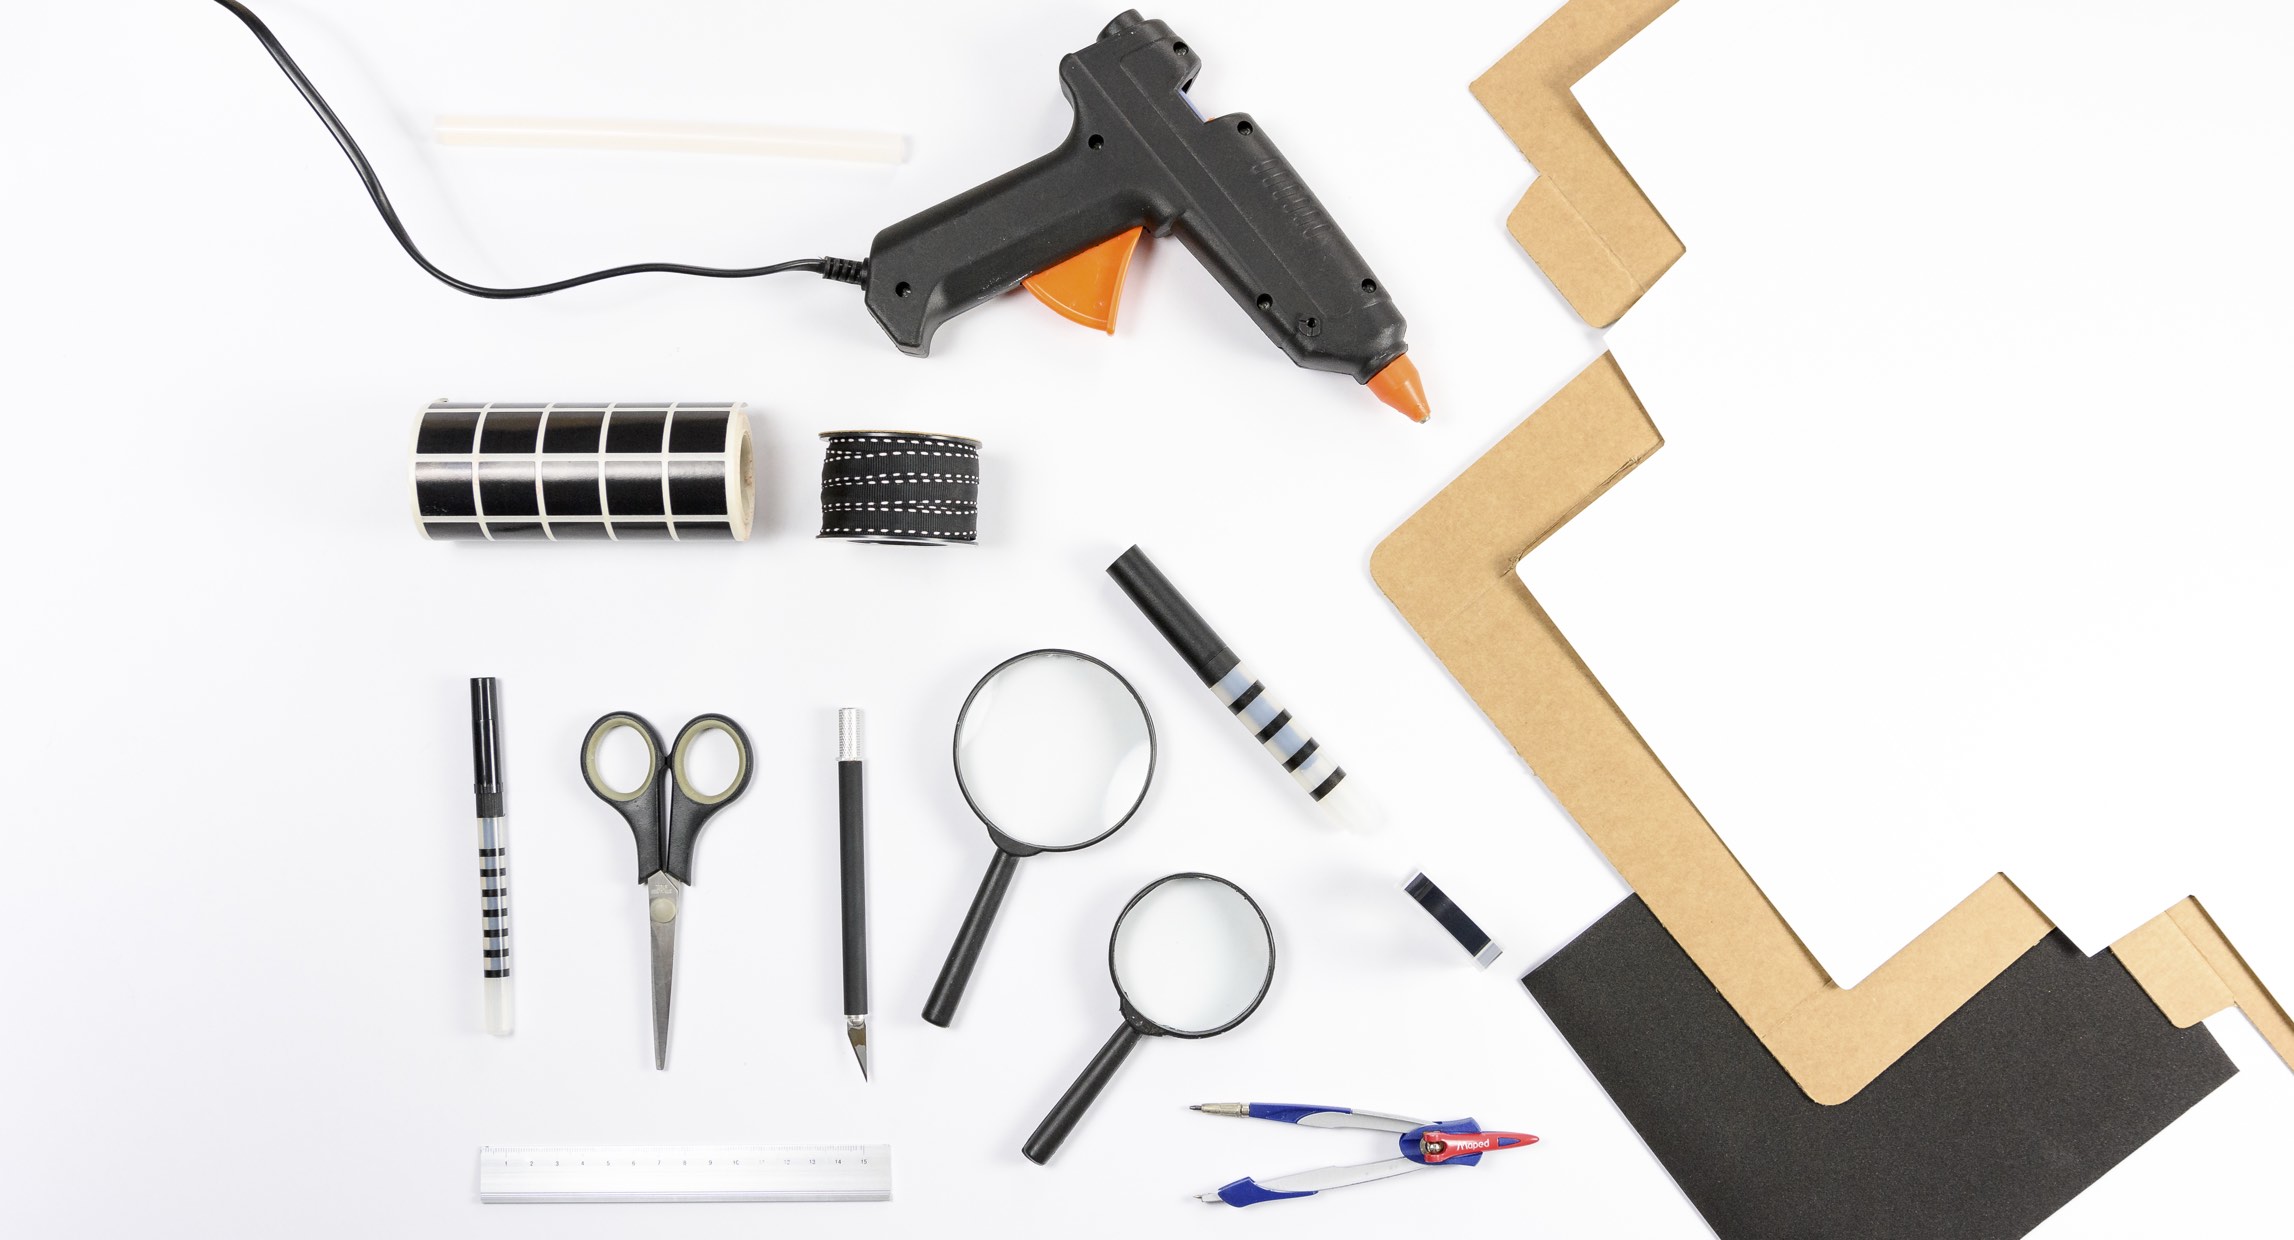
Materials:
- Show box L (ref. 2509)
- Decorative ribbon (ref. ED-CD27) and other decorative elements
- Big and small magnifying glasses
- Black EVA
- Small stand for decorative plates
- Double-sided adhesive tape and/or hot glue applier
- Scissors and/or box cutter
- Felt-tip pen and/or pencil
- Ruler and compass
- Pliers
Step by step:
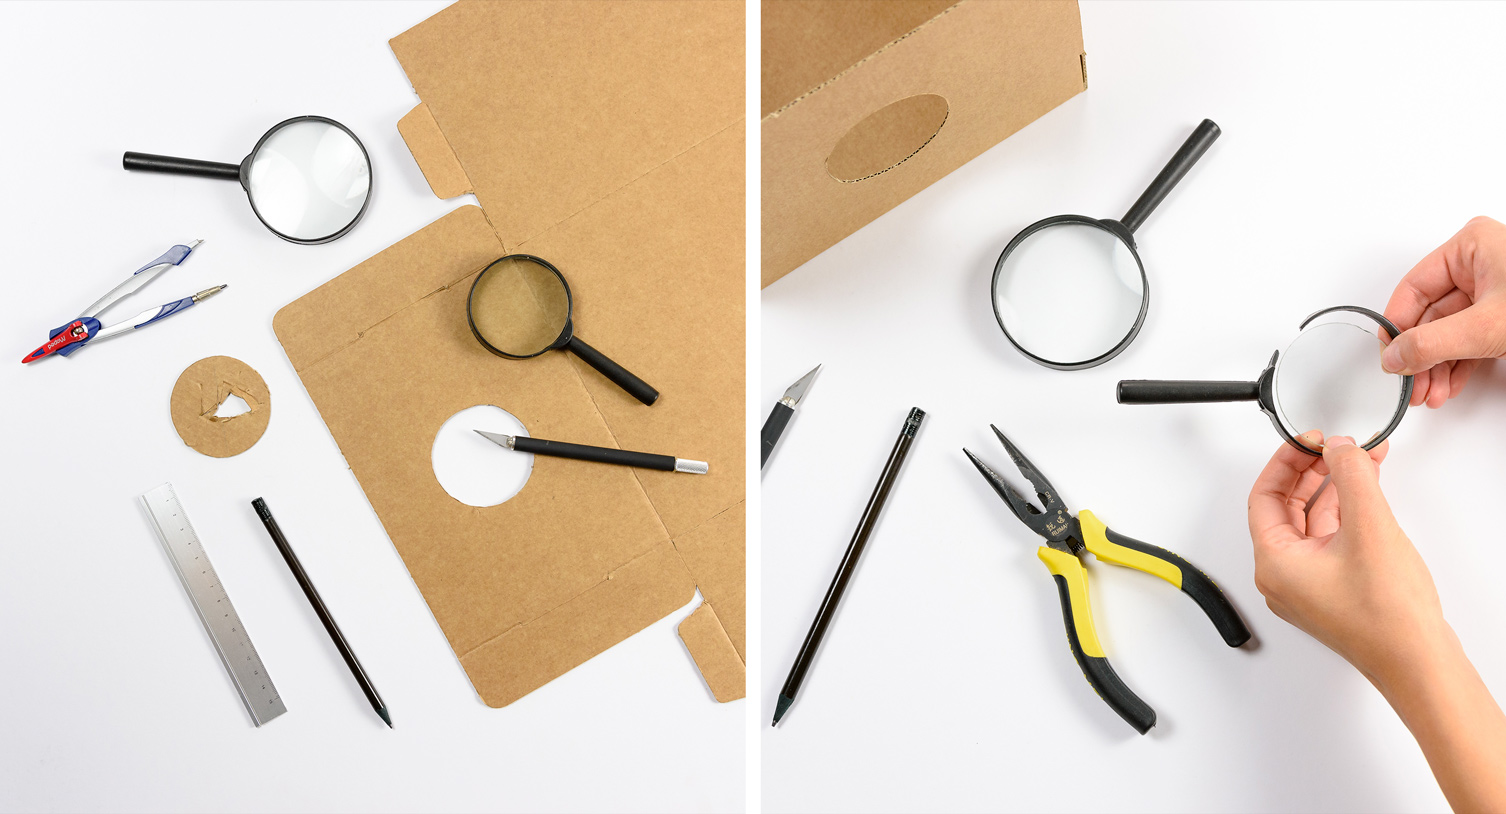
1. Draw a circle the size of the small magnifying glass and cut it out on the front of the shoe box with scissors or a box cutter.
2. Assemble the shoe box. Depending on what your magnifying glass is like, cut off the handle with some pliers or slowly remove the glass.
3. In the centre of the show box lid, make a slot long enough to move the second magnifying glass so as to adjust the focus. Twenty centimetres were enough for us. The width of the slot depends on the handle of the big magnifying glass.
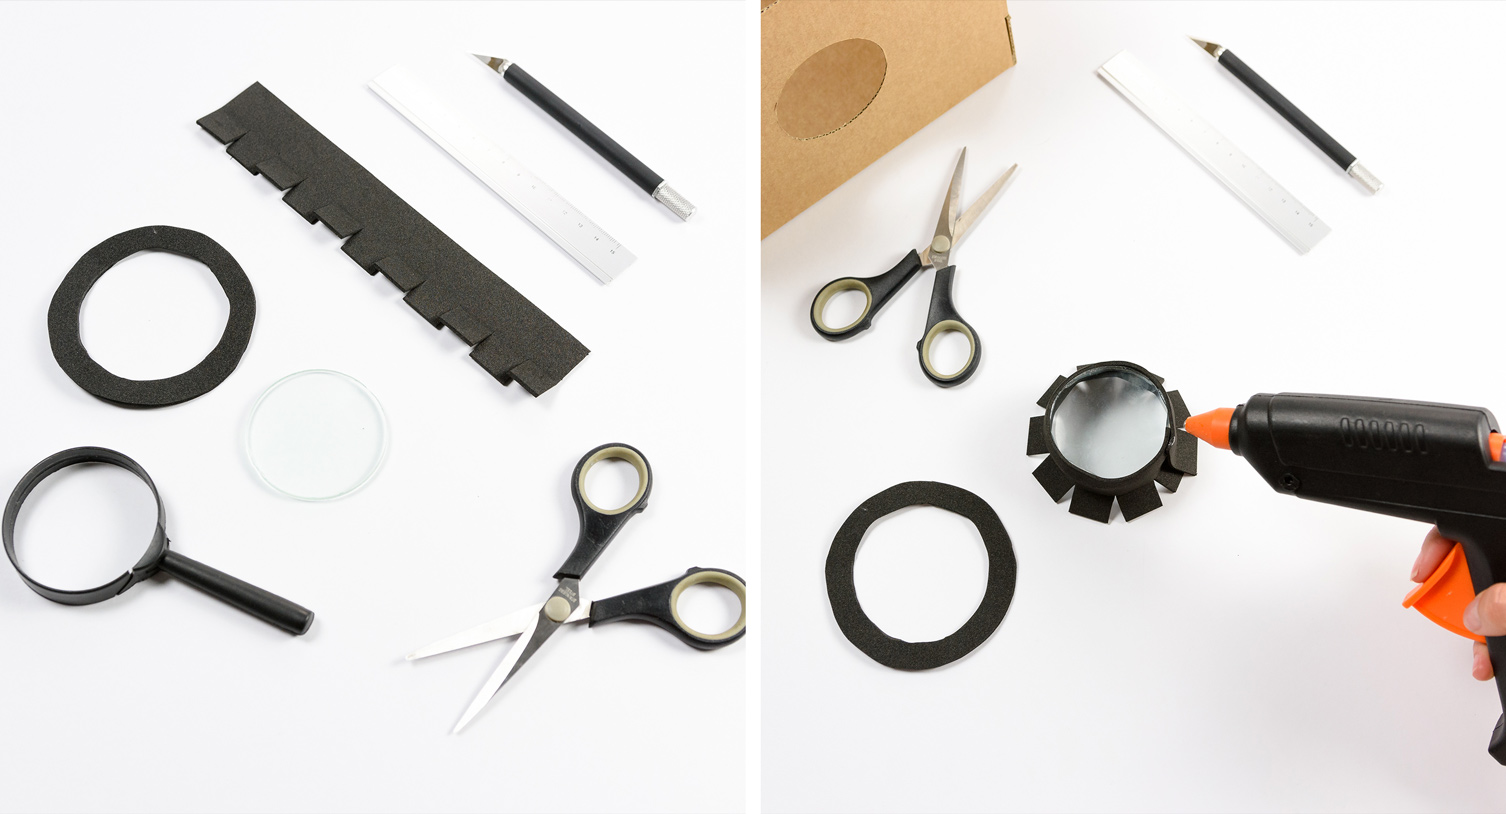
4. So it looks cooler, cut out a strip of EVA to cover the slot and make a cut in the centre. This will make it look nice, and will stop the light of mobile phone from getting out.
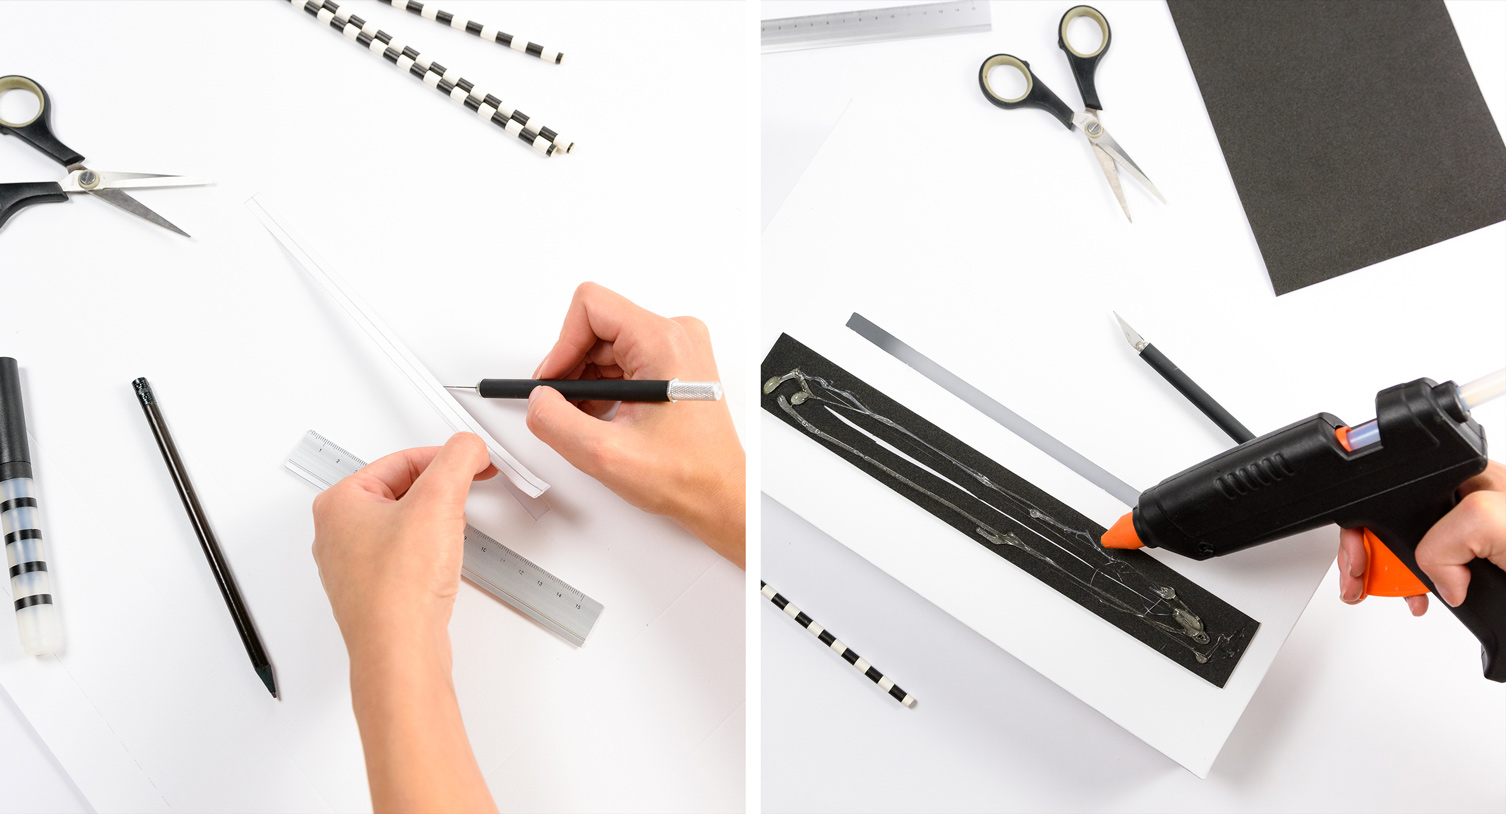
5. Now we are going to fix the glass to the front of the shoe box. Cut out a strip of EVA as big as the perimeter of the glass and make cuts to serve as tabs (as is shown in the picture). Cut out a ring of EVA for a final touch.
6. Place the EVA strip around the glass and stick it on with hot glue. You’ll notice you need quite a lot so it’s fixed.
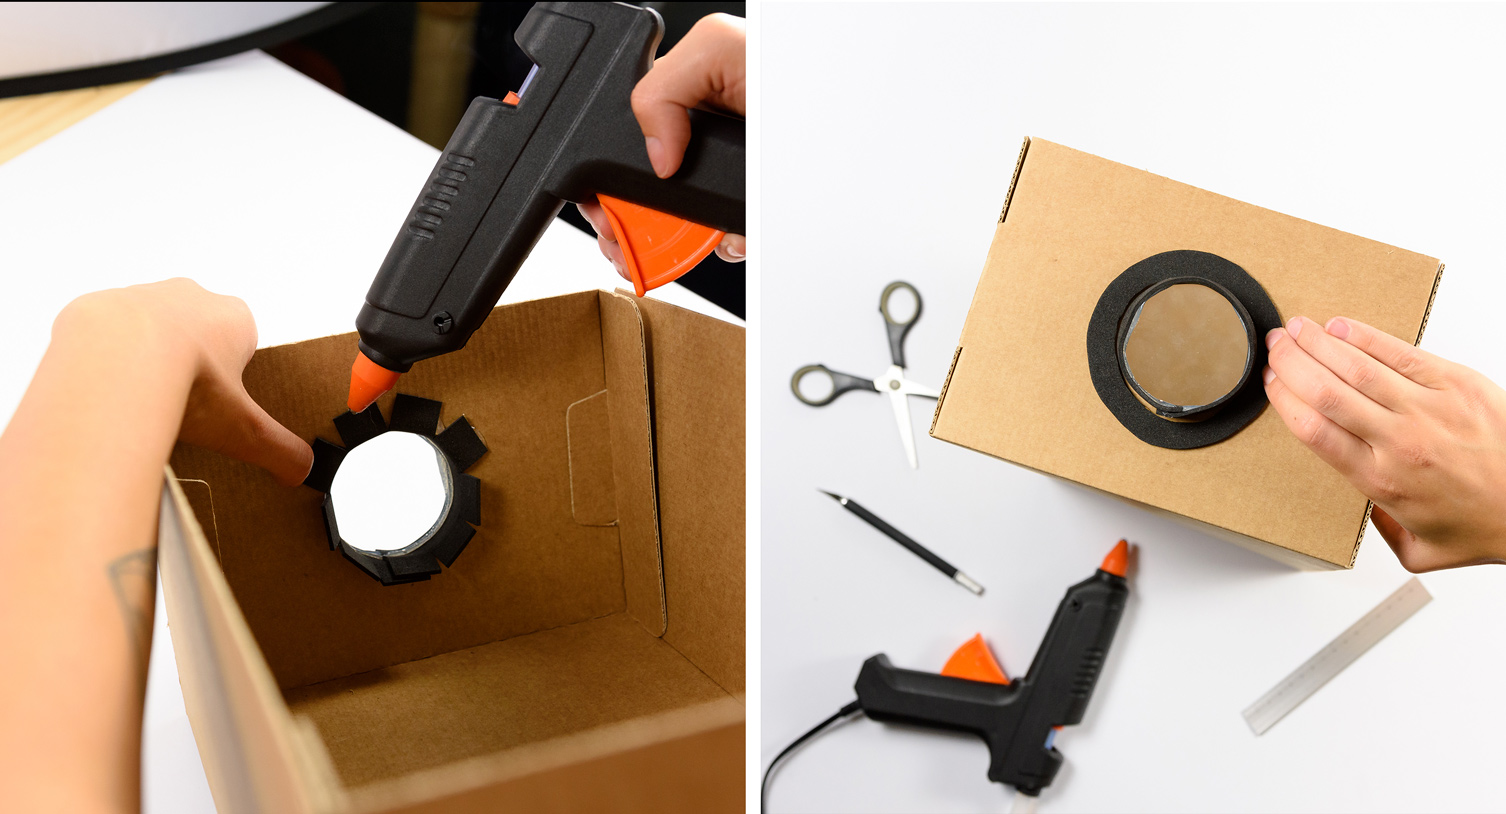
7. Now insert it through the hole on the front of the box and stick the tabs on the inside.
8. Stick the beautifying ring on the outside to add a retro touch.
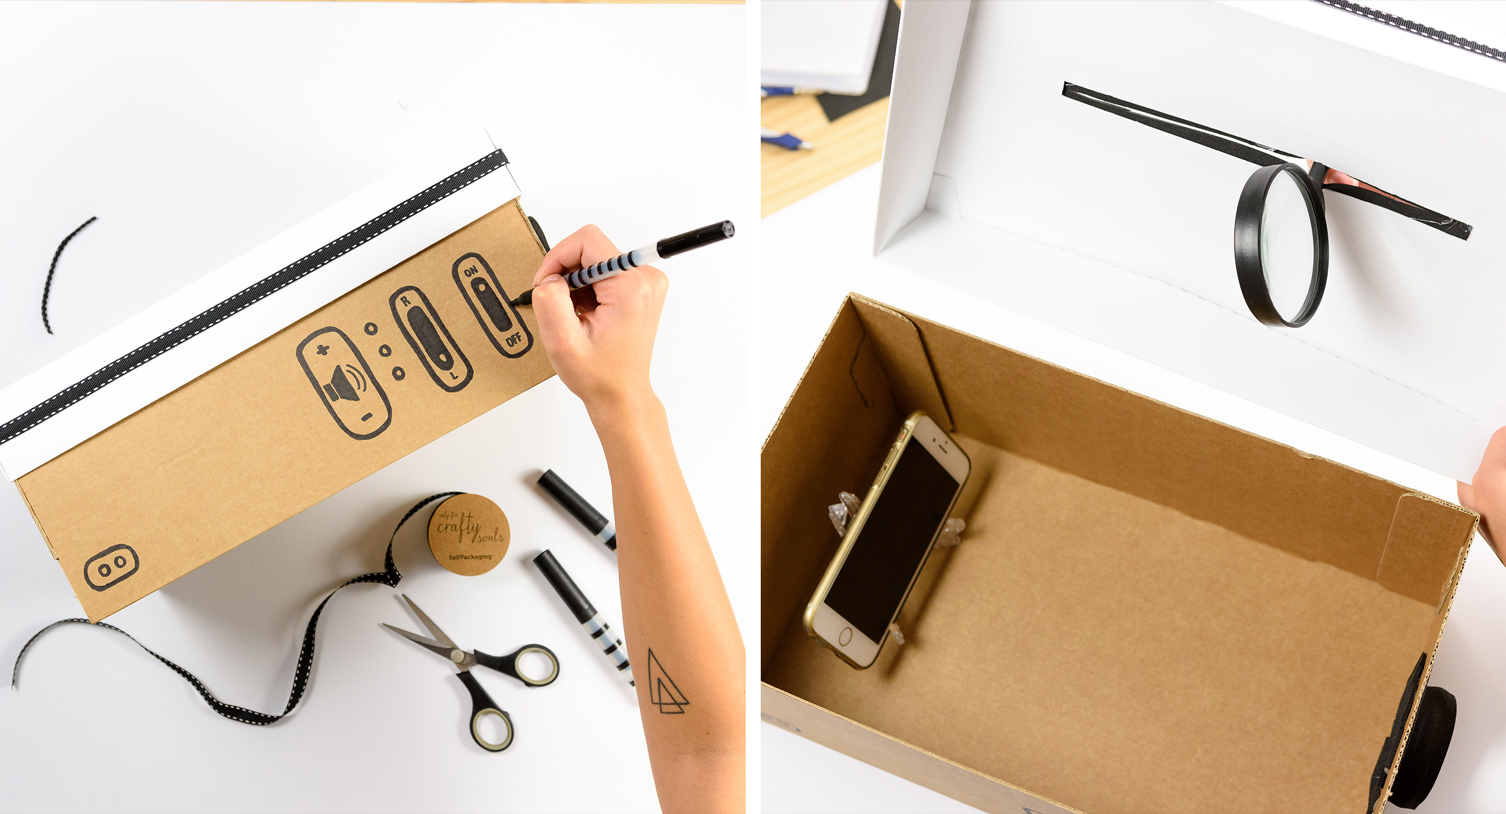
9. Decorate the box to your liking! We have added a black cloth ribbon and some drawings to look like the buttons on an electronic machine. You can use felt-tip pens, crayons, washi tape or colourful vinyl paint.
10. To hold the phone inside the box you can use a small stand. Place it at the back of the box. Also insert the handle of the big spying glass through the slot and close the box.
Now, play a video or show a picture in your phone and slide the magnifying glass to bring the image into focus. Remember you’ll get better results in the dark and projecting the image on a white background.
Lights off and, action! See you next time!