
Content
Halloween is just around the corner and we must get everything ready: the terrifying costume, a couple of pumpkins, orange and black decoration with purple touches and lots of sweets for the little ones (and those not so little).
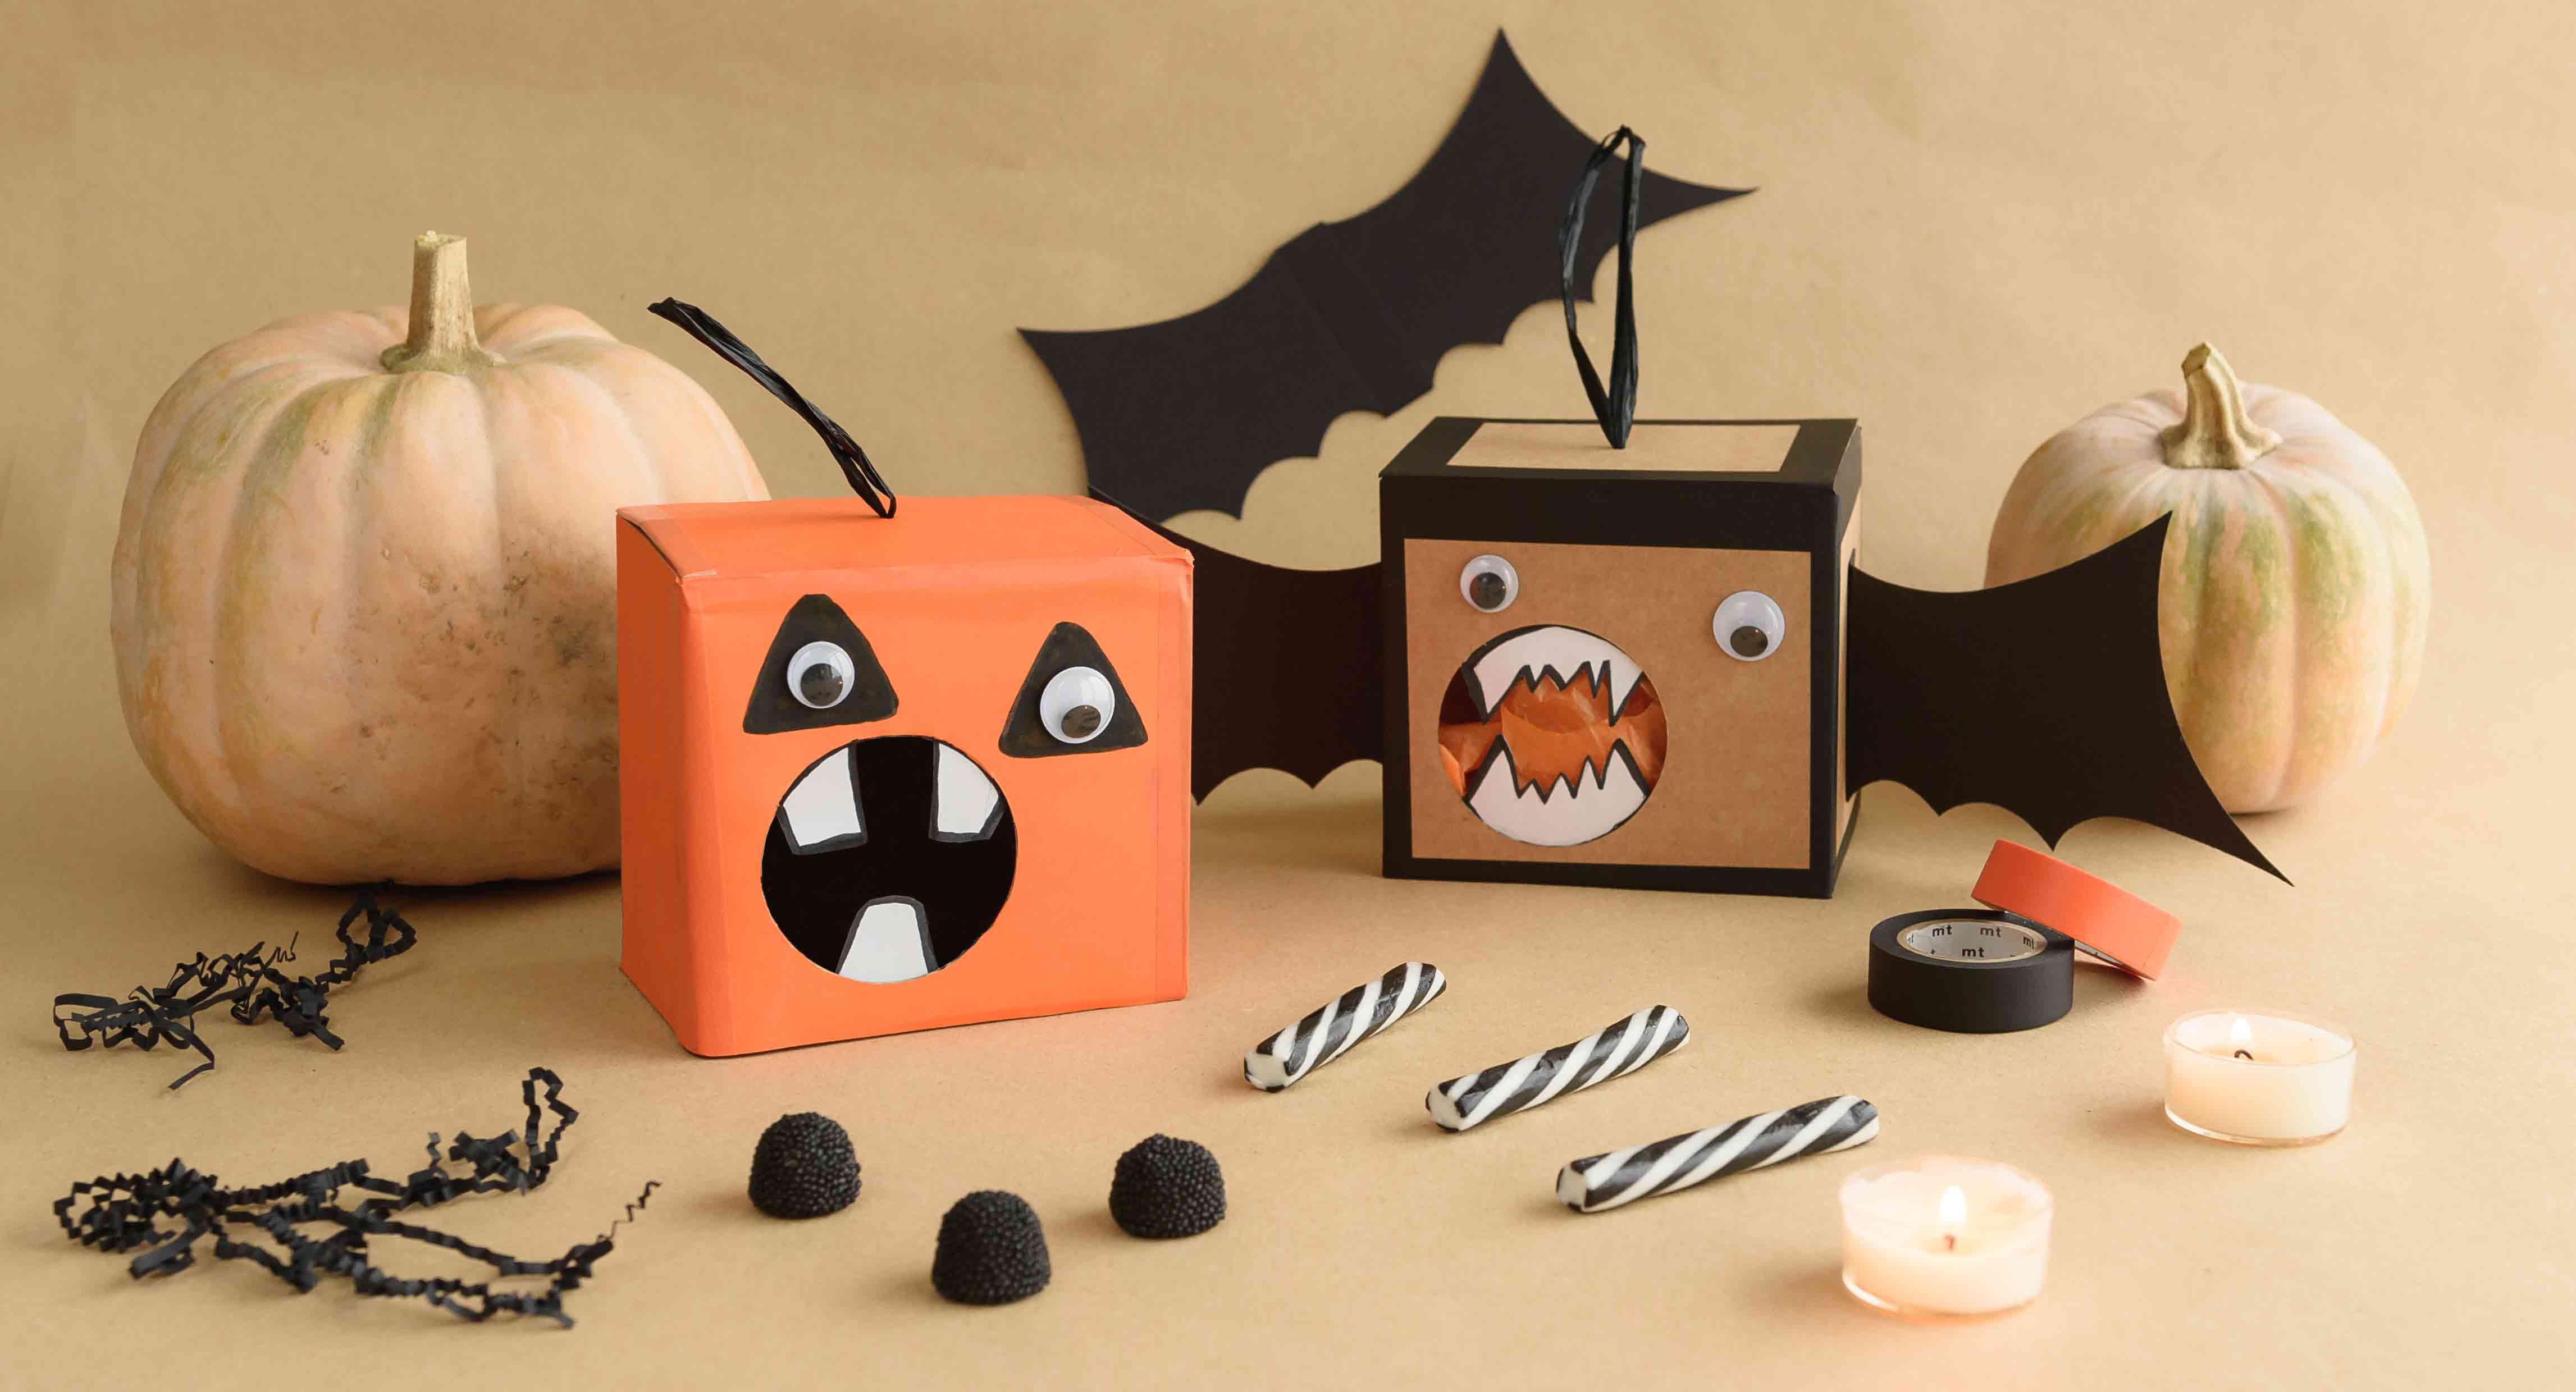
Today we want to give you some ideas on how to give out those sweets that will leave you gobsmacked! We are going to use our boxes for mugs and add a terrifying yet fun touch. Also, you’ll see the step-by-step instructions are really easy so the kids can do it too. They’ll have great fun!
Give out sweet and decorate your house for Halloween with our little and terrifying open-mouthed monsters. Shall we begin?
A super post in collaboration with Esencia Gráfica.
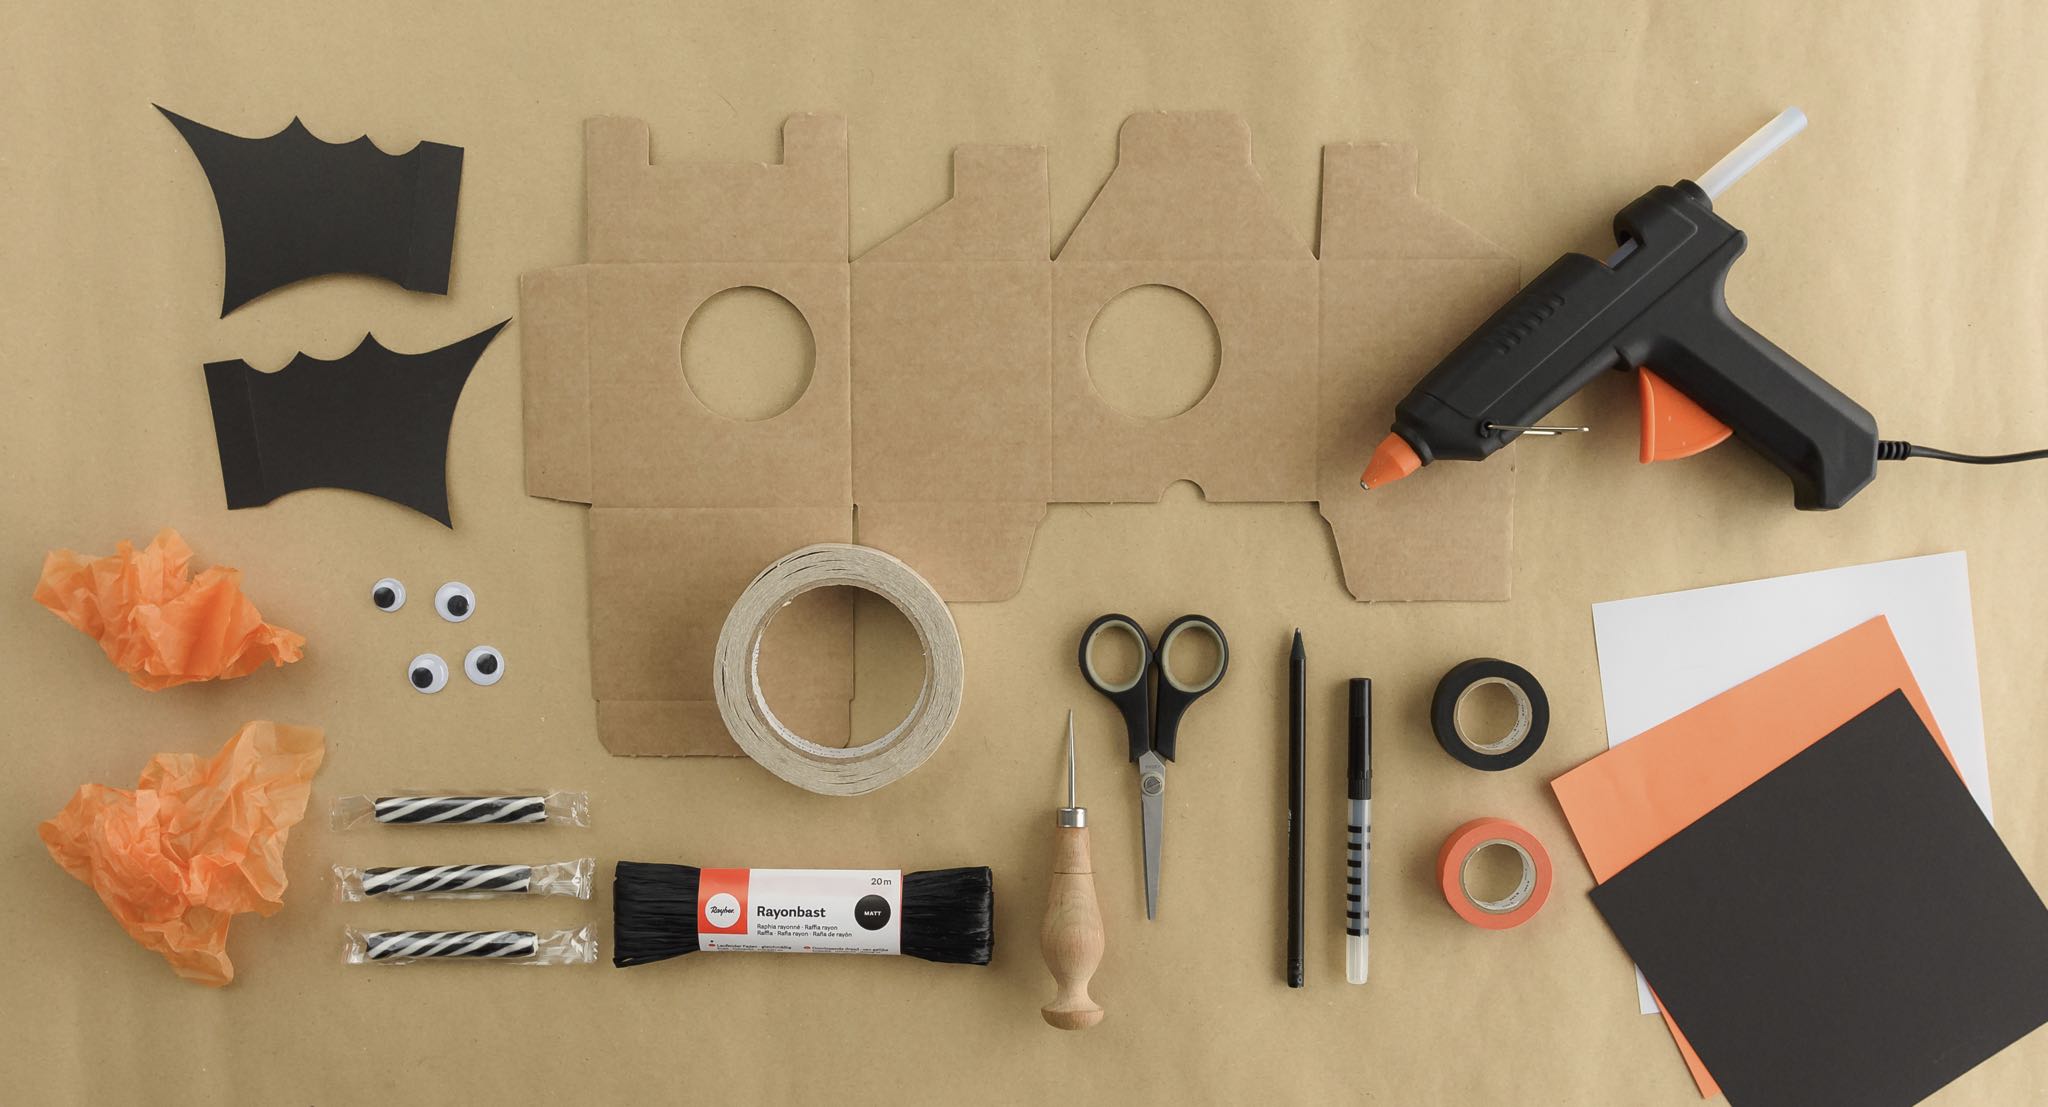
Materials:
- Box for mugs S (ref. 2243)
- Halloween decoration kit (ref. I-SC10) (bat wings and eyes)
- Sweets
- Black and orange tissue paper
- Orange washi tape (ref. E-WT33)
- Black washi tape (ref. E-WT10)
- Black cardboard (ref. I-CC20)
- Orange cardboard (ref. I-CC26)
- Black raffia rayon ribbon (ref. E-CD36)
- Double-sided tape and/or a hot glue gun
- Scissors and/or a box cutter
- Felt-tip pen and/or pencil
- Paper punch
STEP BY STEP:
Bat box for sweets
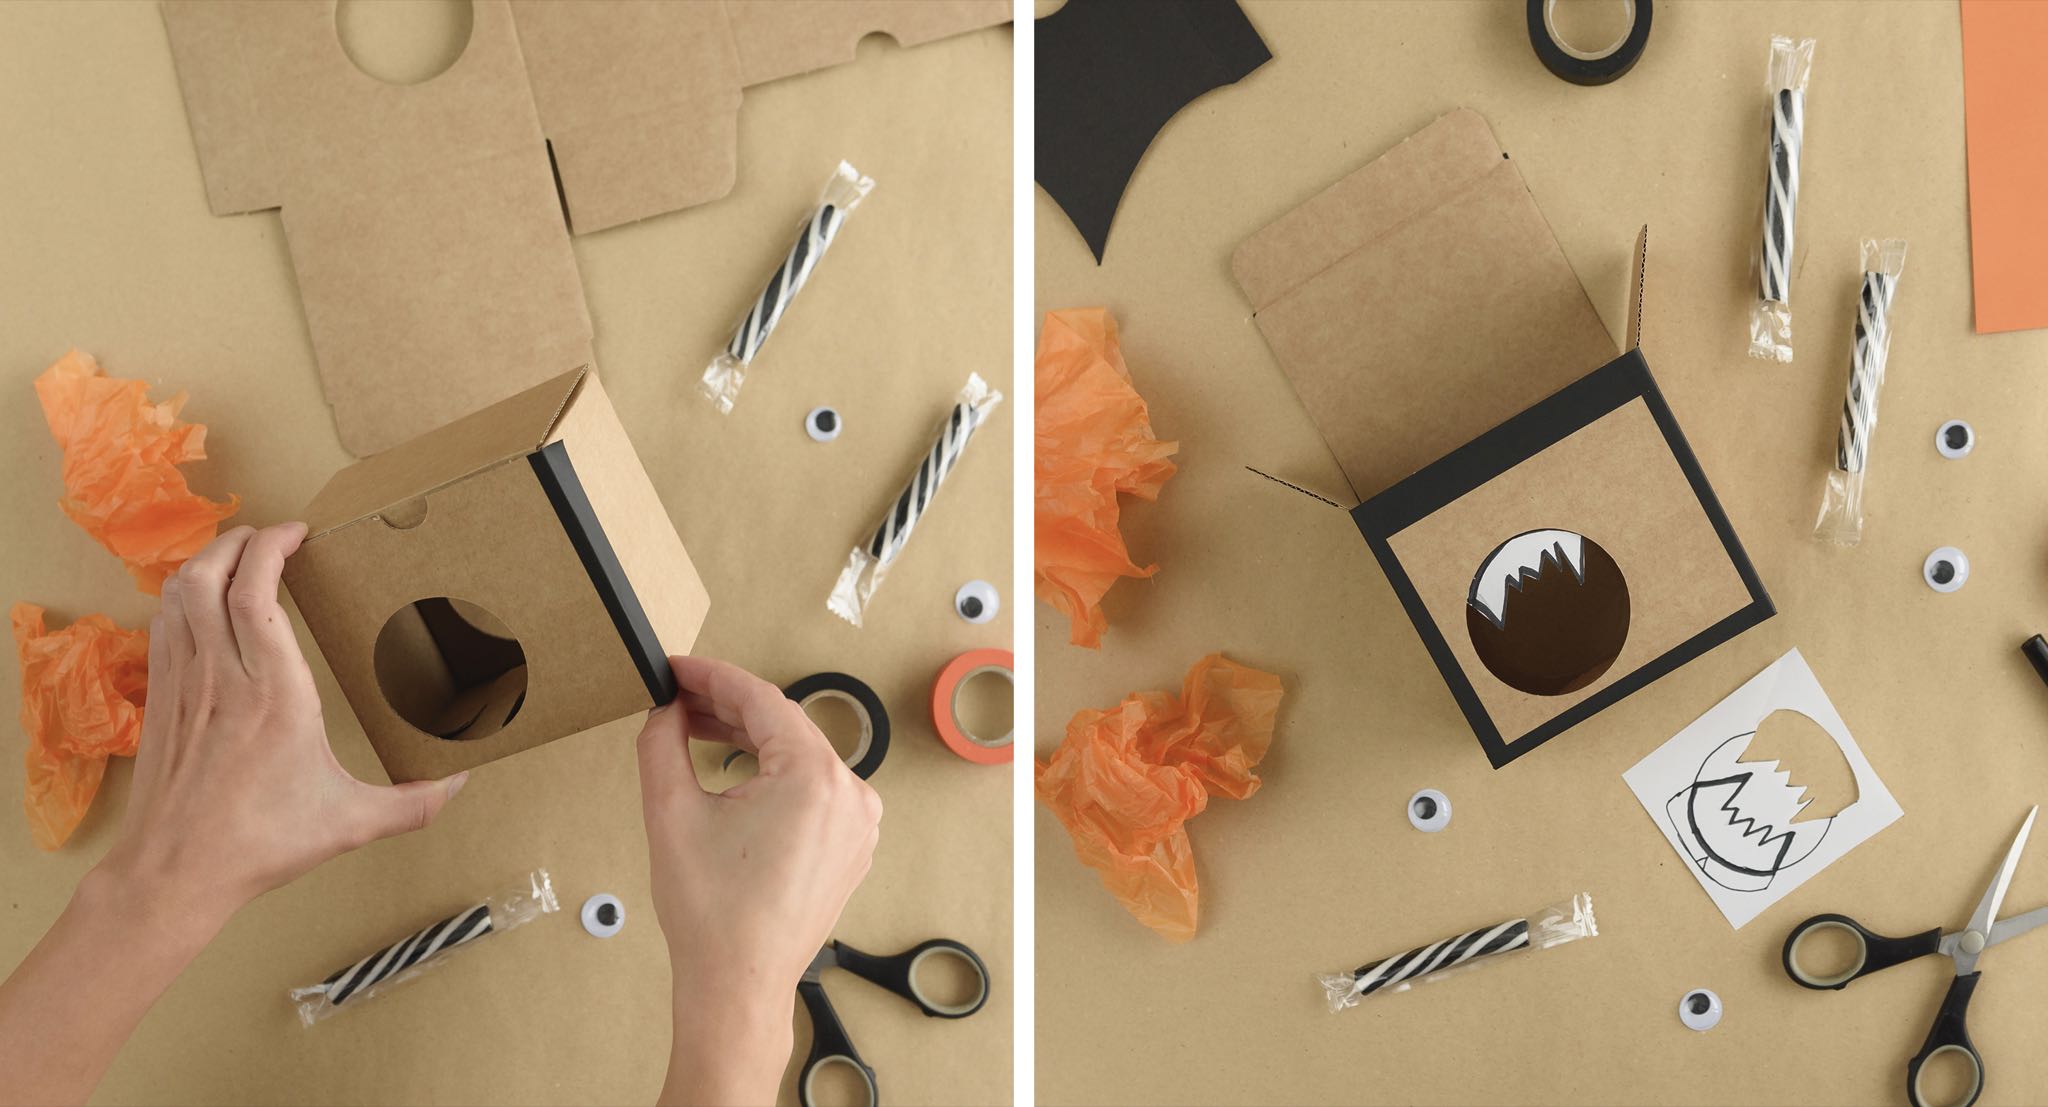
1 – Assemble the box by using a strip of double-sided tape. Place the double-sided tape on the outside of the tab and fold the cardboard to make the sides of the box. Next, fold the cardboard at the bottom to make the base and close the lid. With the punch, make a small hole in the middle of the lid. Then cut out some strips of black washi tape to stick them on the edges of the box.
2 – Draw some sharp bat teeth on a white cardboard. Use the hole in the box as reference, as it will be the mouth. Cut out the teeth and stick them with glue on the bottom of the box.
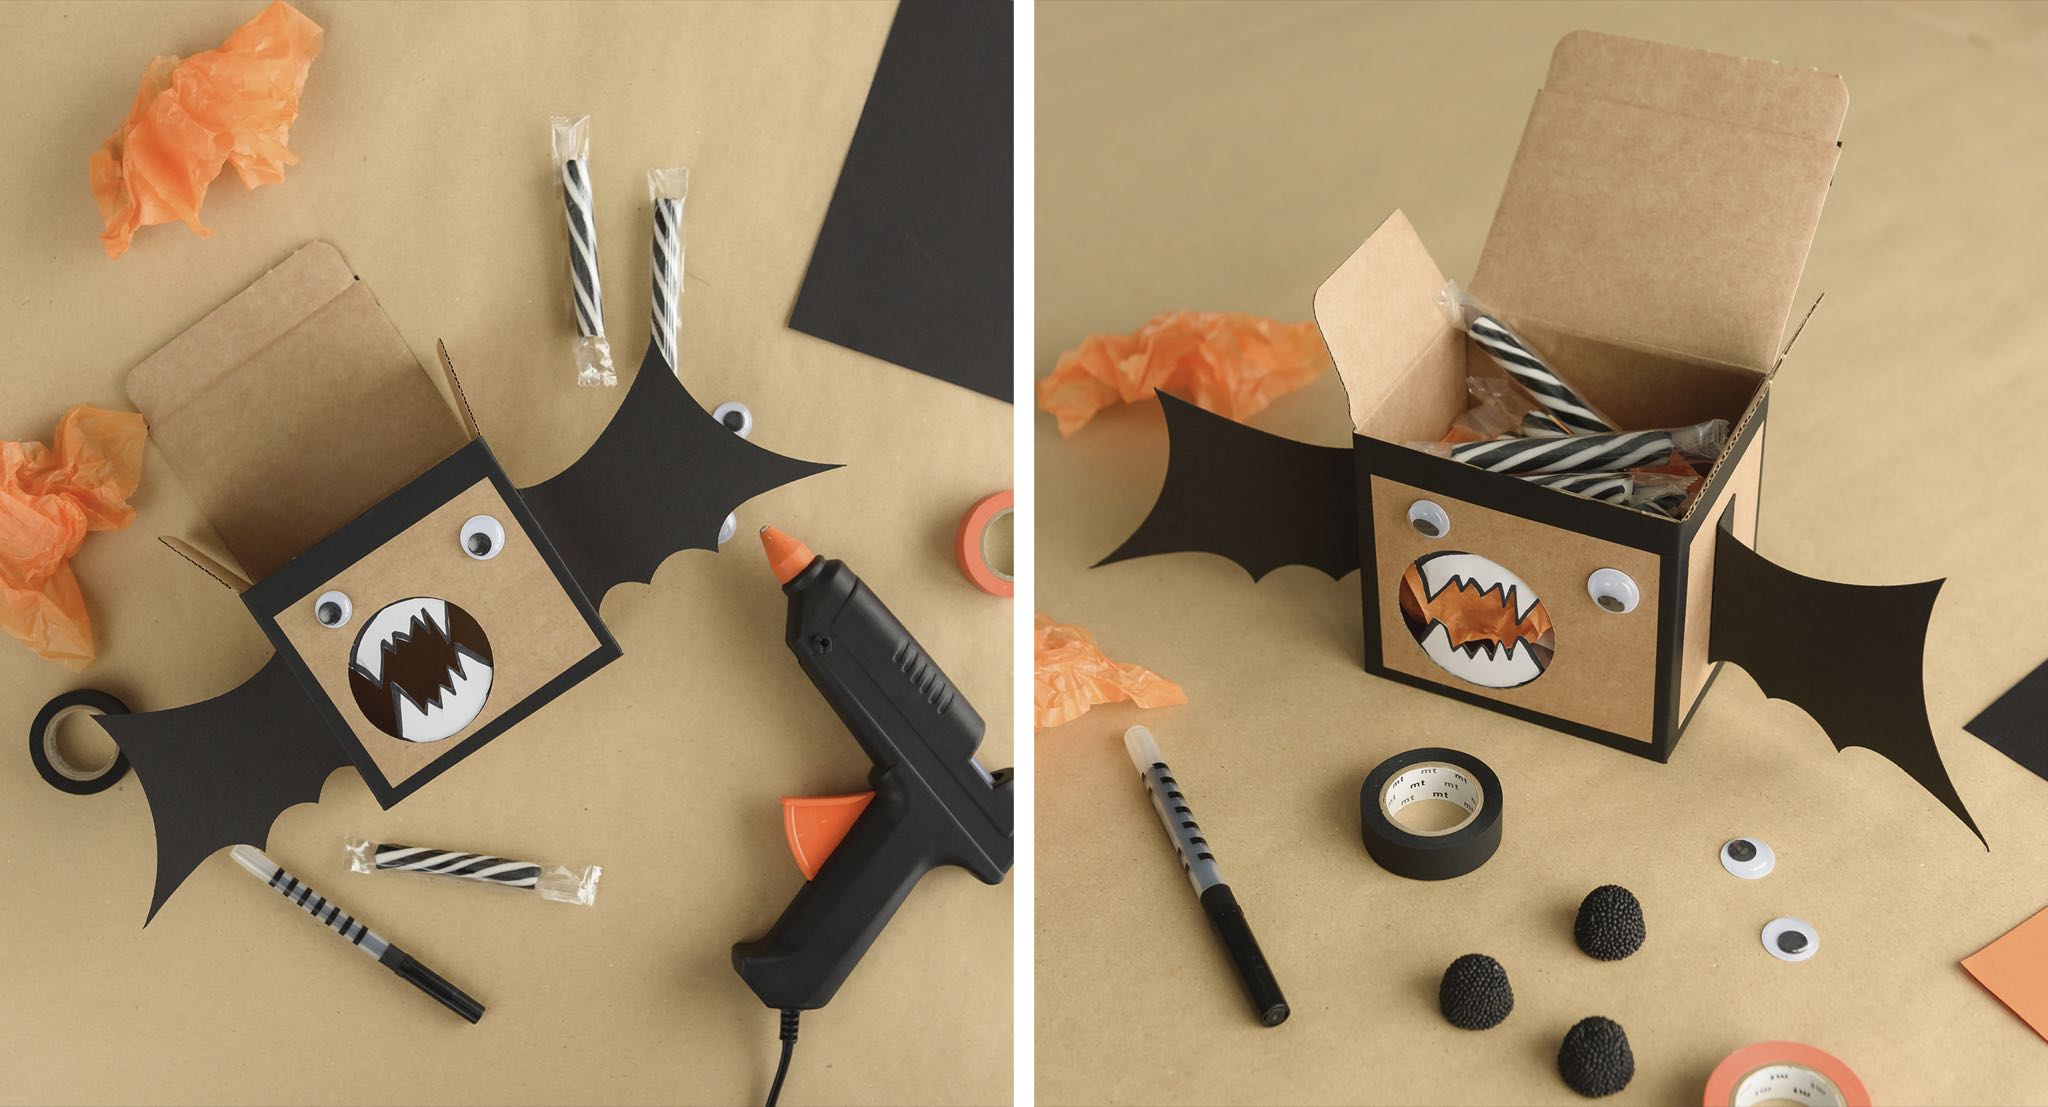
3 – Now stick on the wings and eyes from the Halloween decoration kit with some glue. One wing on each side of the box and the eyes on top of the mouth. We like to use different-sized eyes.
4 – Crumple up strips of orange tissue paper and place them in the box to cover the bottom. Place the sweets on the paper and close the box. Your Halloween bat-box is ready!
Pumpkin box for sweets
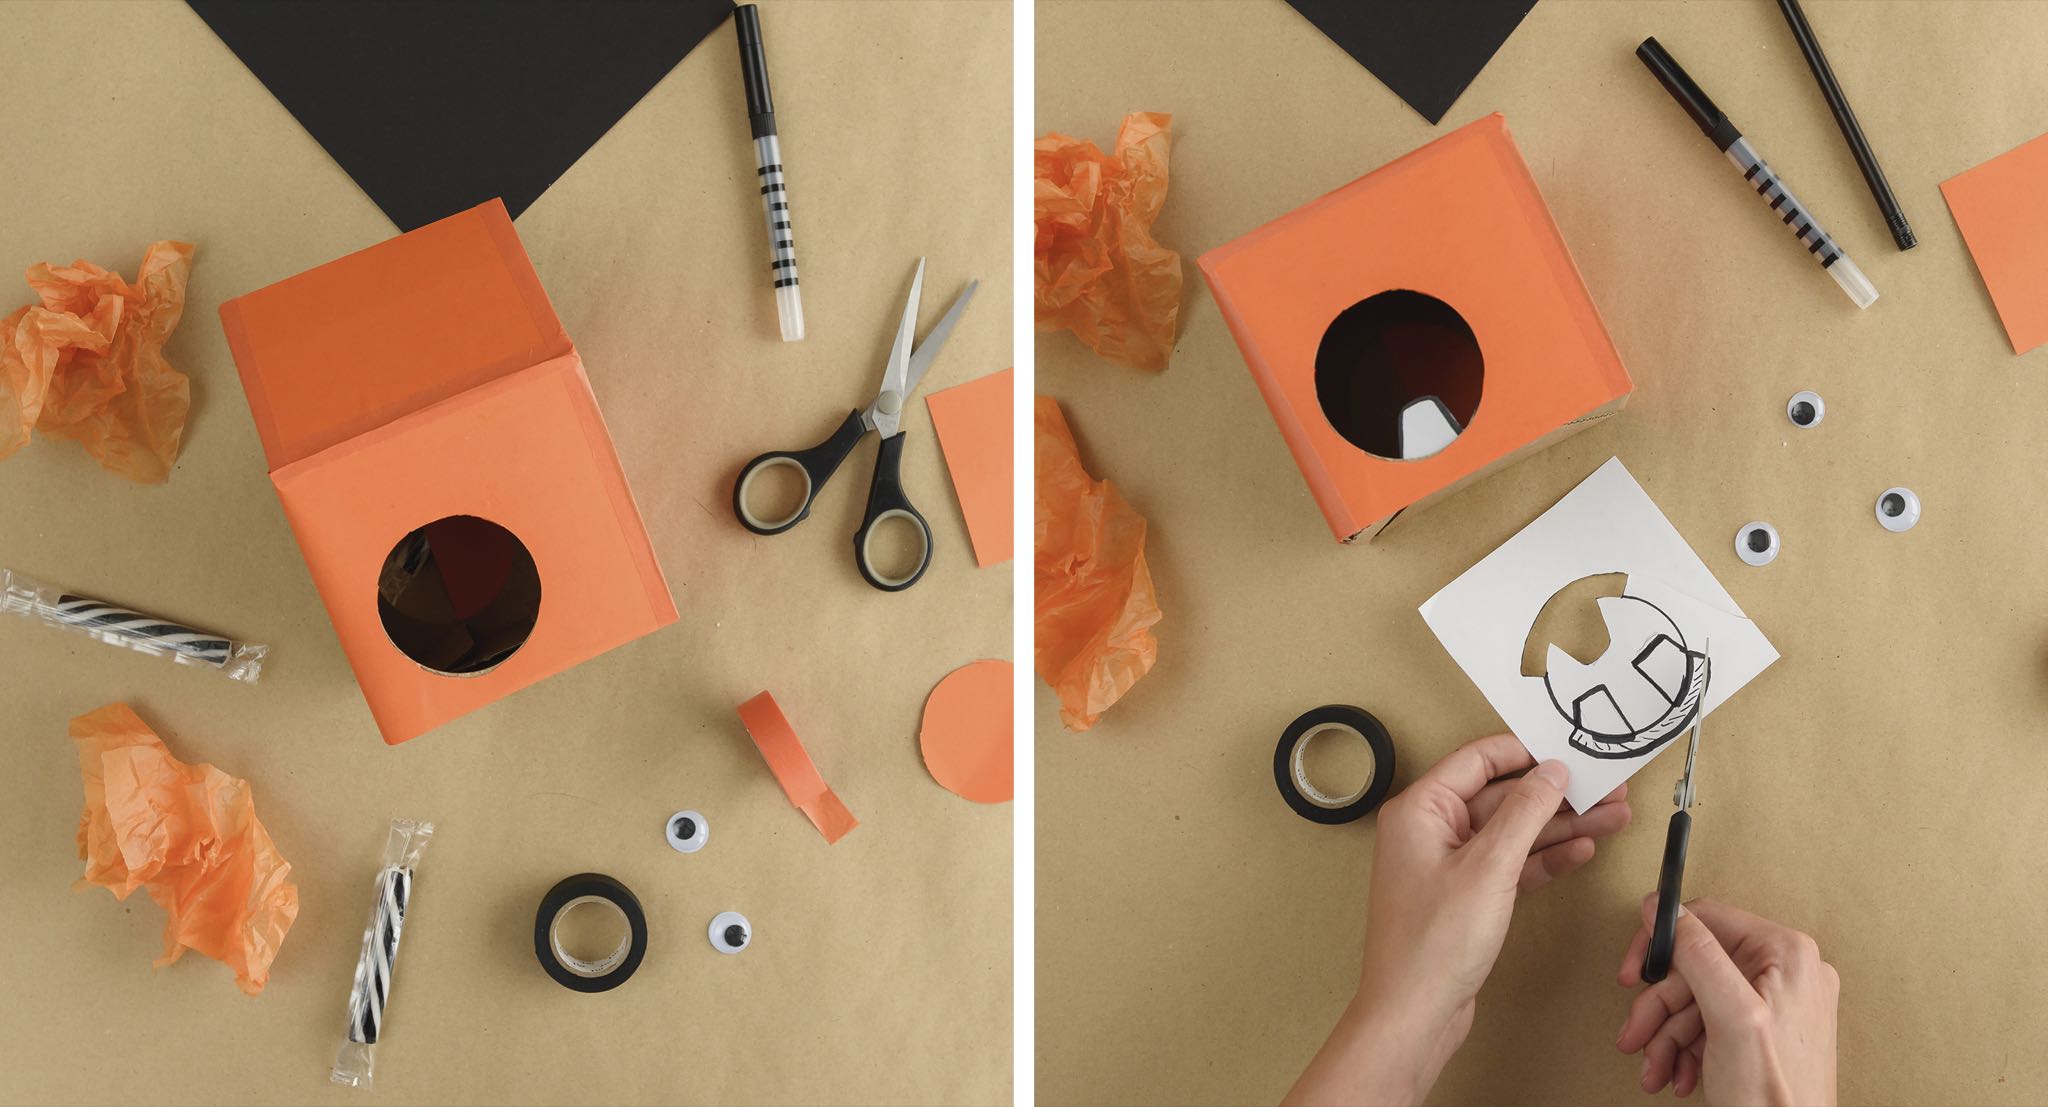
1 – After assembling the box, cover it with orange cardboard and stick it on with glue or double-sided tape. Remember keep the hole in the box open. Next, cut out some orange washi tape strips and stick it on the edges.
2 – Draw some teeth on a white cardboard and cut them out. Stick them on with glue below the hole in the box.
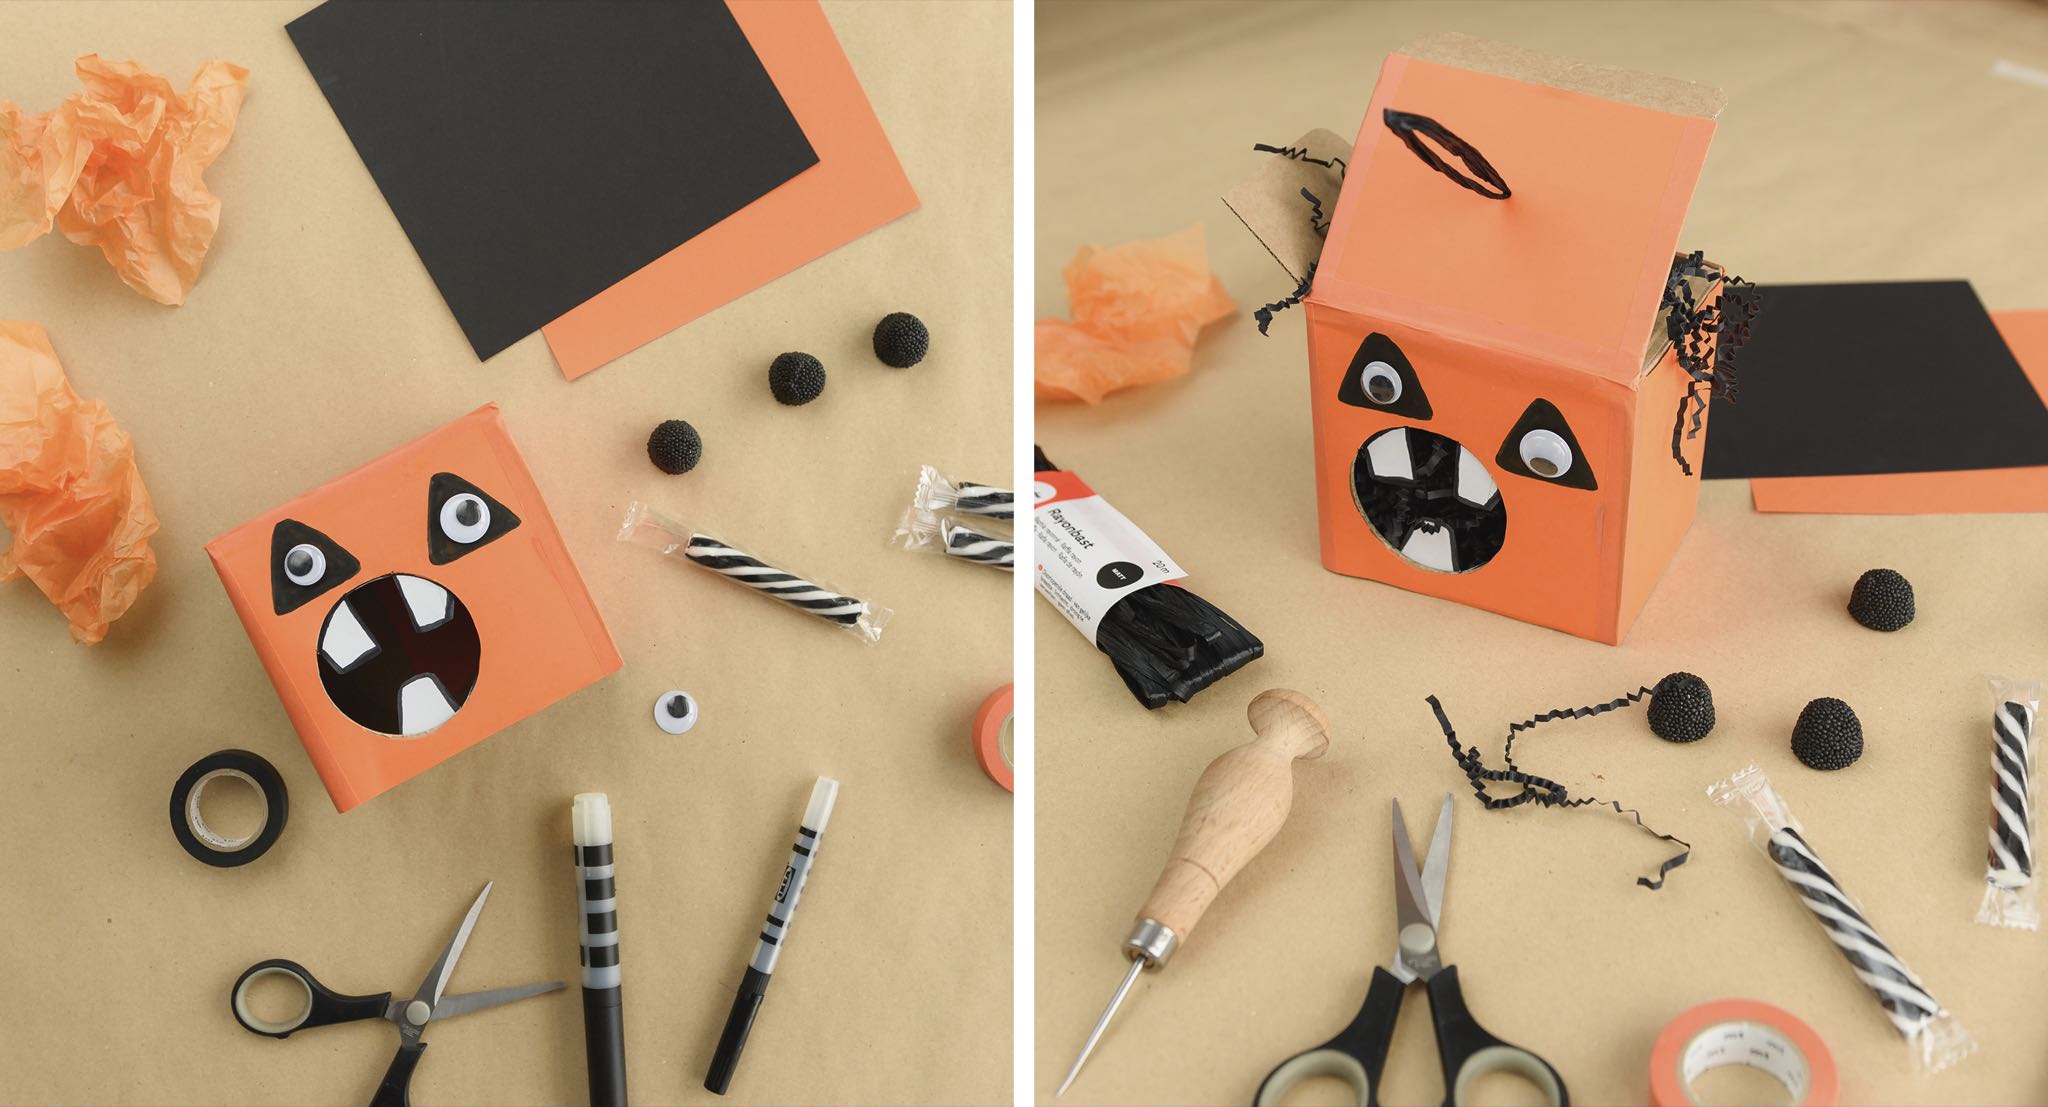
3 – With a black felt-tip pen, draw triangles on top of the mouth and stick the eyes on top.
4 – Make a hole with the punch on the top of the box and thread the raffia rayon ribbon in so you can hang it. Crumple up pieces of tissue paper and place them inside with a few sweets. Your Halloween pumpkin box is ready!
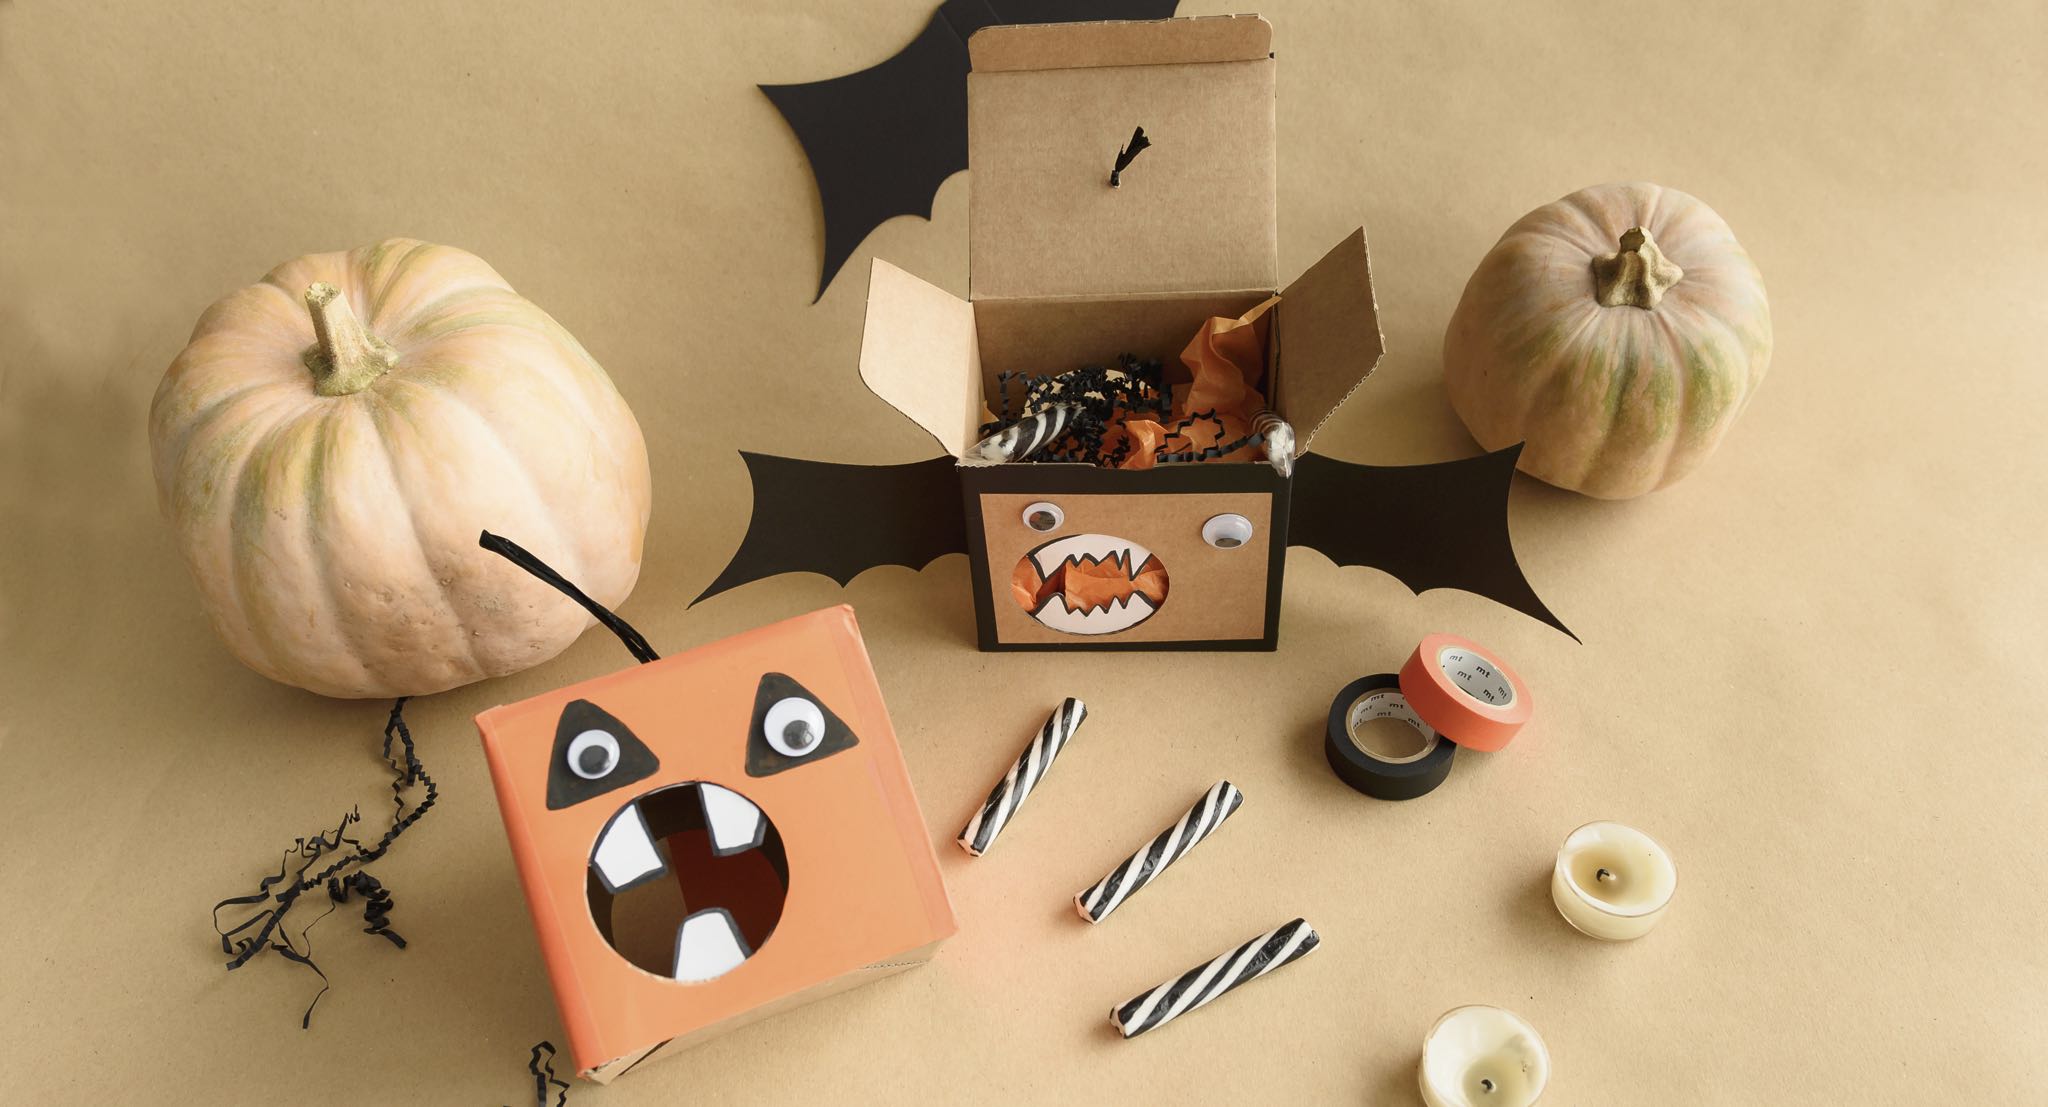
Tick-tack, tick-tack… It’s the countdown to Halloween. We say goodbye open-mouthed!