
The invaluable Marta from the 2nd funniest thing came up with and photographed this tutorial.
You’ll fall in love with today’s DIY tutorial, which will make your creative light shine bright inside you… I know, I know, that was pretty bad wordplay. In deed, what we are going to show you is how to make a lamp out of one of our cardboard boxes, more specifically, out of our famous, acclaimed and widely known picnic box (round of applause). So, without further ado, lets get on with it and find out how we make…
the DIY cardboard box lamp (and once again, ta-da!)
First of all, lets see what we need to carry out this tutorial:
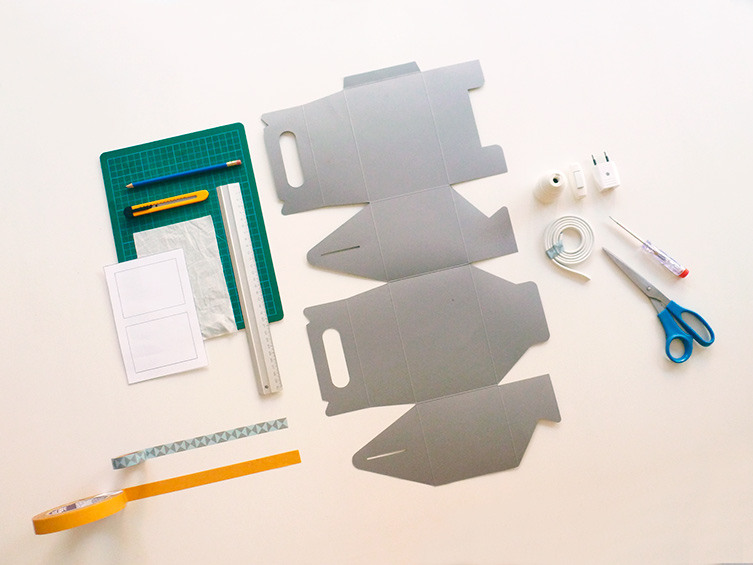
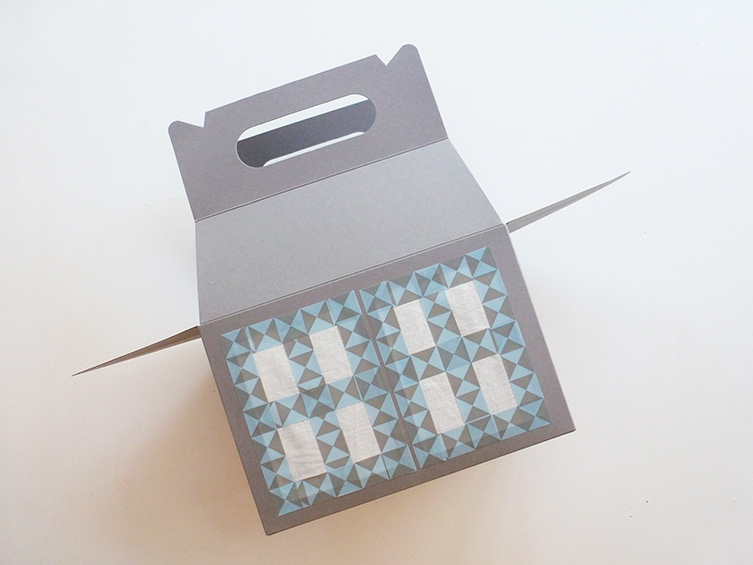
- Our picnic box (in whichever size you think is best, the one you see here is an M)
- A run-of-the-mill cable, with a plug, a switch and a light bulb holder
- Scissors
- Screwdriver
- Cutting mat
- Normal paper
- Tissue paper
- Paper cutter
- Ruler
- Double-sided tape
- Washi tape
- Pencil
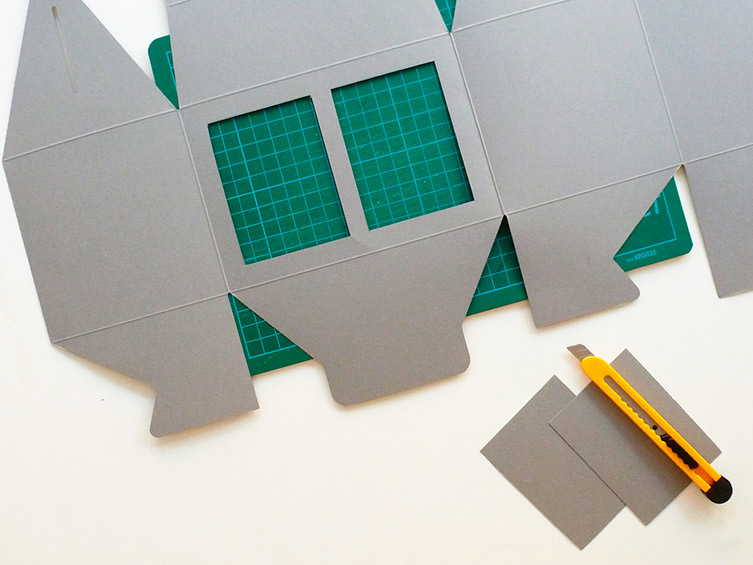
Do you have everything? Great, so let’s do it. The first thing we need to do is to make a template with a couple of rectangles, using the design you can see in the following photograph. Once you have it, we draw the silhouettes of both rectangles on one of the front sides of the picnic box:

Once we’ve drawn the rectangles on the box, the next step will be to cut them out, using the paper cutter and making sure we do it on the cutting mat to avoid unwelcome disasters.
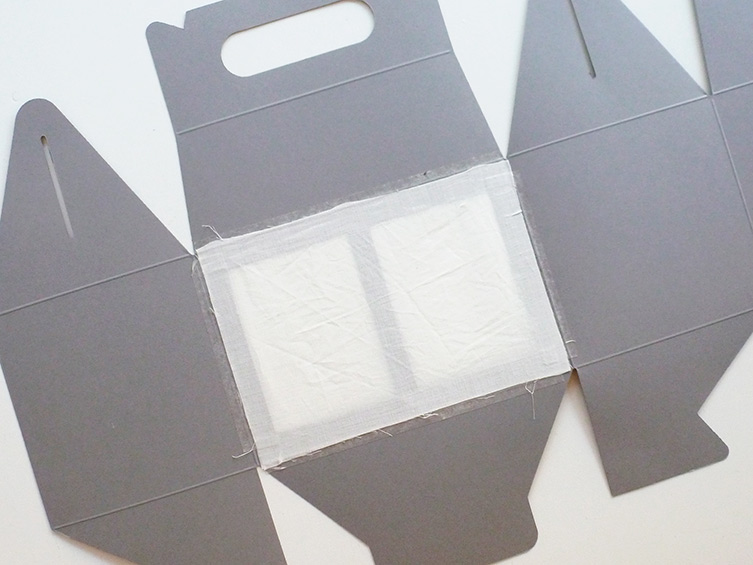
Once we’ve cut the windows out of the box, we cover the outline with double-sided tape.
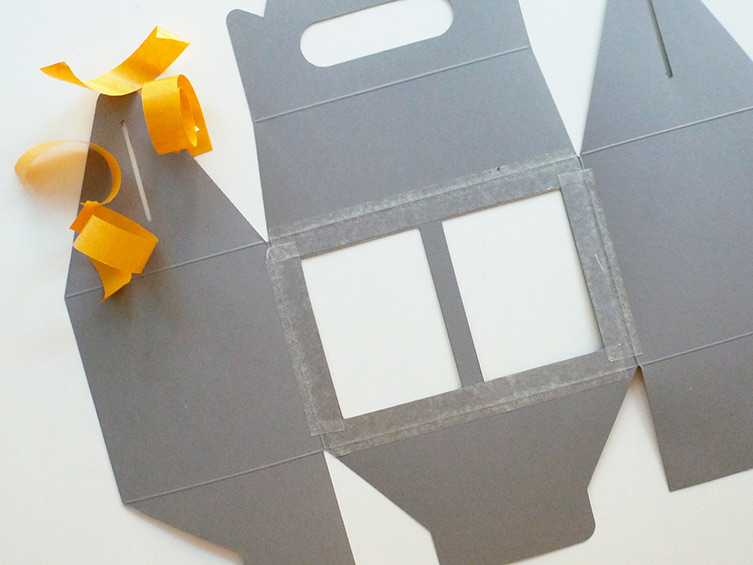
When the surface is properly covered with tape, we can place the tissue paper sheet over it, which we will have cut out to the right size in advance.
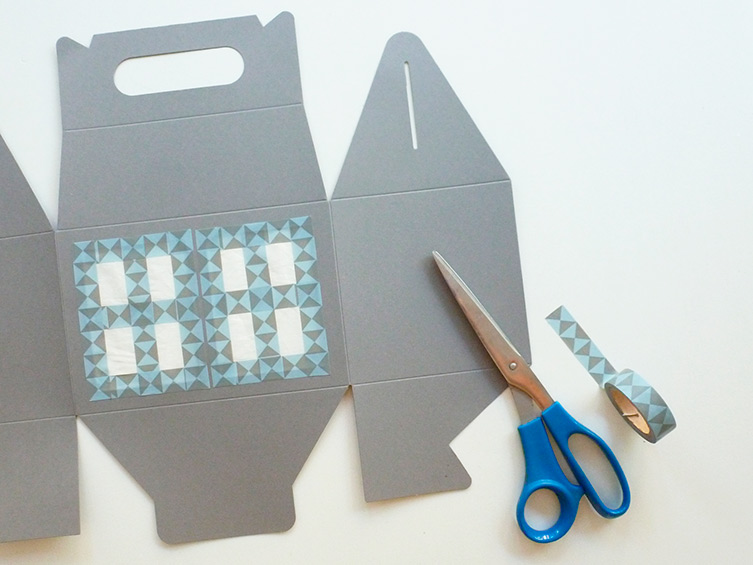
OK, so for now we have been working on the inside of the box, what we won’t be able to see. Now we are going to work on the outside, what we will see, so we’ll choose our washi tape and cover what our window frames would be. This time, we cover the outer, visible side of the box:
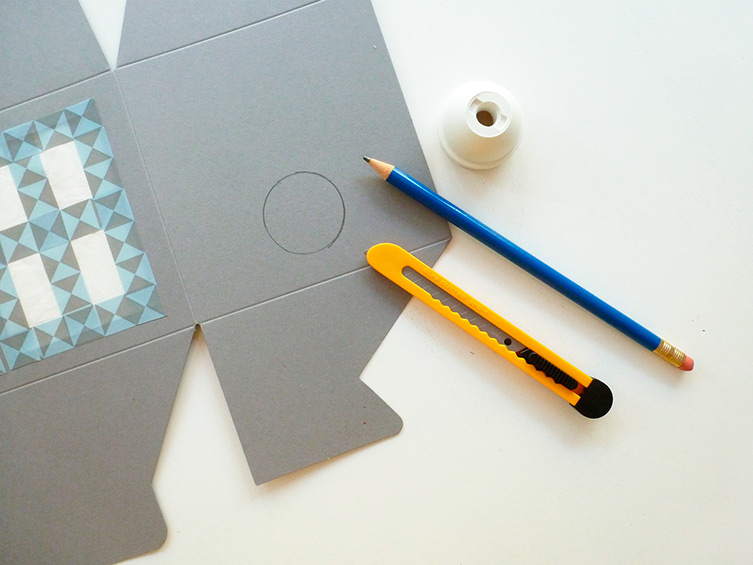
Once the outside of the custom box-lamp is looking good, let’s tackle the technical part. We use the widest part of the bulb holder to draw a circle on the side of the box:
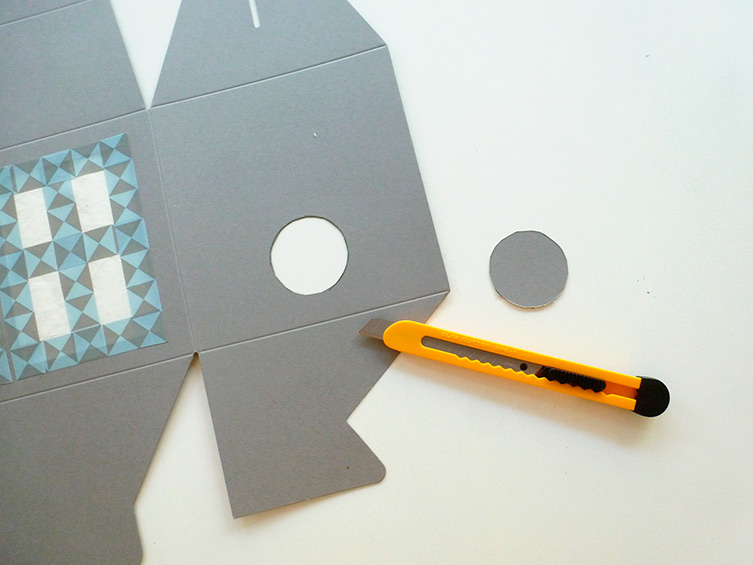
When it is done, we cut it out, using the paper cutter again and protecting the table with the cutting mat (don’t forget, or you’ll have a good reason to be very upset):
Once the picnic box is decorated and ready to become a lamp, it is time to assemble the box. To do so, you can use the assembly video you will find on our YouTube channel.
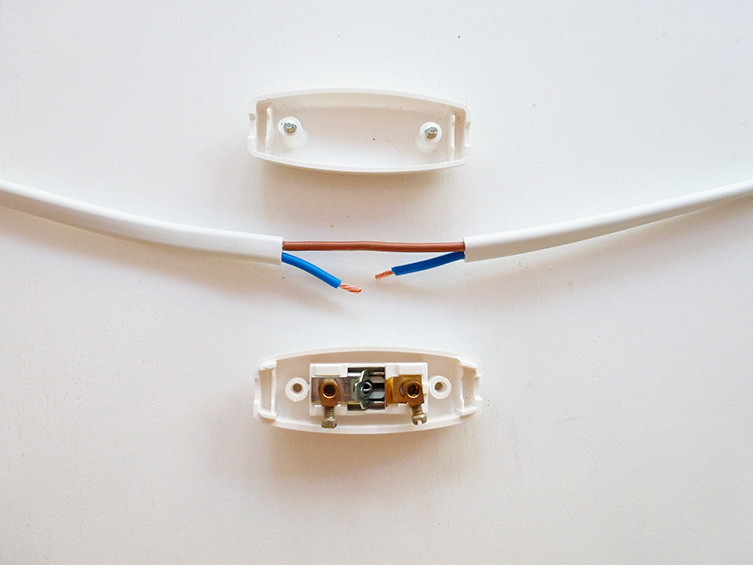
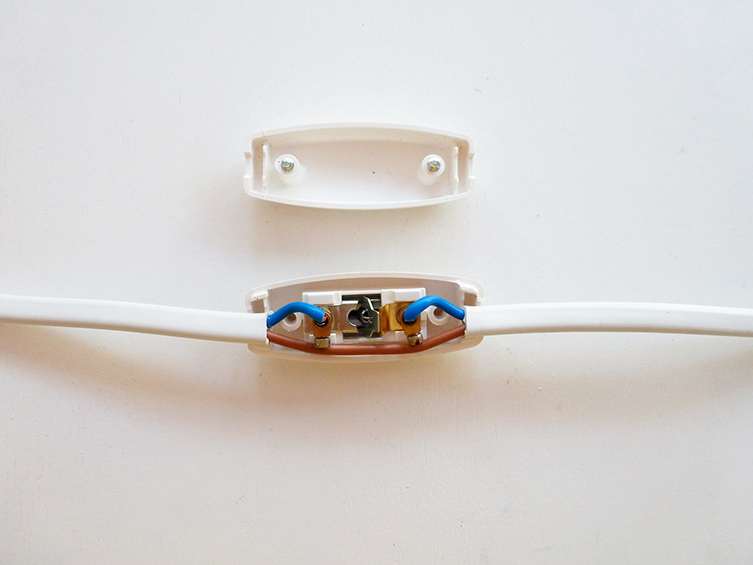
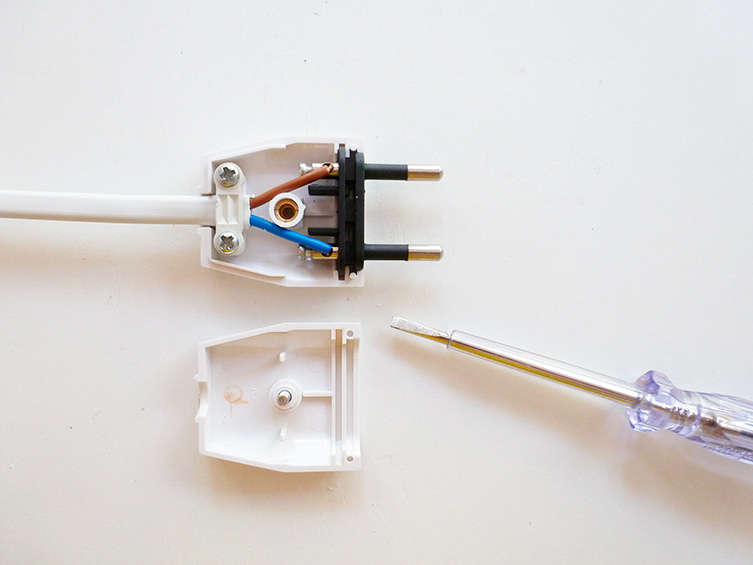
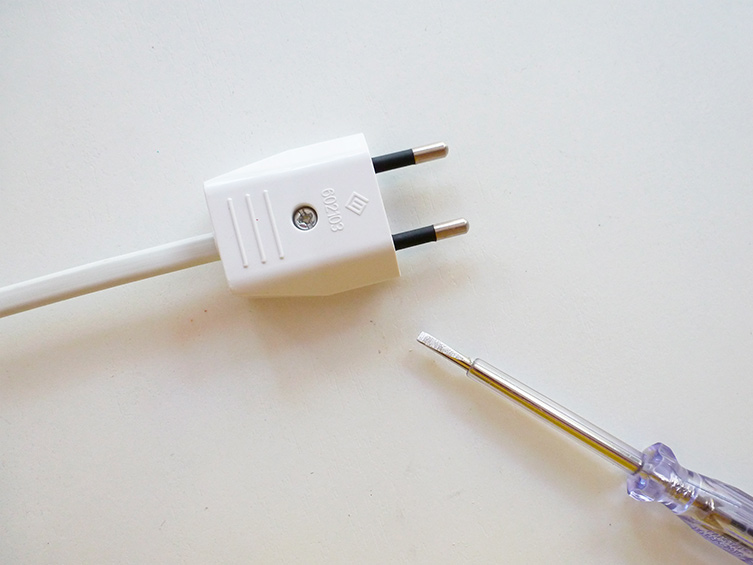
Now, my friend, comes the complicated technical part, the electrical part in which you must handle the cable. Since this is the most delicate part and I don’t want to get you mixed up with words, I’ll settle for showing you the images, worth more than a thousand words, especially these, since Marta has taken really great pictures.
Step 1
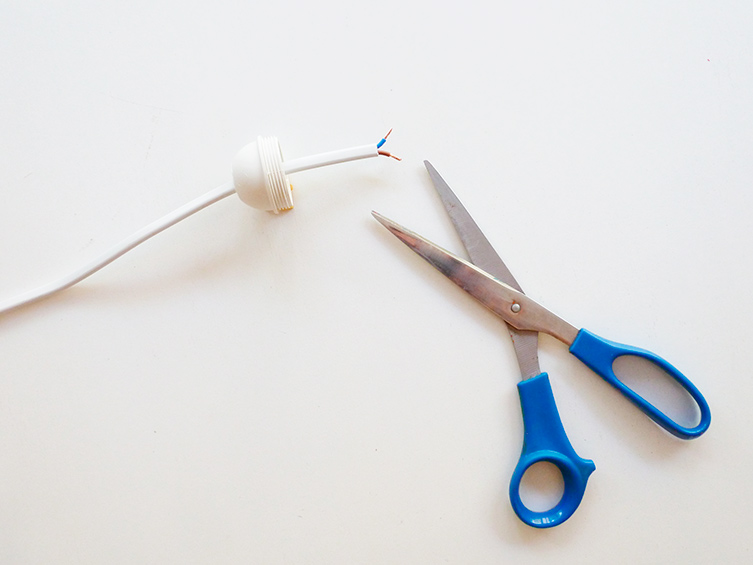
Step 2
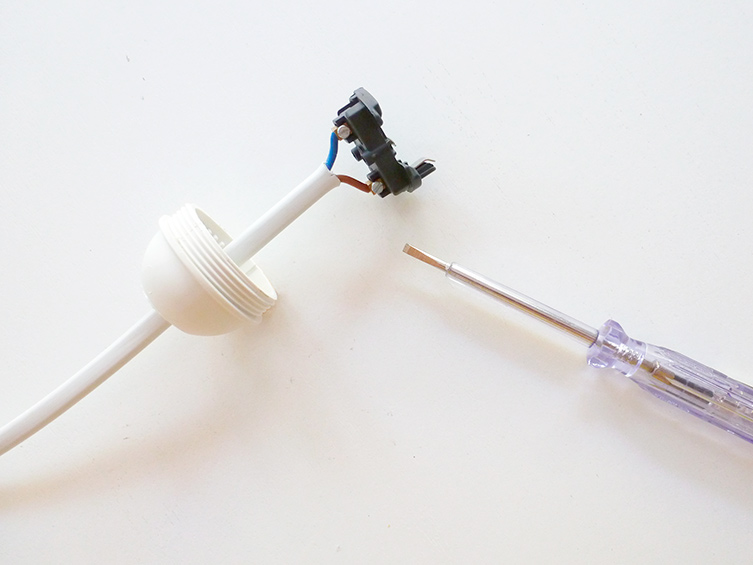
Step 3

Step 4
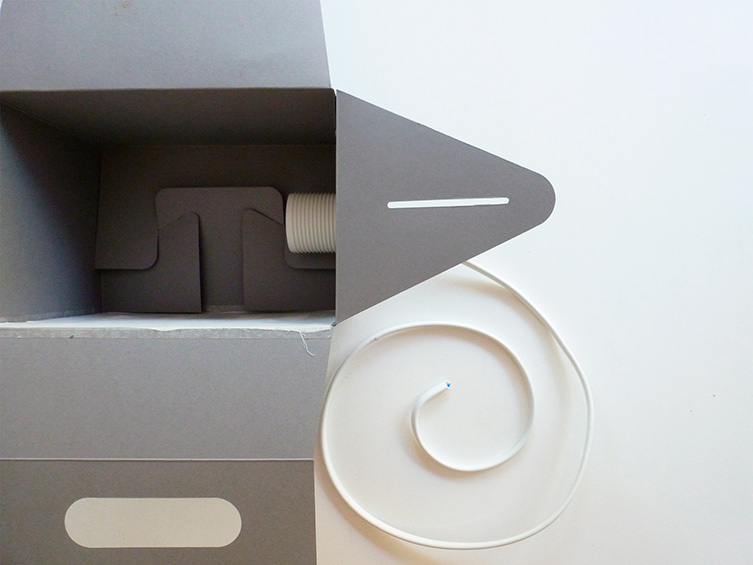
Step 5
Step 6
Step 7
Step 8
We now have our recycled lamp ready, as easy and simple as that…
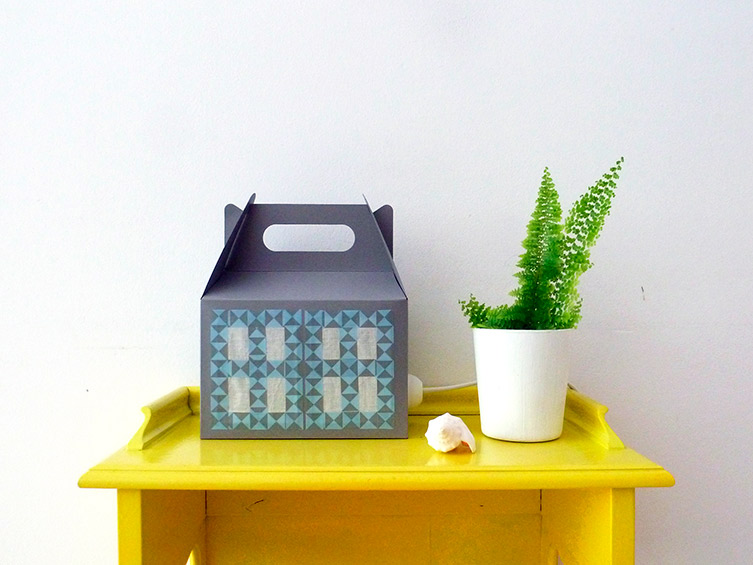
… and as pretty
Now a simple click!…
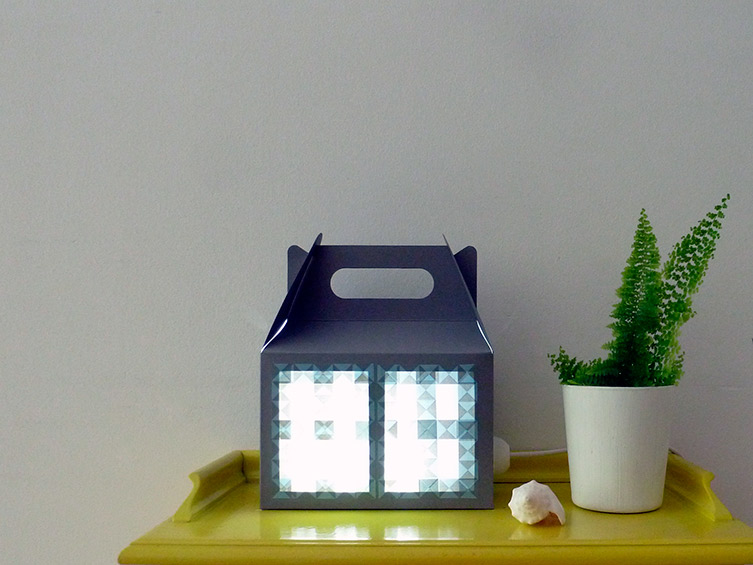
… and then there was light.