
September marks the end of summer vacations and the return to routine. The return to work is more bearable if you have a relaxed and well-organized workspace. A messy desk and full of things you don’t use can make you feel uncomfortable without you noticing. On the other hand, an organized work table and to your liking allows a good concentration and stimulates productivity.
Setting up your desk after the holidays will motivate you to start over with enthusiasm and good spirits. The first thing you should do is store things of little use in drawers or cabinets. In this way, you will only leave the indispensable at hand on your desk. You can gain a lot of space if you store the different tools in the immediate wall to your desk with the help of vertical elements.
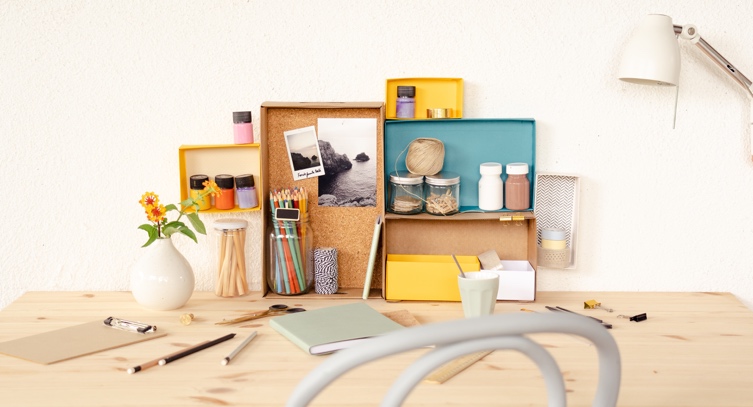
Today we propose a very simple idea to order everything: a desktop organizer made with different models of boxes. It is fully customizable and you can decorate it to your style by combining different colors. First of all, create a list of all the items you need to store and take measurements to find out which box sizes are the most suitable.

To create an environment more to you, you can decorate the boxes with patterned papers and some labels. You can even paste a piece of cork inside one of the boxes to hang notes, calendars or your favorite photographs. Combining different materials such as cardboard, cork or glass, you will get a more striking and attractive decoration. Do not miss the step by step of our organizer so you can see different ideas!
Of course, the final touch to get a pleasant and fresh work environment is to add some natural elements such as a pot or a vase with flowers.
A post made in collaboration with Warm Home Life.
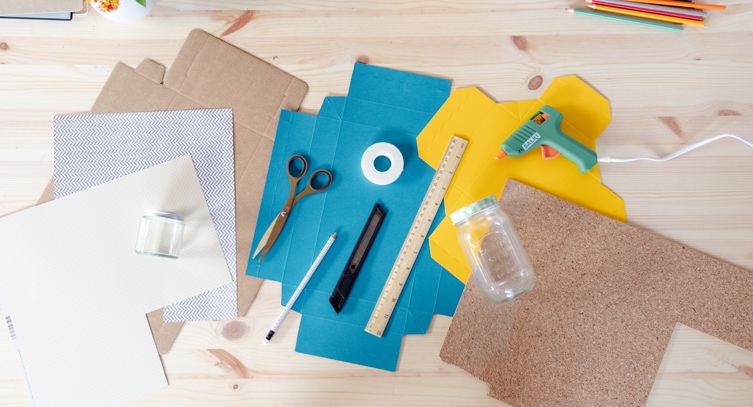
MATERIALS
– Shoe box
– Rectangular gift box with lid
– Square box for watches
– Cardboard tray
– Macaron Box
– Glass jar for creams
– Chrystal jar
– Patterned paper
– Cork
– Pencil
– Ruler
– Cutter
– Scissors
– Hot glue
– Double sided adhesive tape
STEP BY STEP
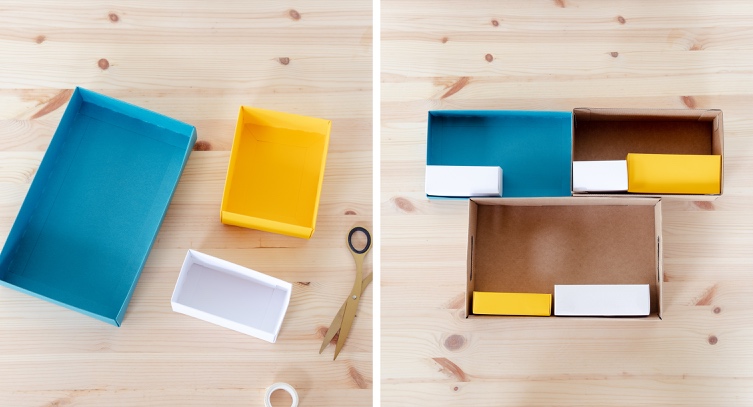
1. To start, assemble all the boxes. The more different sizes and shapes the better!
2. Now distribute the boxes on the table so that they fit like a puzzle. Use the bases on the one hand and the covers on the other. It may also be very useful to place one inside the other by turning the base.

3. When you have the composition you like best, glue all the boxes together on the sides with hot glue. Try to respect the straight bottom so that the set of boxes can be held upright.
4. Use colored and patterned pals to decorate the bottoms of the boxes. Also cut a sheet of cork and paste it in another box to hang your photos and notes.
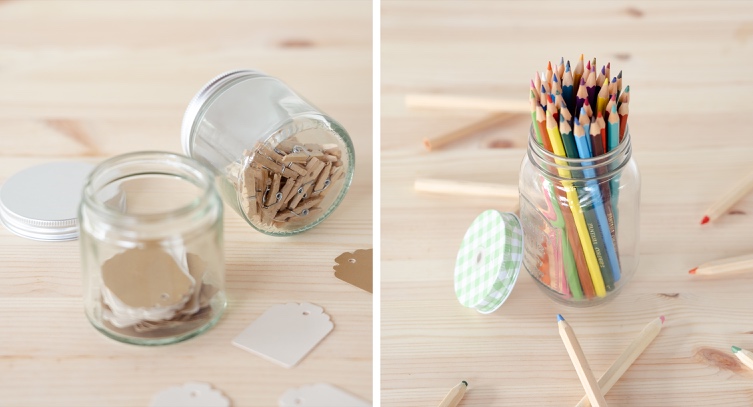
5. Add containers of other material, such as our glass jars for storing small things. Being transparent will allow you to see what’s inside. They are the perfect size so you can place them on the organizer boxes!
6. For pens and colored pencils use jars. Our beverage jar is perfect!
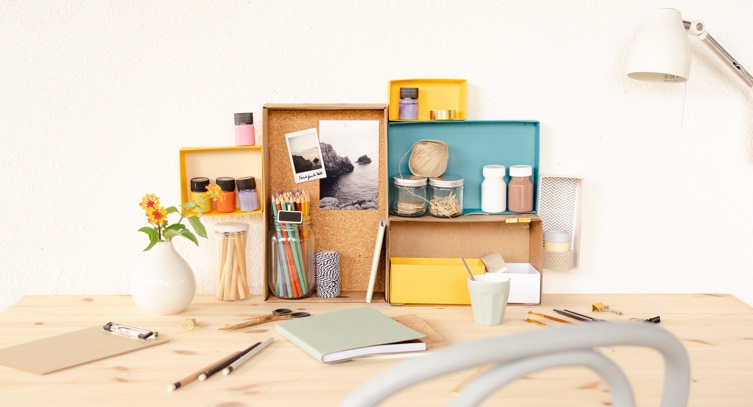
Voilà! Your desktop organizer is ready to return to the routine. Now put the glass jars and jars in their place, hang photos and notes on the cork and store your essential tools in each compartment.
Ah! And do not forget to give the final touch with a vase with flowers or a pot.
Ready to go back to the routine :)?