
After our post on Candy Bars, today we’re giving you a tutorial consisting of balloon decoration, a rising trend in all sorts of parties.
Ideal for decorating any corner, the aero-static balloon decoration is perfect to surprise your guests. Easy to build and personalise to your liking.
We’re showing you two different styles; one focused towards weddings and more occasional dates and another more simple, perfect for all sorts of party.
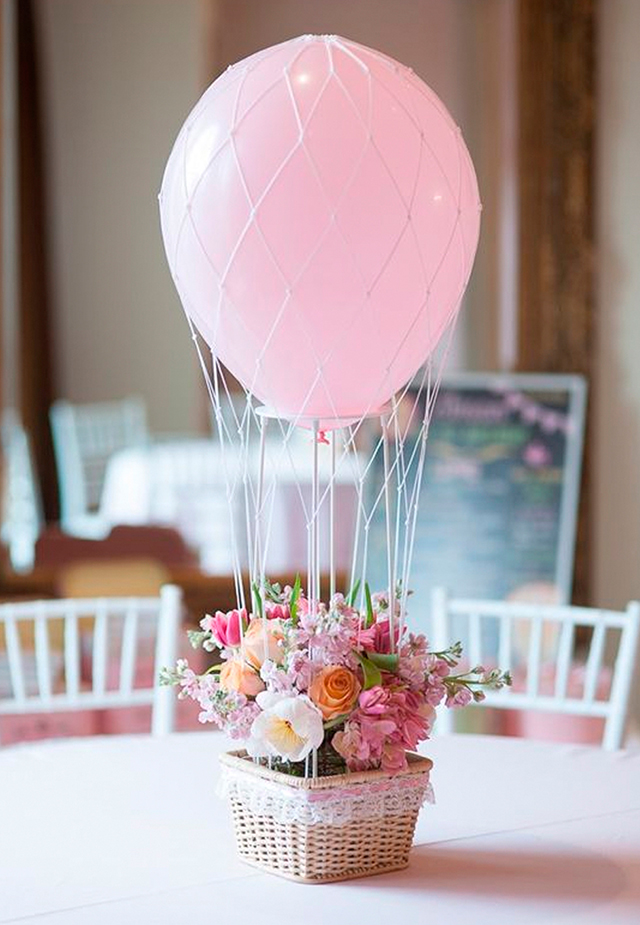
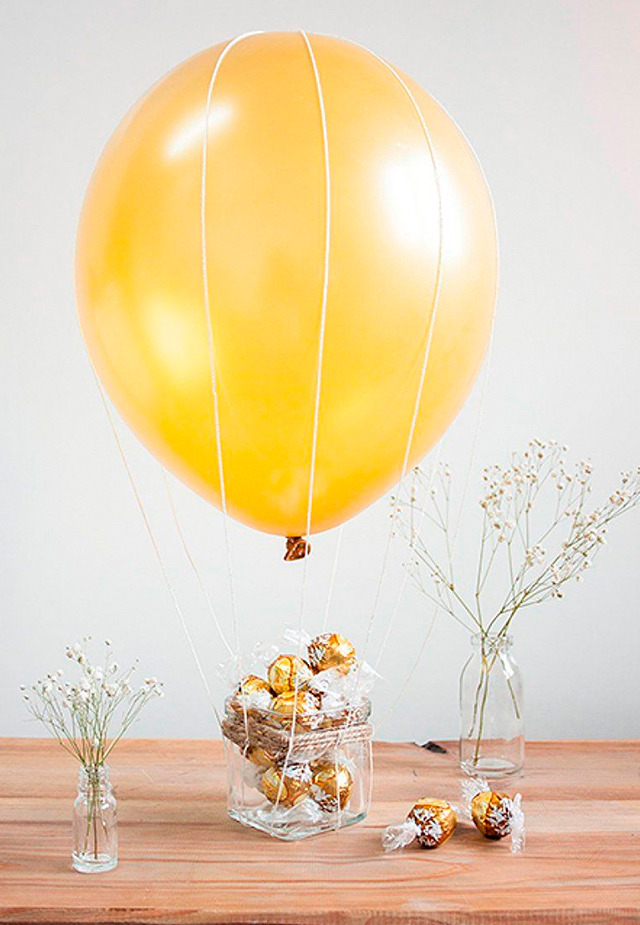
Photo: All Lovely Party
Today we want to give you a tutorial on decorating with balloons, so you can create the most festive balloon. A tutorial created by the fantastic Koral, of Fábrica de Imaginación.
What a start to the party!

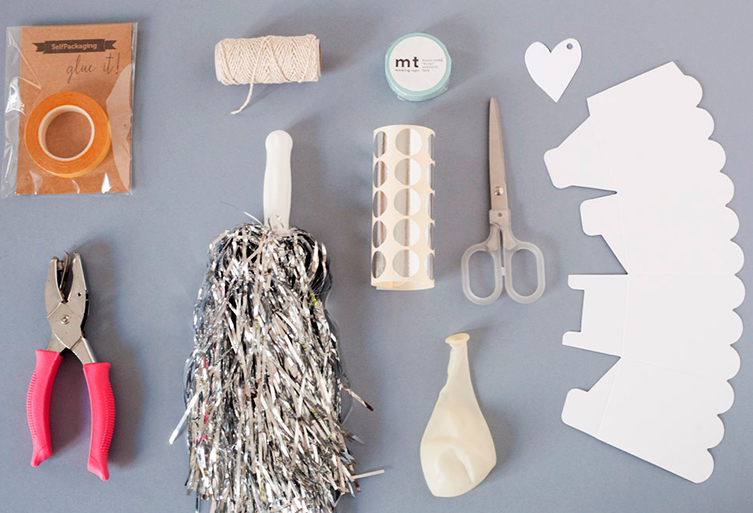
Here you have the materials that you will need and you will need to have ready when you put your hands to work.
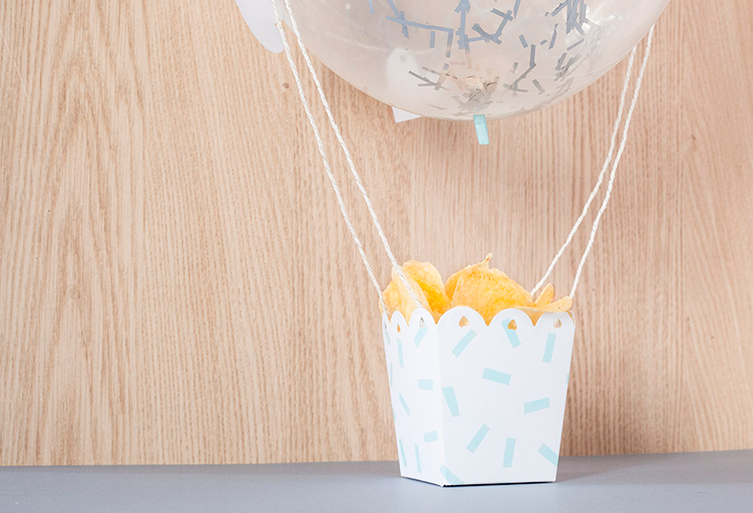
Materials:
- Box of popcorn white S
- Irregular hearts
- Metallic Baker’s Twine
- Double sided tape
- Blue Washi tape
- Manual Heart Cutter
- Scissors
- Transparent balloon
- Silver Pom Pom
- Silver stickers
- Funnel
And now that we have everything prepared. Let’s get started!
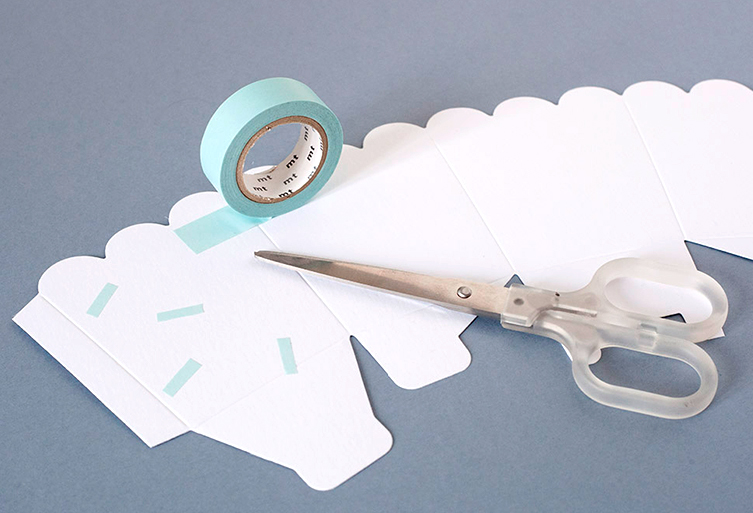
Step 1
Make thin strips with the washi tape and decorate the box with confetti effect. The result is great!
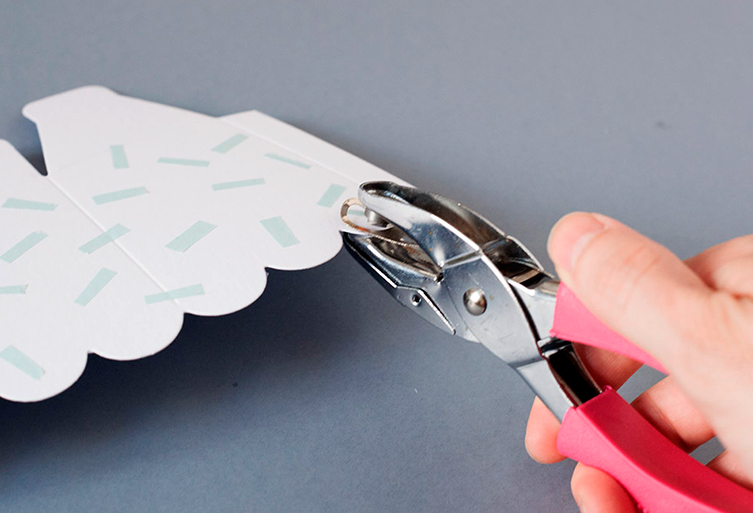
Step 2
The second step consists of making heart shaped holes in the undulations of the box.
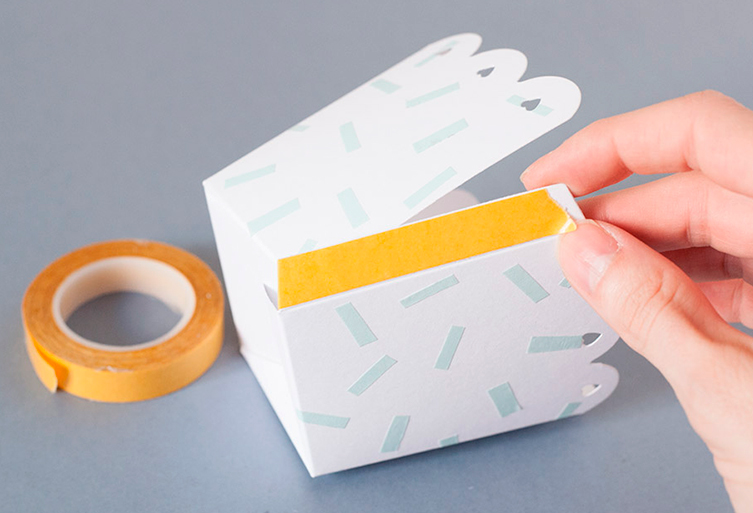
Step 3
Close the box with tape! Now the box is assembled and decorated.
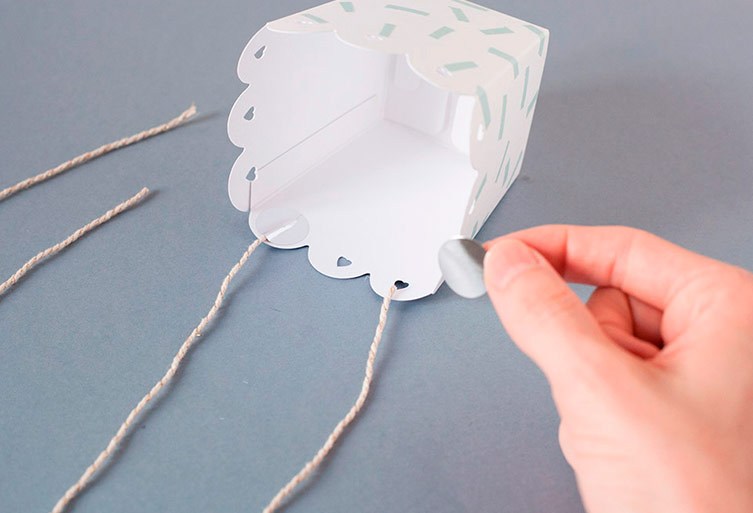
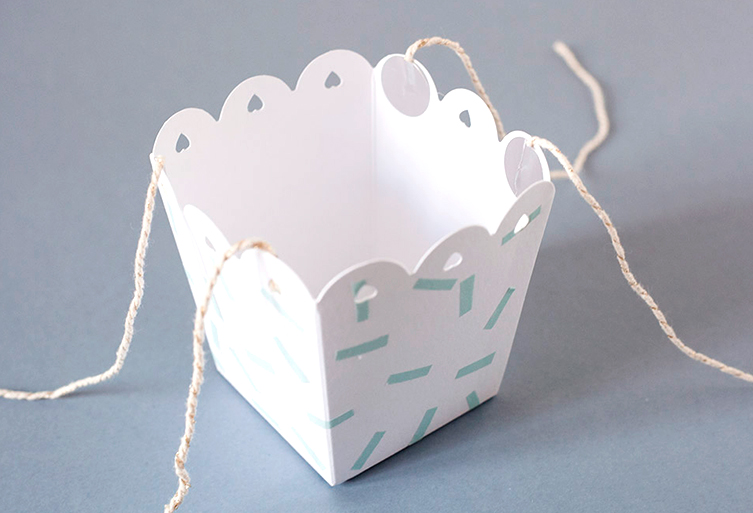
Step 4 and 4.1
Then cut 4 pieces of 28 cm thread and stick them to the box with the stickers.
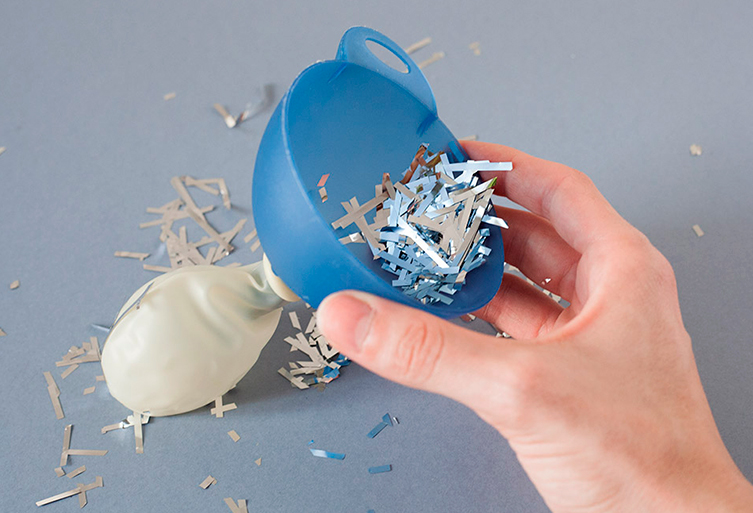
Step 5
Take the Pompom and cut the ends to make silver confetti.

Step 6
Once you have the prepared confetti, stuff the balloon with confetti with the help of a funnel.
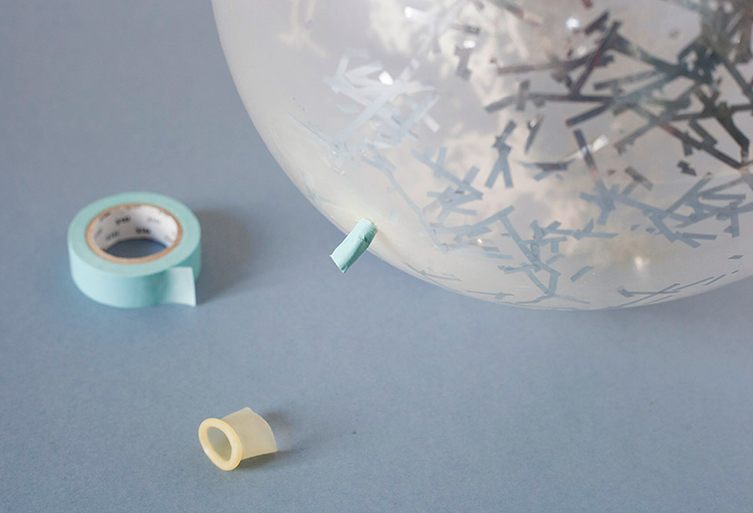
Step 7
Inflate the balloon with helium, preferably. Holding the balloon so that you don’t go up to the ceiling cover the knot with a little bit of washi tape and cut off the end.
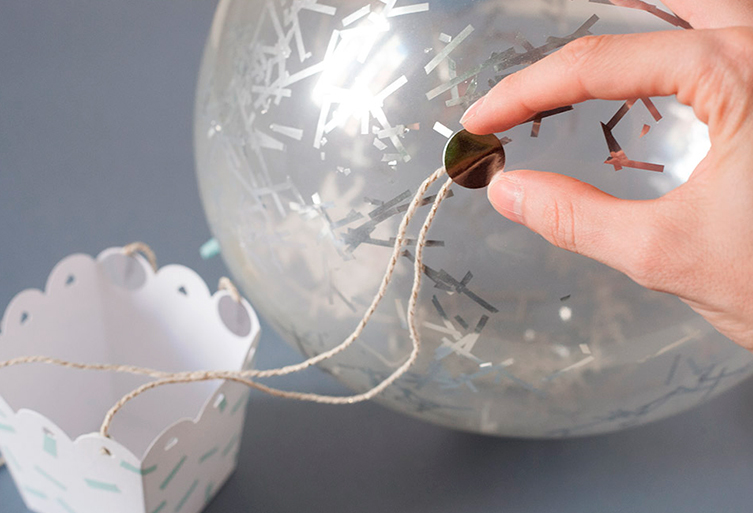
Step 8 and 8.1
To attach the thread to the balloon, use the silver stickers
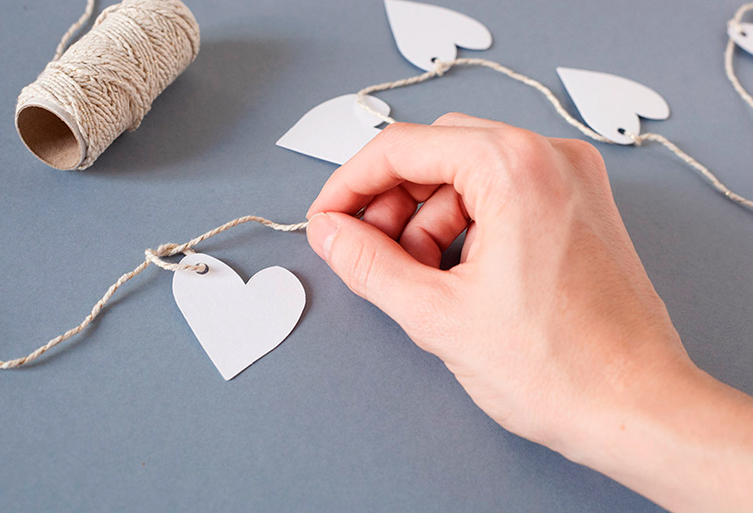
Step 9
To add an even more fun touch? Make a wreath by tying the hearts with the thread.
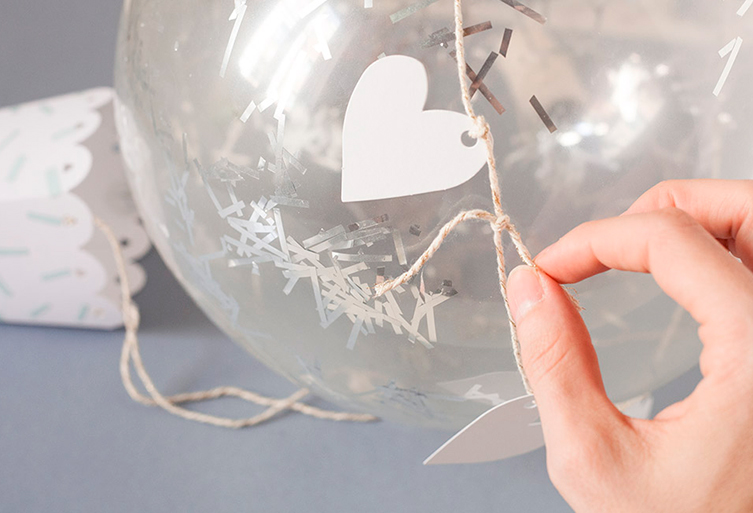
Step 10
And to decorate the globe! Surround the balloon with the wreath and make a knot.
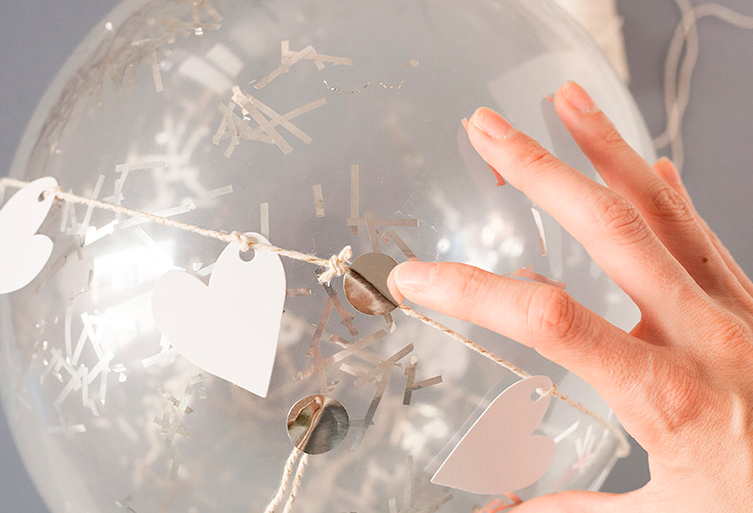
Step 11
Cut the ends of the thread and fix the wreath to the balloon with a couple of stickers.
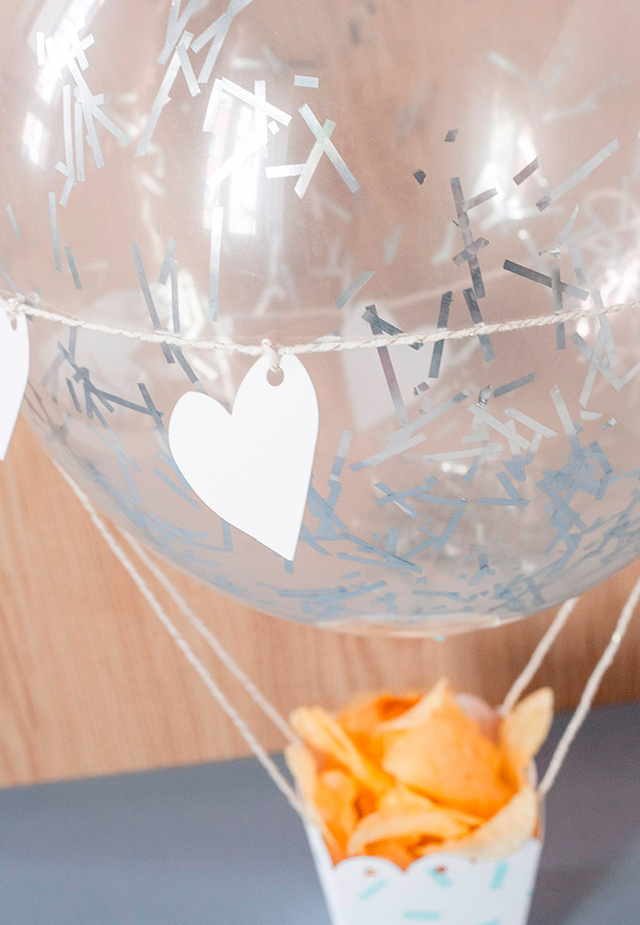
And already we have our balloon decoration! A tutorial with simple steps so that you start to decorate allll of your parties. Ideal as a centrepiece, for all kinds of celebrations.

Fill the box with potatoes and surprises for kids and adults!
Happy decorating!