Christmas is just around the corner and we bet the most organised ones of you have already got a few gifts ready. For those who don’t want to wait until the last minute and don’t like the typical wrapping paper, we bring you a really original way to decorate your gift boxes. In this tutorial we are going to use Christmassy colours, but you can change them to decorate your boxes for any occasion.
It’s so easy to make and it looks great. Mixing the cardboard with the textile fabric looks really nice. This Christmas make a difference with your gifts with this amazing idea.
Be careful what you buy for people, maybe the person receiving the gift likes the box more than what’s inside!
Balls of wool at the ready and get to work!
A super post in collaboration with Warm Home Life.
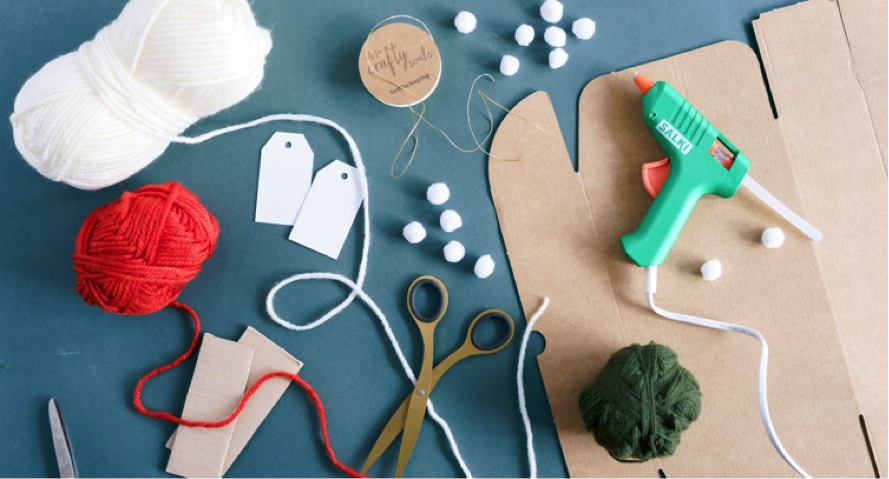
MATERIALS:
- Self-assembly box
- White pompoms
- Purple lace for gifts
- Labels ready to personalise your gifts
- Scissors
- Coloured wool
- Cardboard
- Hot glue sticks
- Hot glue gun
STEP BY STEP:
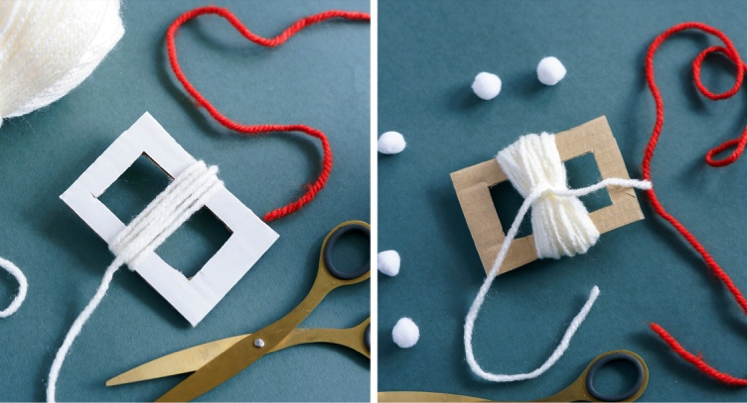
1. First we are going to learn to make the pompoms. It’s really easy. Cut out a piece of cardboard of about 10 x 7 centimetres and cut out a rectangle of around 6.5 x 4 centimetres inside it. It should look like a little frame. Take the wool yarn in the colour that you want and start to wrap it around the cardboard on the narrowest side. Go around it about 30-40 times. Remember that the more times you go around, the thicker the pompom will be.
2. Cut a piece of wool and circle around the cut-out part inside the cardboard, as centrally as possible. Knot the yarn tightly. It is better if you do a double knot. The tighter you make the knot, the rounder the pompom will be.
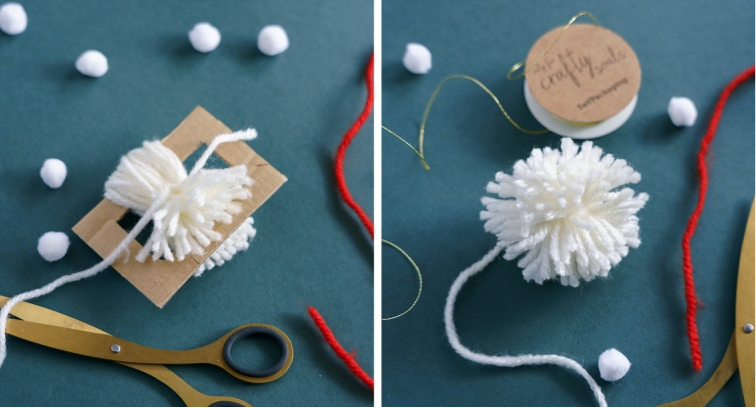
3. Using some scissors, cut the loops of wool on the outside part of the cardboard. Once the cardboard has been taken away, cut each pompom yarn so that they are the same size and so that the pompom is a round shape. Now you have your pompom ready! The yarn that we have used to make the central knot can be kept to knot the pompom later on.
4. Make several pompoms. Try with thicker or thinner cardboard, in this way you will have bigger or smaller pompoms. Remember that the more times you go around the cardboard with the yarn, the bulkier the pompom will be.
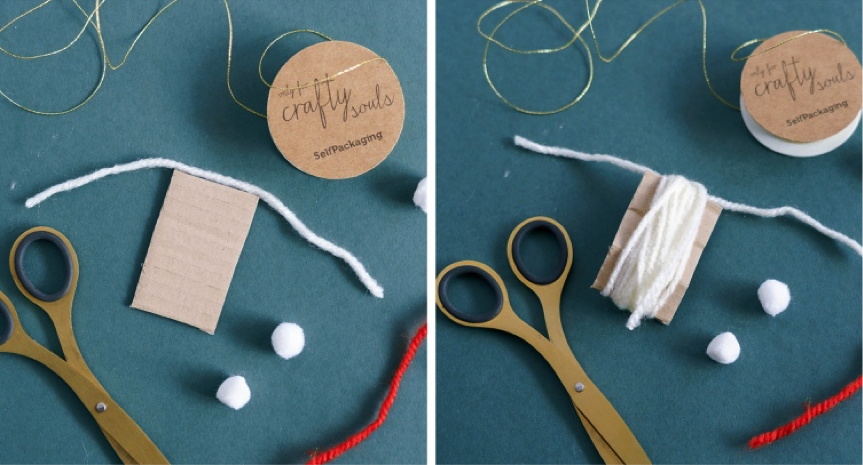
5. Now we are going to make the tassels. Cut out around 7 x 3.4 centimetres of cardboard. Cut a piece of yarn and put it on the top part of the cardboard.
6. Now go around the longest part of the cardboard around 20-30 times. The yarn that we have put on the top part will be under all the loops of thread.
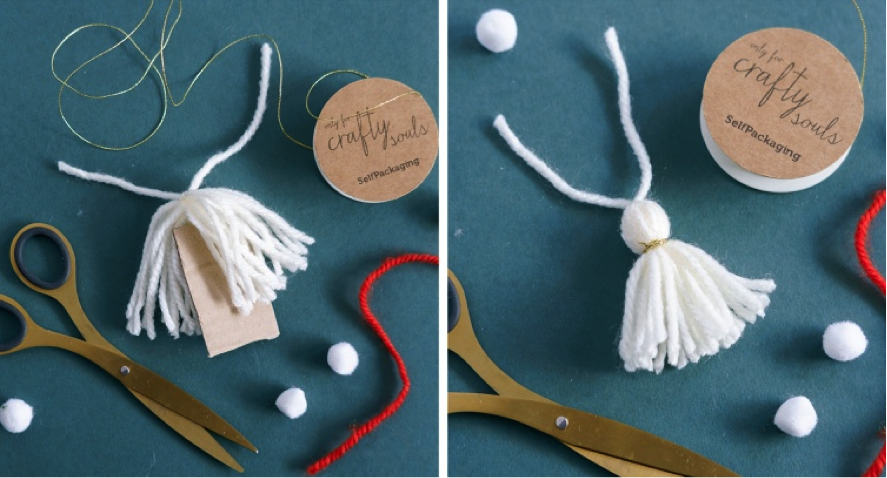
7. When you have gone around with the yarn, knot the ends of the yarn that are underneath tightly. Then, cut the yarn on the other side of the knot and match them with the scissors if some of them are uneven.
8. Using another piece of the same wool or purple lace, we go around a few more times about one centimetre from the knot more or less. Finally, match the ends of the tassel so that it is all even and perfect.
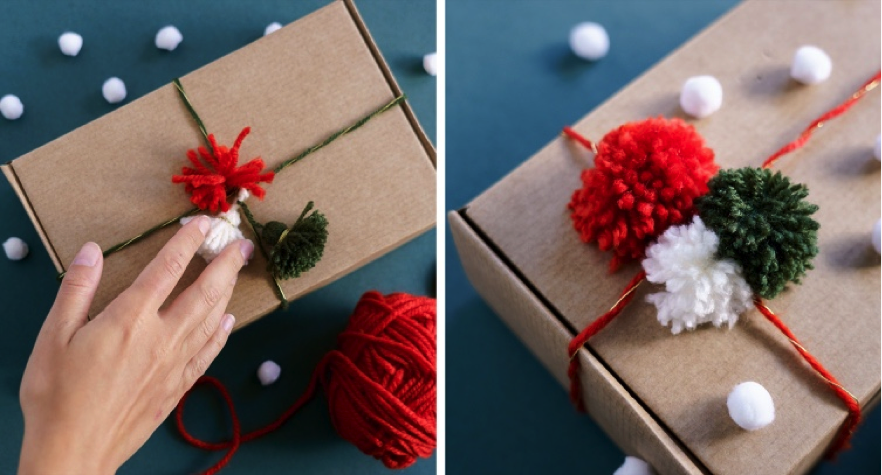
9. Now we are ready to start decorating the box. Before doing anything else, assemble the box and spread out the pompoms and tassels how you want. You can put several different coloured pompoms together with a bit of yarn or purple lace.
10. Stick the pompoms with some hot glue and fix the label with the name of the lucky person who is going to receive your gift.
There you have it! It was easy, wasn’t it?


Making pompoms and tassels is so easy and relaxing that you’re going to be looking for excuses to make more gifts. Mix colours and try different ways of putting them on the boxes.

