Content
Finding the right sewing box that fully meets your needs can be a complicated task. As you know, we always favour anything you can do yourself, it will always turn out cooler and more personal. So if any of these thoughts have crossed your mind: “my sewing box is too small”, “all my sewing stuff is in a mess” or “mine is really ugly”; this is your tutorial. Today we bring you an idea so you can organise everything in your sewing box, perfectly customised and exactly the right size.
We will show you how to make our picnic boxes into a pretty embroidered sewing box. The idea is that you find the boxes that fit your needs best so you can keep everything nice and tidy and decorate the box with full colour embroidery drawings. Yep, everything to your liking!
Get your thread and needle ready, and let’s get started!

A super post in collaboration with Esencia Gráfica.
Materials:
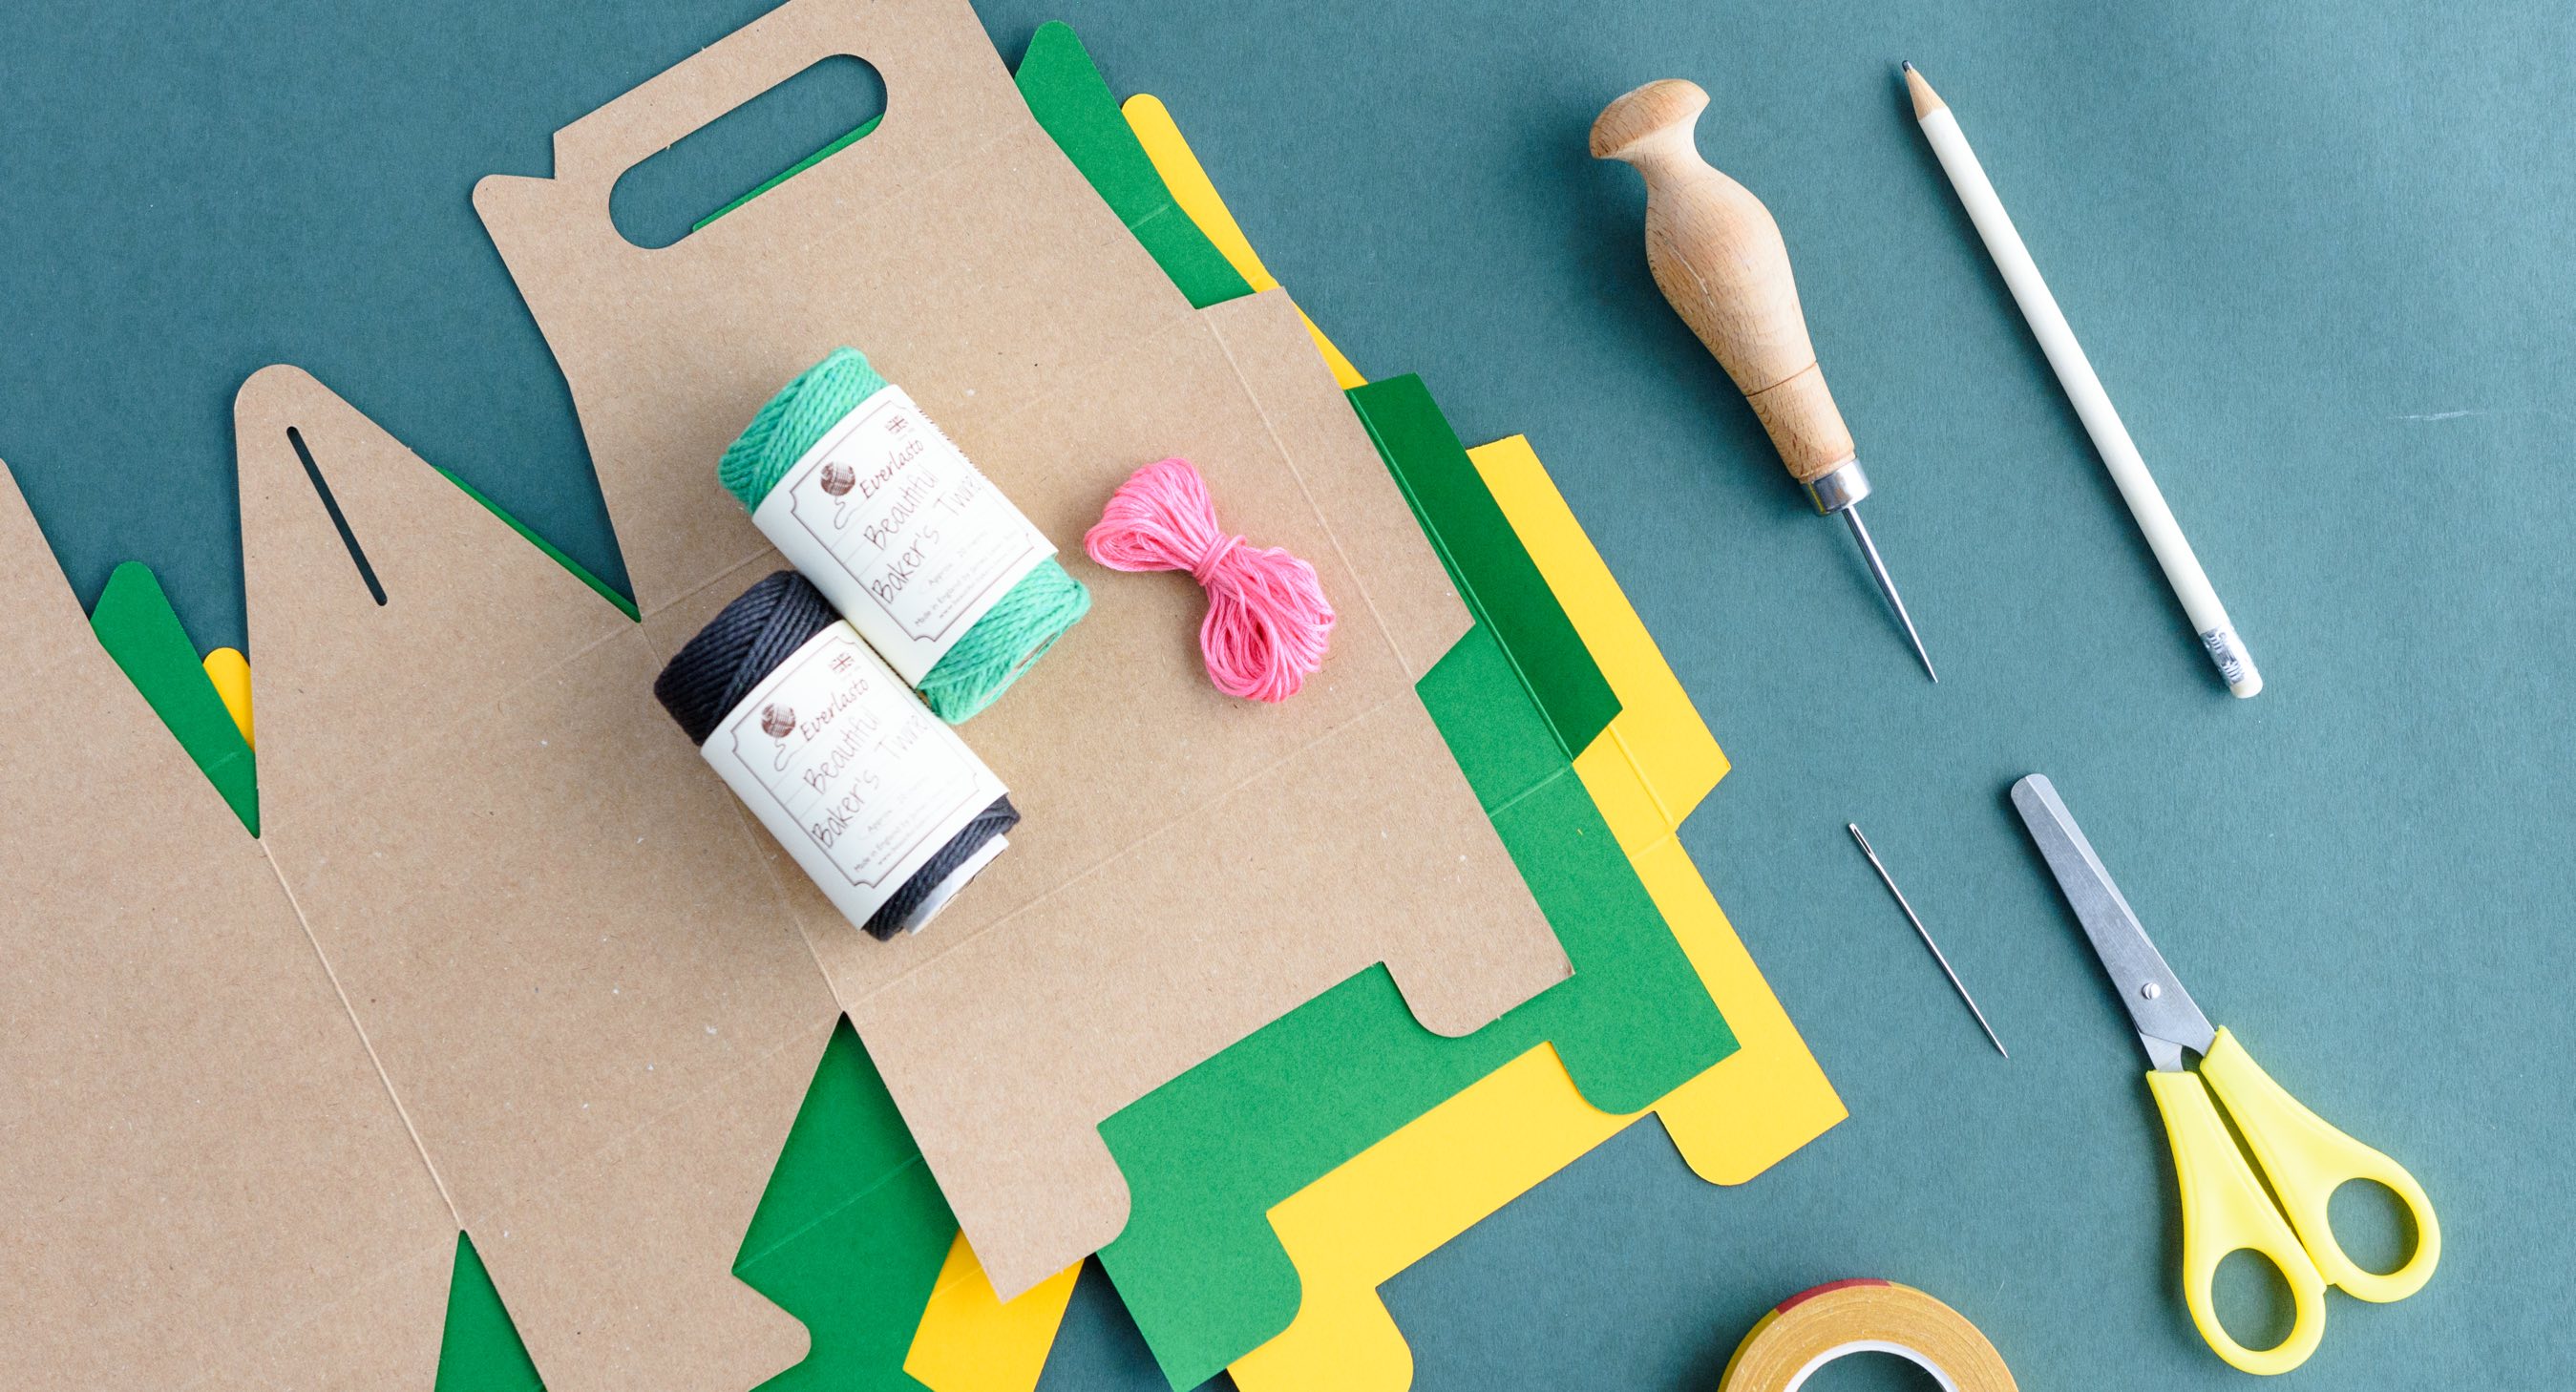
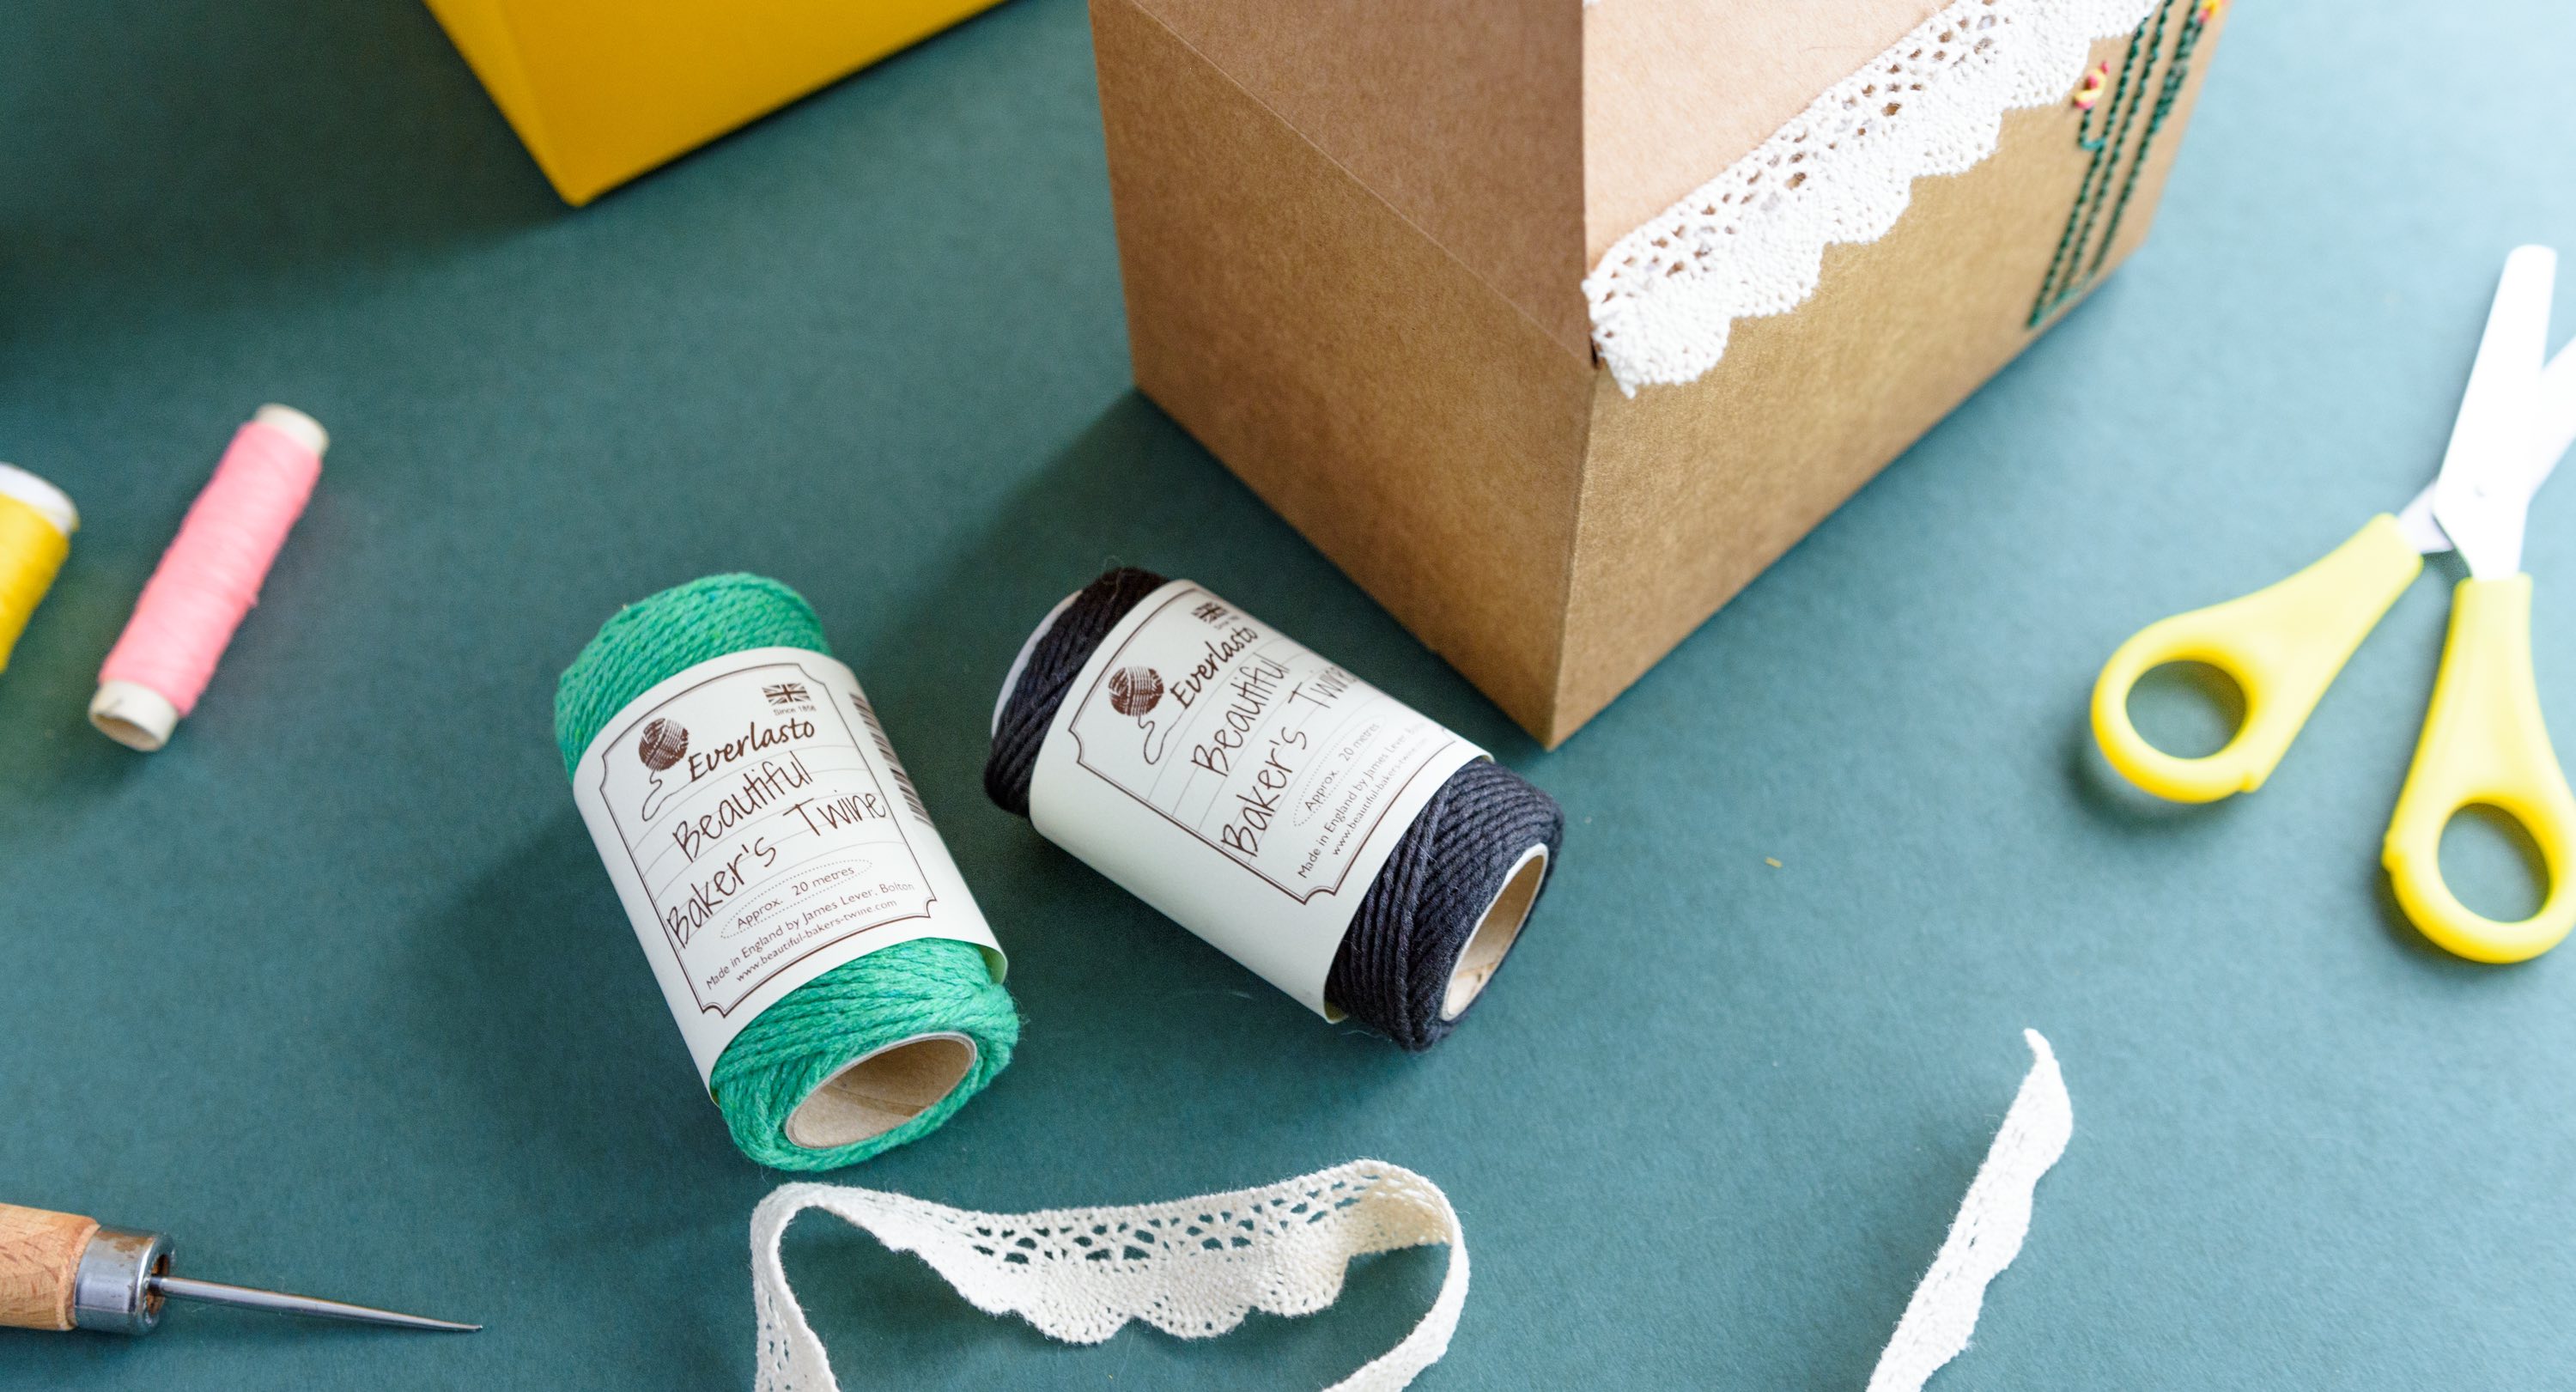
- Picnic box
- Coloured threads
- Lace for crafts
- Ribbon with tassels
- Needle
- Thimble
- Pencil
- Double-sided tape
- Hot glue
- Hole punch
- Scissors
Step by Step:
Before you start, choose the best box size and model to suit your needs. In our case, we have chosen a couple picnic boxes, to keep everything nice and tidy. In one box, we’ll keep all our reels and in the other, our sewing tools.

1 – On one of the sides of the box, draw the decorative drawing of your choice. In our example, we are going to have a cactus with a flower on it.
2 – Using the manual hole punch, make holes all along the outline so it is easier to sew.
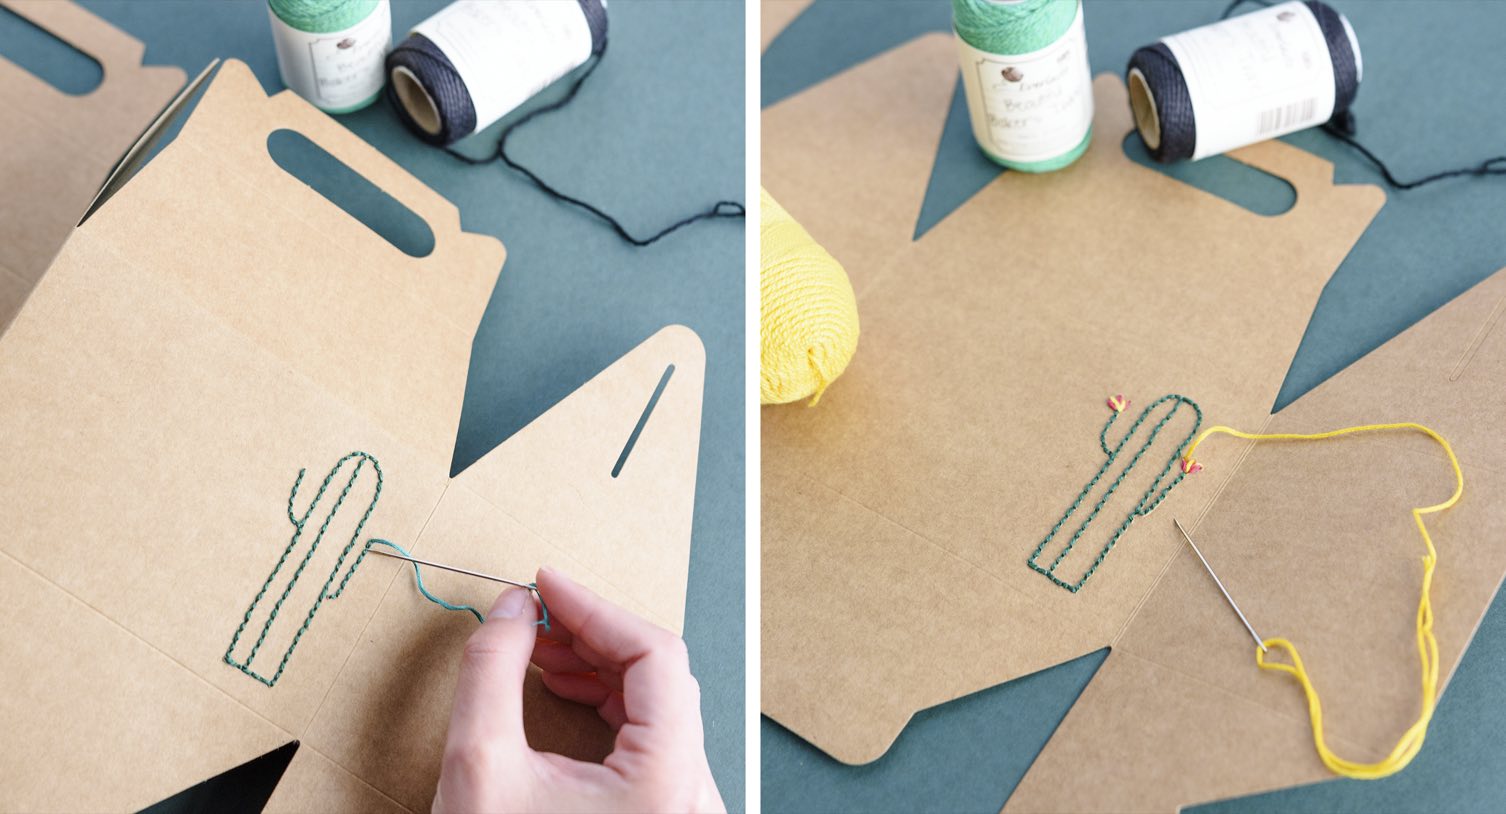
3 – Thread your favourite colour thread through the needle. For our design, we are going to do the outline of the cactus in green. For this step, you can sew a simple stitch along the outline of the drawing or embroider the silhouette. You can use the sewing technique you prefer.
4 – Combine threads in other colours to add details to your drawing. For the cactus, we have chosen pink thread for the petals of the flower and a yellow dot in the centre.
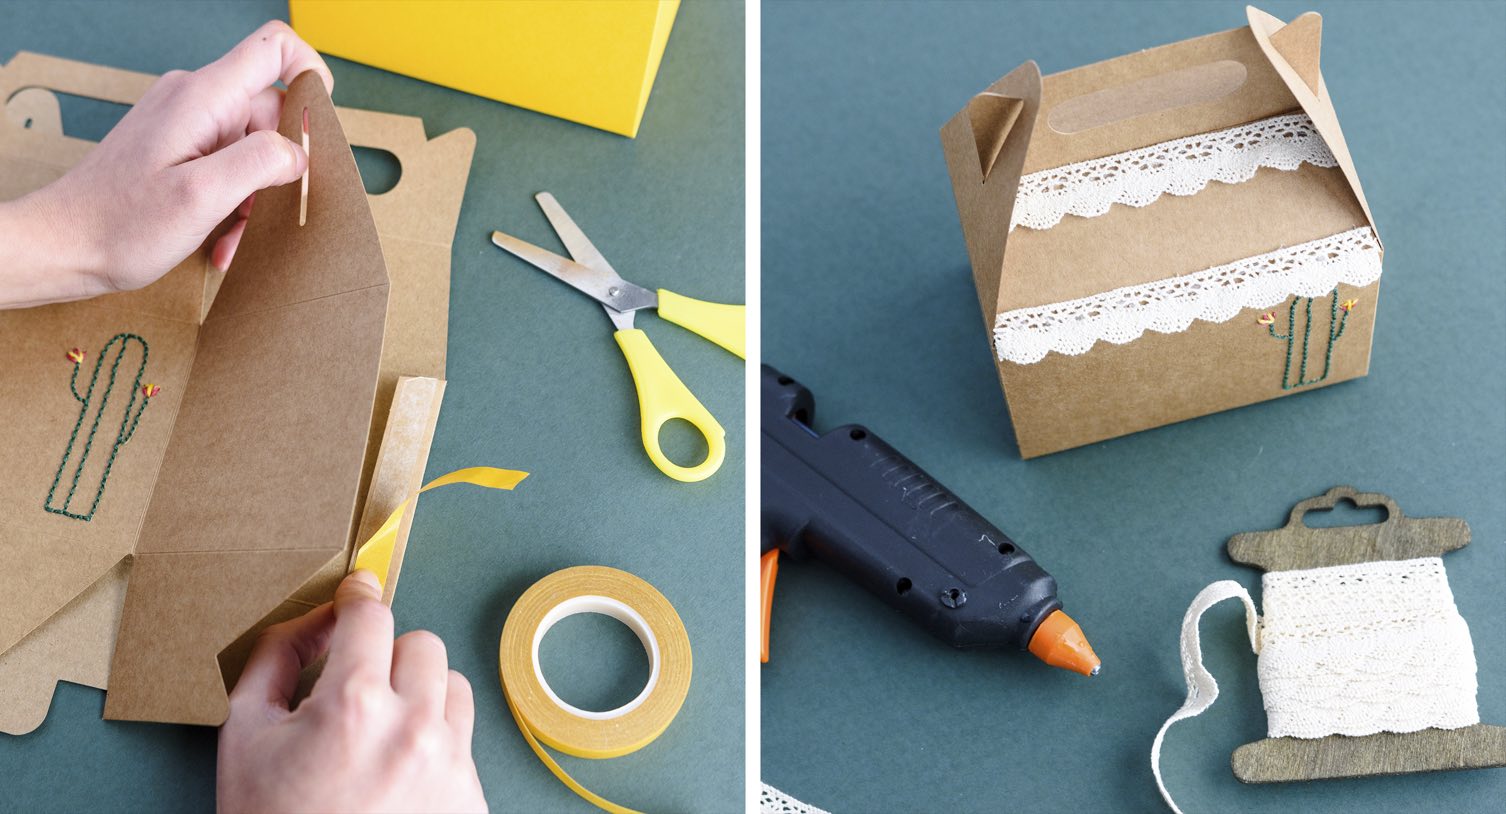
5 – Then assemble your box using double-sided tape or hot glue. Follow the step-by-step video on our site.
6 – Now, add a final touch to your sewing box with pretty ribbons, lace or tassels. Fix them on properly with hot glue.
When everything is ready, place your buttons, reels and sewing tools in each of the boxes.