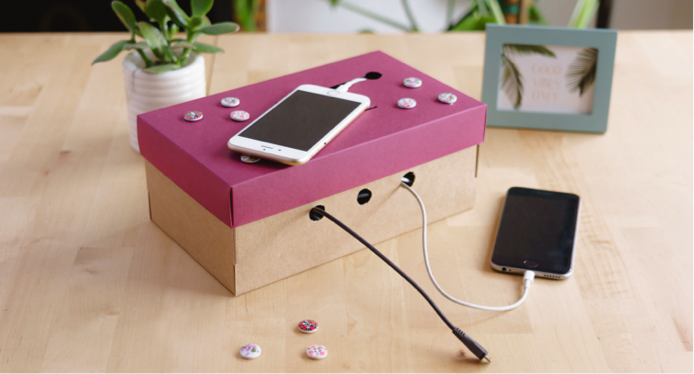
At home we have all got smart phones, tablets, cameras… and loads of little electronic devices. They are really useful and we use them every day. We always need them to hand with the battery fully charged.
It’s unquestionable that they are part of our daily life, and often, these electronic devices and their charging cables are in our living rooms and bedrooms. I’m sure that a large part of us have once found tangled up cables when different devices are charging at the same time from the same plug socket. It’s not nice, we’ve got to admit. The plugs don’t have any type of nice decoration. But luckily we can improve this and make it another decorative element in your living room or bedroom.
Let’s do away with tangled up cables and ugly plug sockets! We are going to show you a really simple way to improve this aspect of our day-to-day lives. Design a charging station for your favourite devices with us. We will use a simple box with a lid, some buttons, a multiple plug socket and some labels to make sure it it all nicely organised.
Let’s get to work!
A super post in collaboration with Warm Home Life.
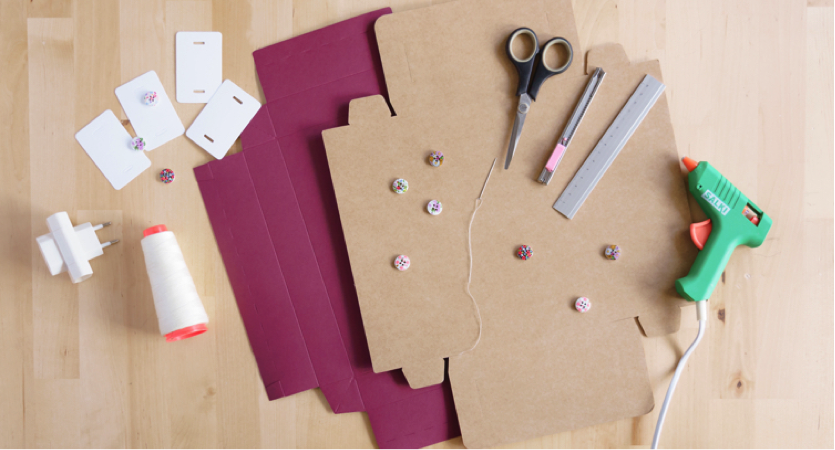
MATERIALS:
– Box
– Buttons
– Multiple plug socket
– Hot glue
– White sowing thread
– Needle
– Craft knife and/or scissors
– Ruler
– Black marker pen and/or pencil
STEP BY STEP:
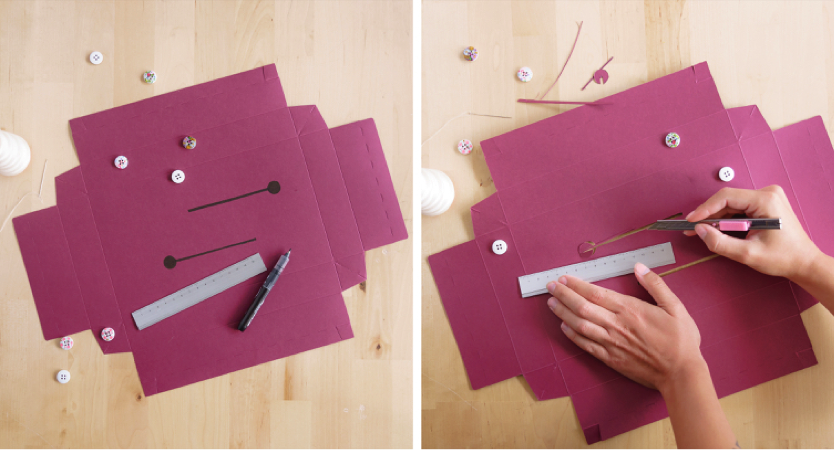
- To start, draw some 5mm-thick lines on the box lid with the marker pen or the pencil. You can draw the shape you like the most: horizontal, vertical, diagonal lines, lines with curves… If you prefer you can also let them cross over or even draw a maze! The most important thing is that they have the same minimum thickness that the charging cables that you are going to use have. The lines also need to have an end with a bigger square or circle. The end of the cable where it connects to the smart phone or tablet needs to go through this hole, because it is usually thicker than the cable itself.
- Now cut them out with the craft knife and align the outside of the lines to get the holes. Before moving on to the next step, check that the cable and its connector go through these holes correctly and can move easily.
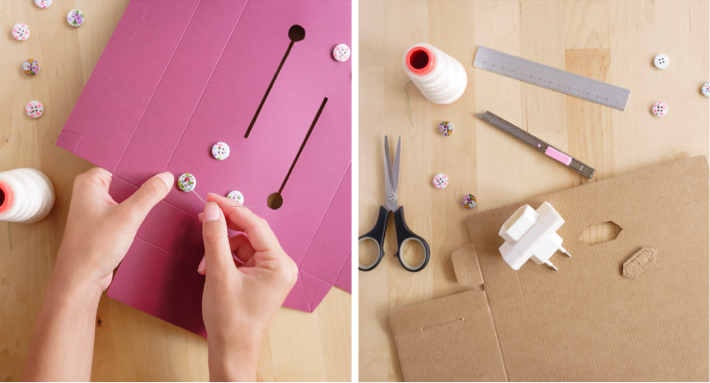
- Put some buttons around the cut out lines until it looks even and how you want it to look. Once you know where to put each button, cut a piece of white sewing thread and thread the needle. Stitch each button into place so that they don’t move. If it is difficult for you to poke the needle through when stitching, you can mark the four little holes on the buttons with a punch beforehand, using the button as a template.
- Then, measure the perimeter of the back of the multiple plug and draw it with a pencil onto the base of the box. You must place it at the centre of one of the bigger sides of the box.
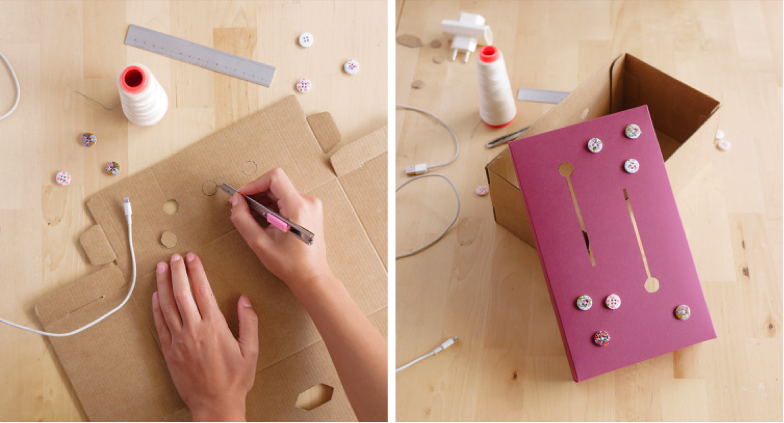
- On the side opposite the plug hole, cut out as many circles or squares as you like. The connectors and cables will come out of these new holes.
- Once everything is correctly cut out, assemble the base and the lid of the box.
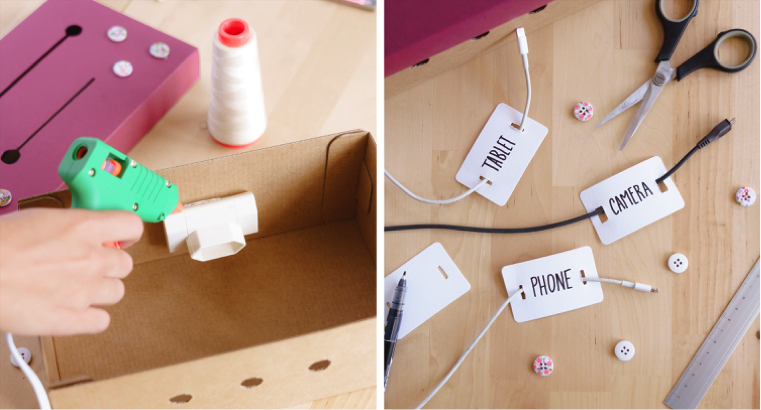
- With the help of hot glue, fix the multiple plug to the hole on the base of the box so that the plug is outside and juts out from the box.
- To keep all your charging cables tidy, use our clip labels. Write each name on them and put the end of the cable through each hole. If the end of the cable is too thick, make the clips a little bigger using a craft knife.
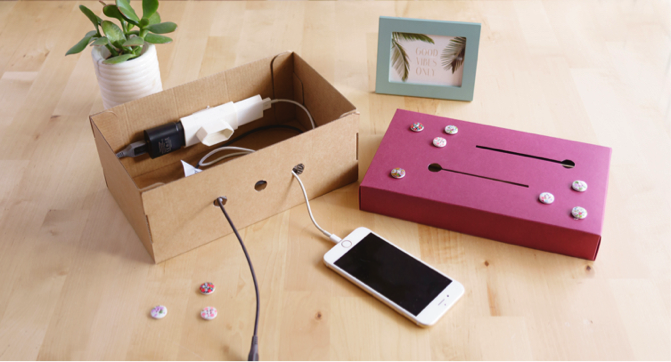
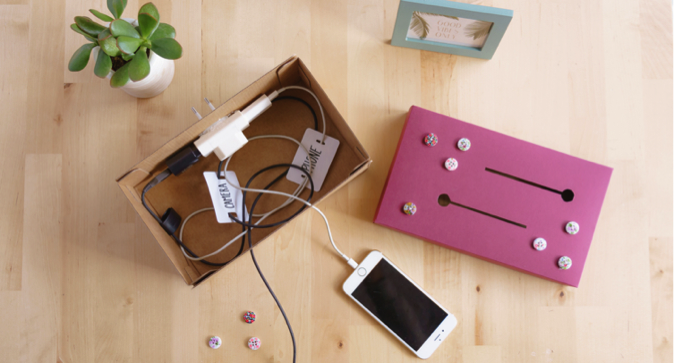
Connect as many chargers as you want to the multiple plug and leave the part of the cable with the labels inside. Then make the ends with connectors come out of any of the holes on the base of the box or the lid.
Put the charging station on a table with a socket and start to charge your smart phone, tablet or camera at the same time in a nice and tidy way!
